Workgroups
A Workgroup is a set of related sessions that iTerm2 builds from a single one. You define the layout once; entering the Workgroup spawns all of its sessions at once, and exiting it closes them again and leaves your original (main) session running. Each session can run its own command and carry its own toolbar.
Workgroups grew out of a specific problem. Running a coding assistant like Claude Code, I wanted two companion sessions beside it: one showing a live diff of my changes, and one for code review. Setting that up by hand every time, splitting panes or juggling tabs and keeping them together as you work, is clumsy. A Workgroup lets you define that layout once and summon the whole set on demand (or automatically, with a trigger). The related sessions always travel with your main one and stay a keystroke away.
Peers are the key idea
The one concept to understand first is the Peer, because it does not behave like a tab.
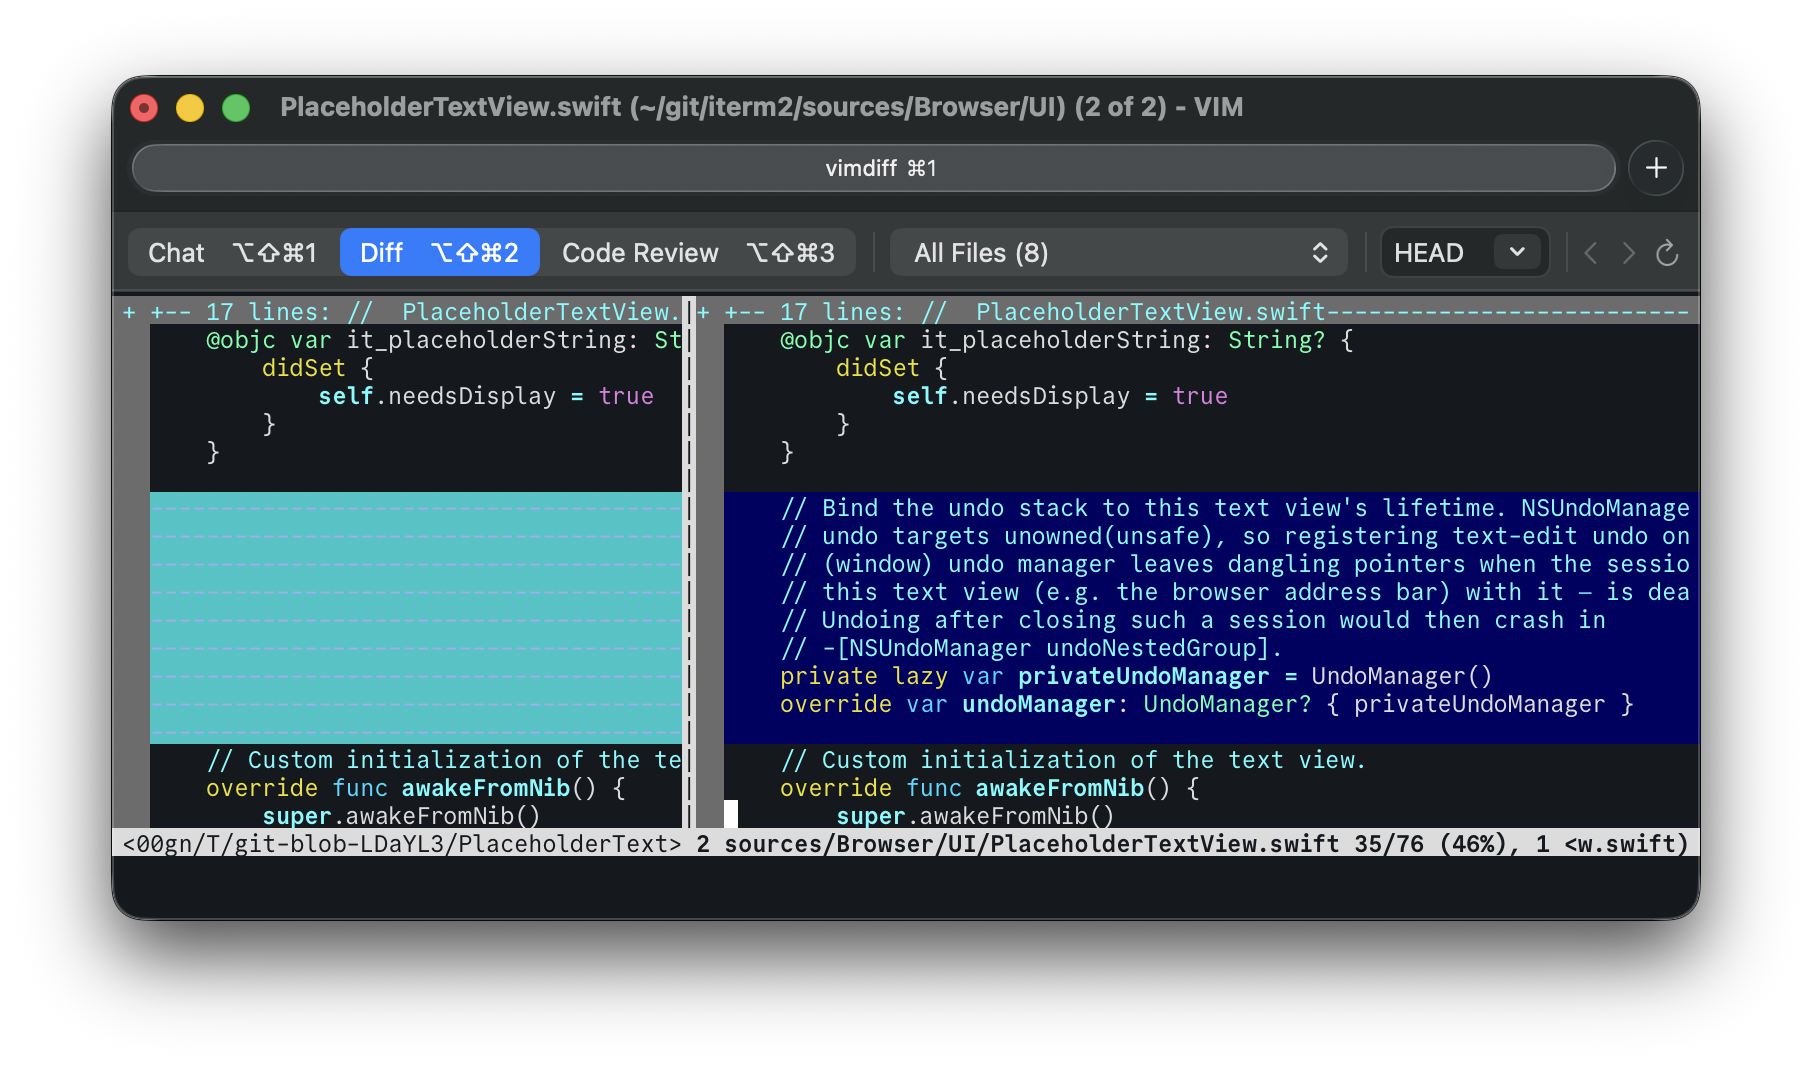
Peers are several sessions that share a single pane, as though they were tabs living inside that one pane. Only one Peer is visible at a time; you switch among them in place, instantly, without opening a new tab or disturbing any other pane. That is the whole point: your diff and code-review sessions stay one keystroke away in the exact same spot, instead of scattered across the tab bar.
The main session and its Peers occupy the same pane and share one toolbar. That toolbar has a row of buttons, one per Peer, for switching among them.

Peers are not macOS tabs and not the Workgroup's own Tabs (described below). If you press ⌘T, you get an ordinary new tab that is not part of the Workgroup. Peers are added when you define the Workgroup, not on the fly.
How a Workgroup is Built
Every Workgroup has one main session: the session you are in when you enter the Workgroup. To it you can add any number of related sessions of three kinds:
Peers
Multiple sessions sharing one pane, switched in place (see above). Peers are the heart of the feature. Each Peer has a name, which labels its switch button.
Splits
An independent pane that sits alongside its parent. You choose its orientation (vertical or horizontal), which side it goes on, and how much of the parent's area it takes.
Tabs
A new tab that opens when you enter the Workgroup. Like splits, each tab is an independent session with its own toolbar.
Entering and Leaving a Workgroup
To enter a Workgroup by hand, choose it from Shell > Workgroups. Entering spawns the Workgroup's Peers, splits, and tabs and wires up the toolbars. The session you were in becomes the main session.
The Workgroup you are currently in is marked with a checkmark in this menu, so you can always tell which one is active.
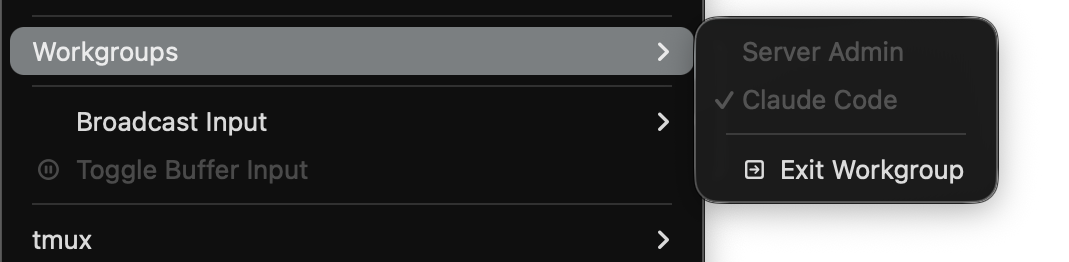
To leave, select Shell > Workgroups > Exit Workgroup. This closes the sessions the Workgroup created and returns the main session to its normal toolbar. The main session itself keeps running.
You can also enter and exit automatically using triggers (see Automatic Entry with Triggers below).
Switching Between Peers
When a Workgroup has Peers, its toolbar shows a Peer switcher: a row of buttons, one per Peer. Click a Peer's button to switch to it. If you prefer the keyboard:
⌥⇧⌘1through⌥⇧⌘8activate the first eight Peers (⌥⇧⌘9activates the last Peer when there are nine or more).- Window > Select Split Pane > Previous Peer (
⌥⌘[) and Next Peer (⌥⌘]) step through the Peers in order.
Each Peer can also define its own custom shortcut in place of the default.
Toolbars
Every session in a Workgroup, the main session and its Peers, splits, and tabs alike, has its own toolbar, and that toolbar can hold tools specific to that session's purpose. A session's toolbar always shows its name automatically. You build each session's toolbar from these items:
Peer Mode Switcher
The row of buttons, one per Peer, for switching between them (shown above). It only appears on Peer toolbars.
Git Status
Shows the working directory's current git status and updates it live.
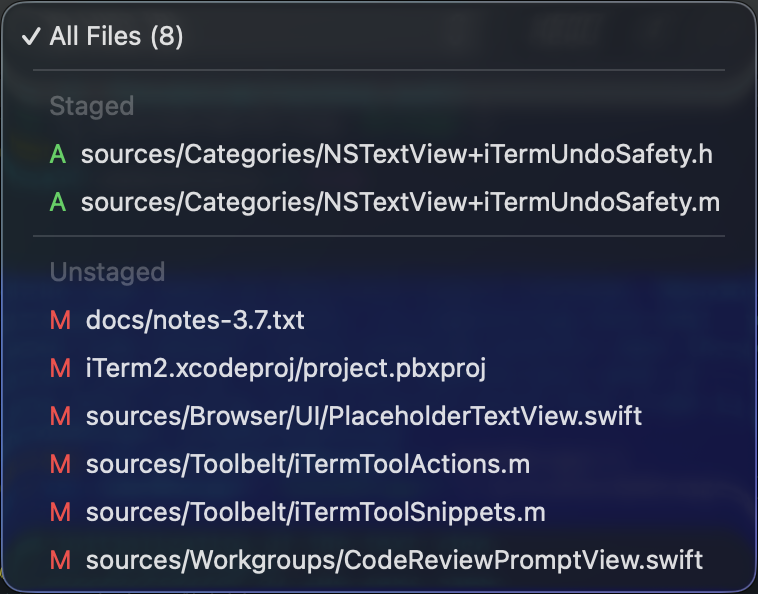
Changed File Selector
A popup of the files that have changed. Picking one runs that session's per-file command, for example to show the diff of just that file.
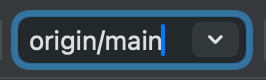
Git Base Selector
Chooses the git revision to diff against. It defaults to HEAD, and commands can read the chosen value as the gitBase variable.
Navigation Buttons
Back and forward buttons for stepping through the changed-file list. Each has an optional keyboard shortcut.

Reload
A standalone reload button, with an optional keyboard shortcut.

Auto-Send Clippings When Idle
A toggle offered on Code Review sessions (off by default). When on, the review session's Clippings are sent to the Workgroup's main session each time the review session goes idle.

Auto-Request Review When Idle
A toggle offered on the main session (off by default). When on, a review is automatically requested from the Workgroup's code-review session each time the main session goes idle. It requires the Workgroup to have exactly one code-review session.

Spacer
Flexible whitespace for arranging the other items.
Session Modes
Each session in a Workgroup runs in one of three modes:
Regular
Runs its command immediately when you enter the Workgroup. This is the default.
Diff
Waits until there are pending changes in the working directory before running its command. This avoids launching a diff tool against a clean tree. As soon as changes appear, the command runs.
Code Review
Shows a prompt overlay before the command runs. You type a free-form instruction (or pick a saved one from the Prompts menu) and click Start. iTerm2 exposes the text you enter to the command as the codeReviewPrompt variable, so the session can pass it to whatever program it launches. A companion variable, codeReviewSystemPrompt, holds a reusable system prompt that shapes how the review is conducted; you can edit it in Settings > General > AI > Prompts > Code Review System Prompt. The Claude Code Workgroup uses this mode to hand your review request to Claude, passing your instruction as the prompt and the system prompt through Claude's --append-system-prompt option.
A Code Review session can also add items to the Clippings panel, which every session in the Workgroup shares. This is how you pass comments from the review to a coding-assistant session: the review adds its findings as Clippings, and the other sessions in the Workgroup see the same panel.
Configuring Workgroups
Open Settings > Arrangements > Workgroups. The left side lists your Workgroups; use + and - to add or remove them, and the Add Preset popup to start from a built-in template (see Presets).
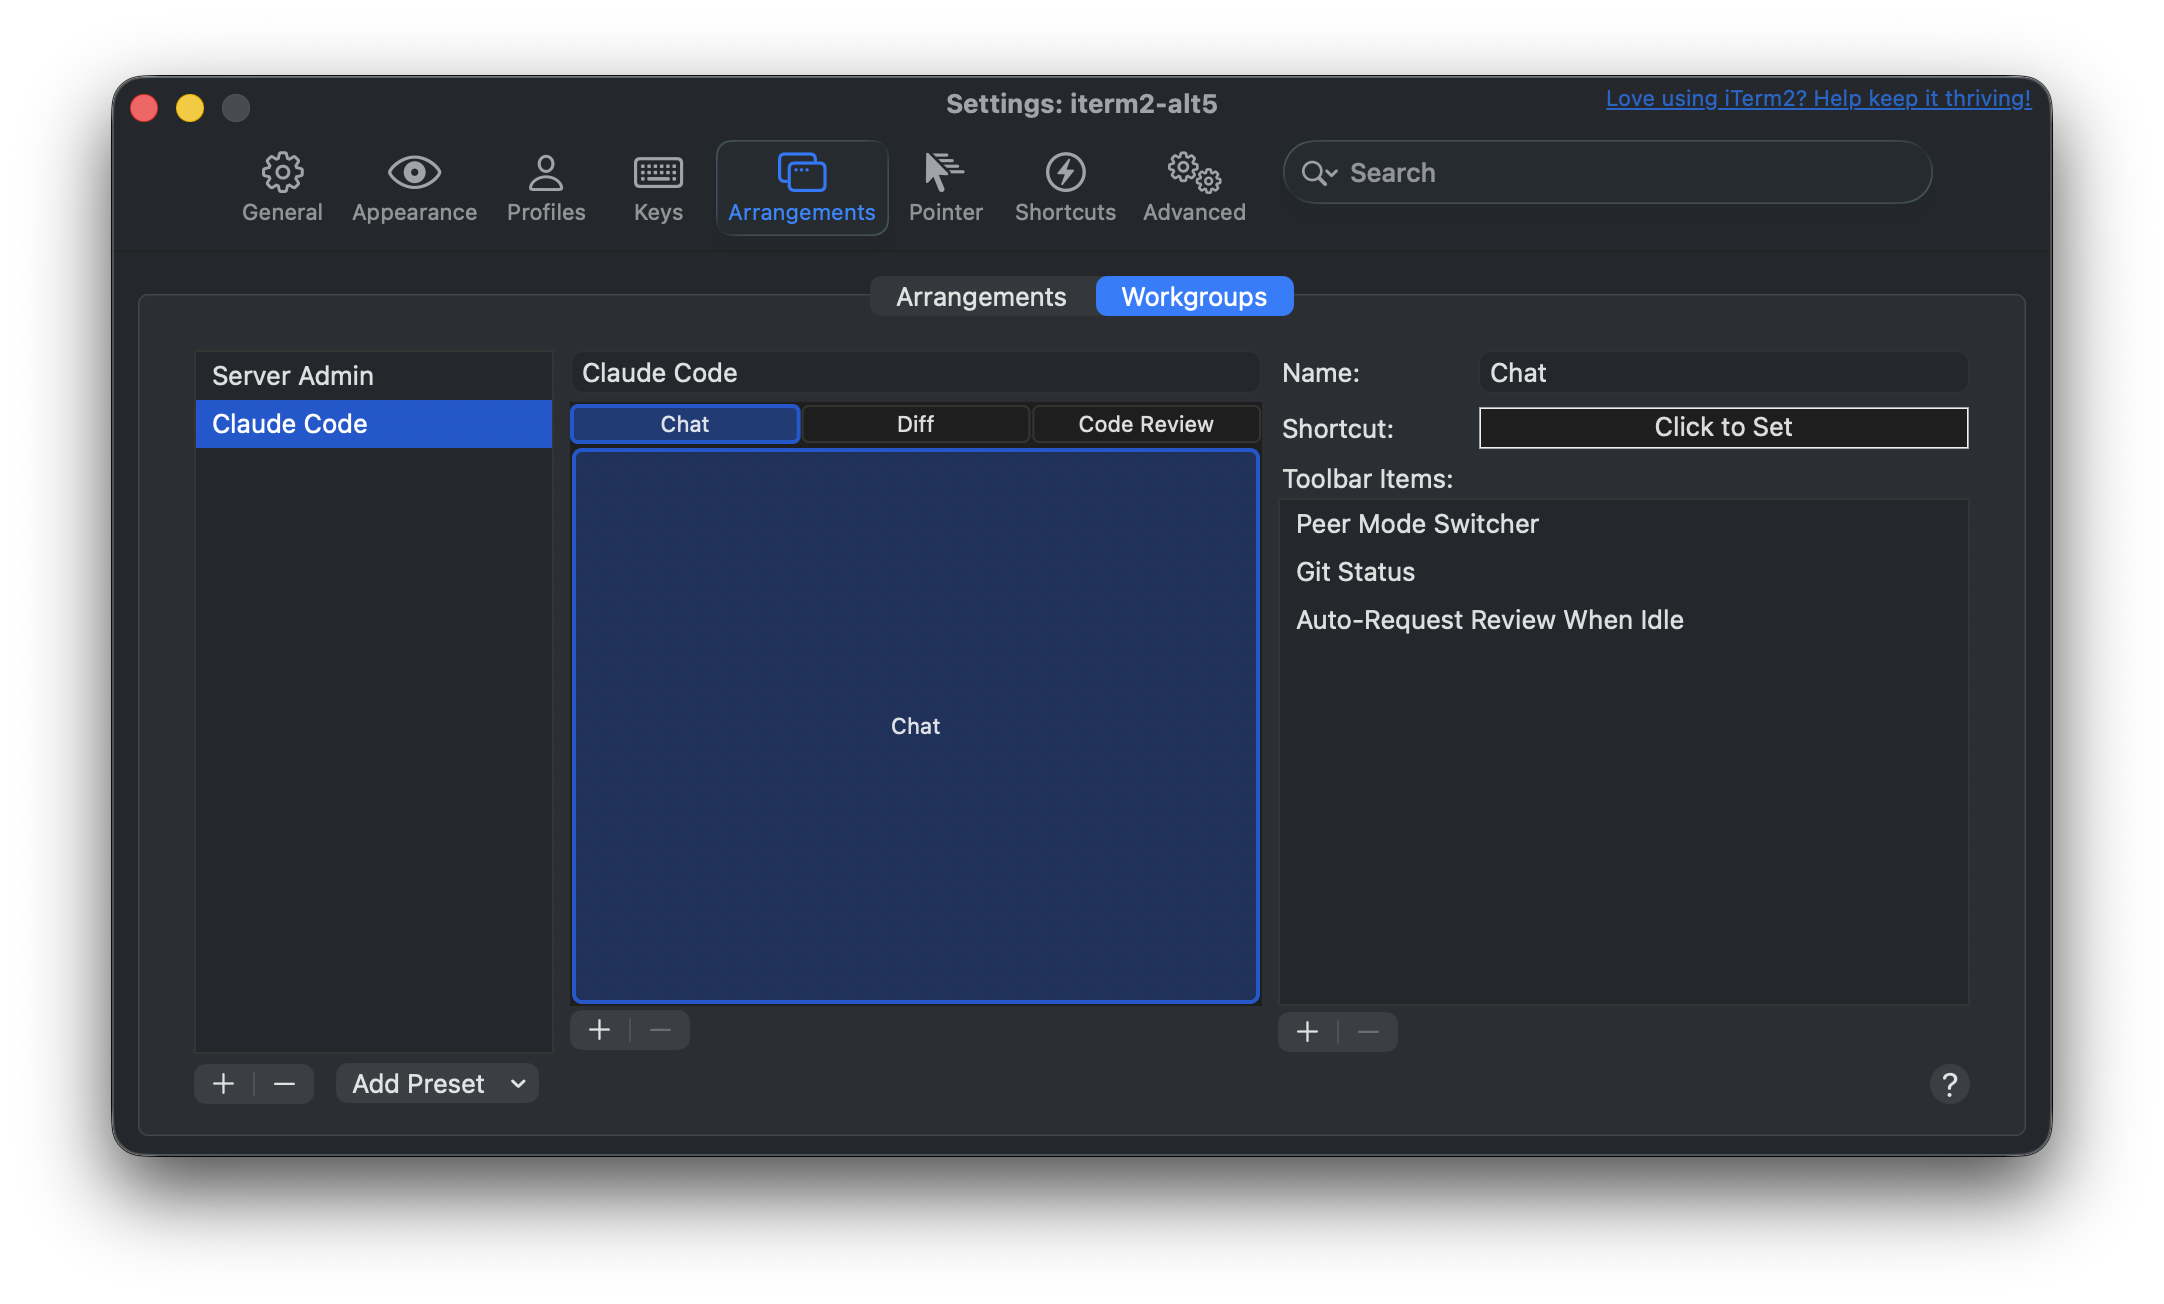
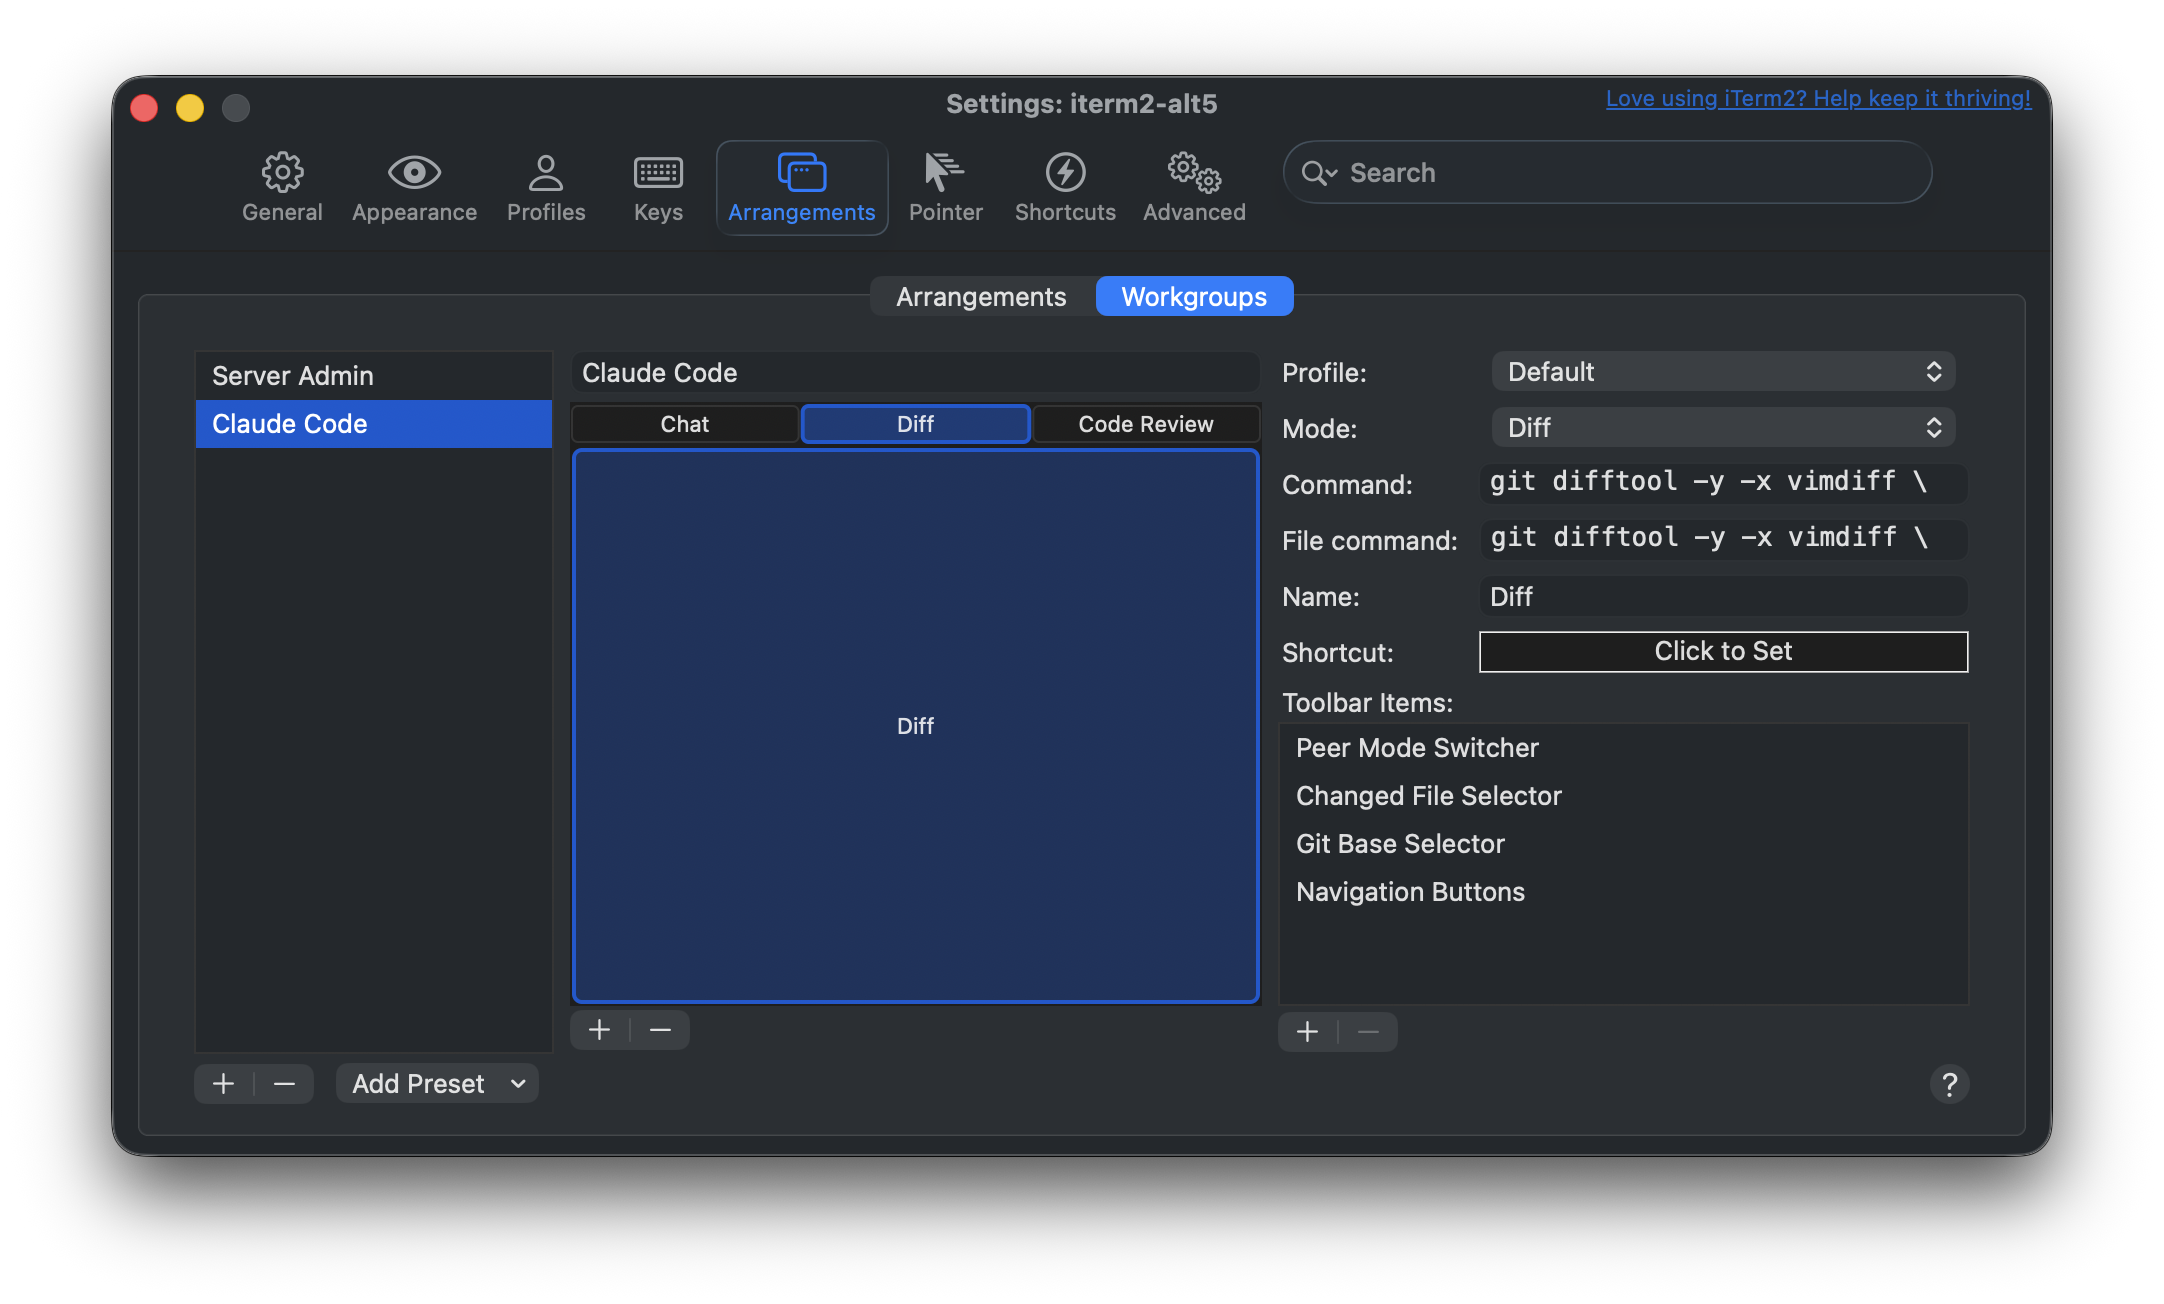
Select a Workgroup to edit it in the middle, where its sessions appear as the buttons above a layout preview. Select a session to configure it on the right. The settings available depend on the session: the main session has only a name, shortcut, and toolbar items (its command is whatever you were already running when you entered), while an added Peer also has a profile, mode, and command.
The main session, here named "Chat".
A Diff-mode Peer. Because its toolbar includes the Changed File Selector, it also gets a File command.
A Code Review Peer, whose command passes \(codeReviewPrompt) to Claude.
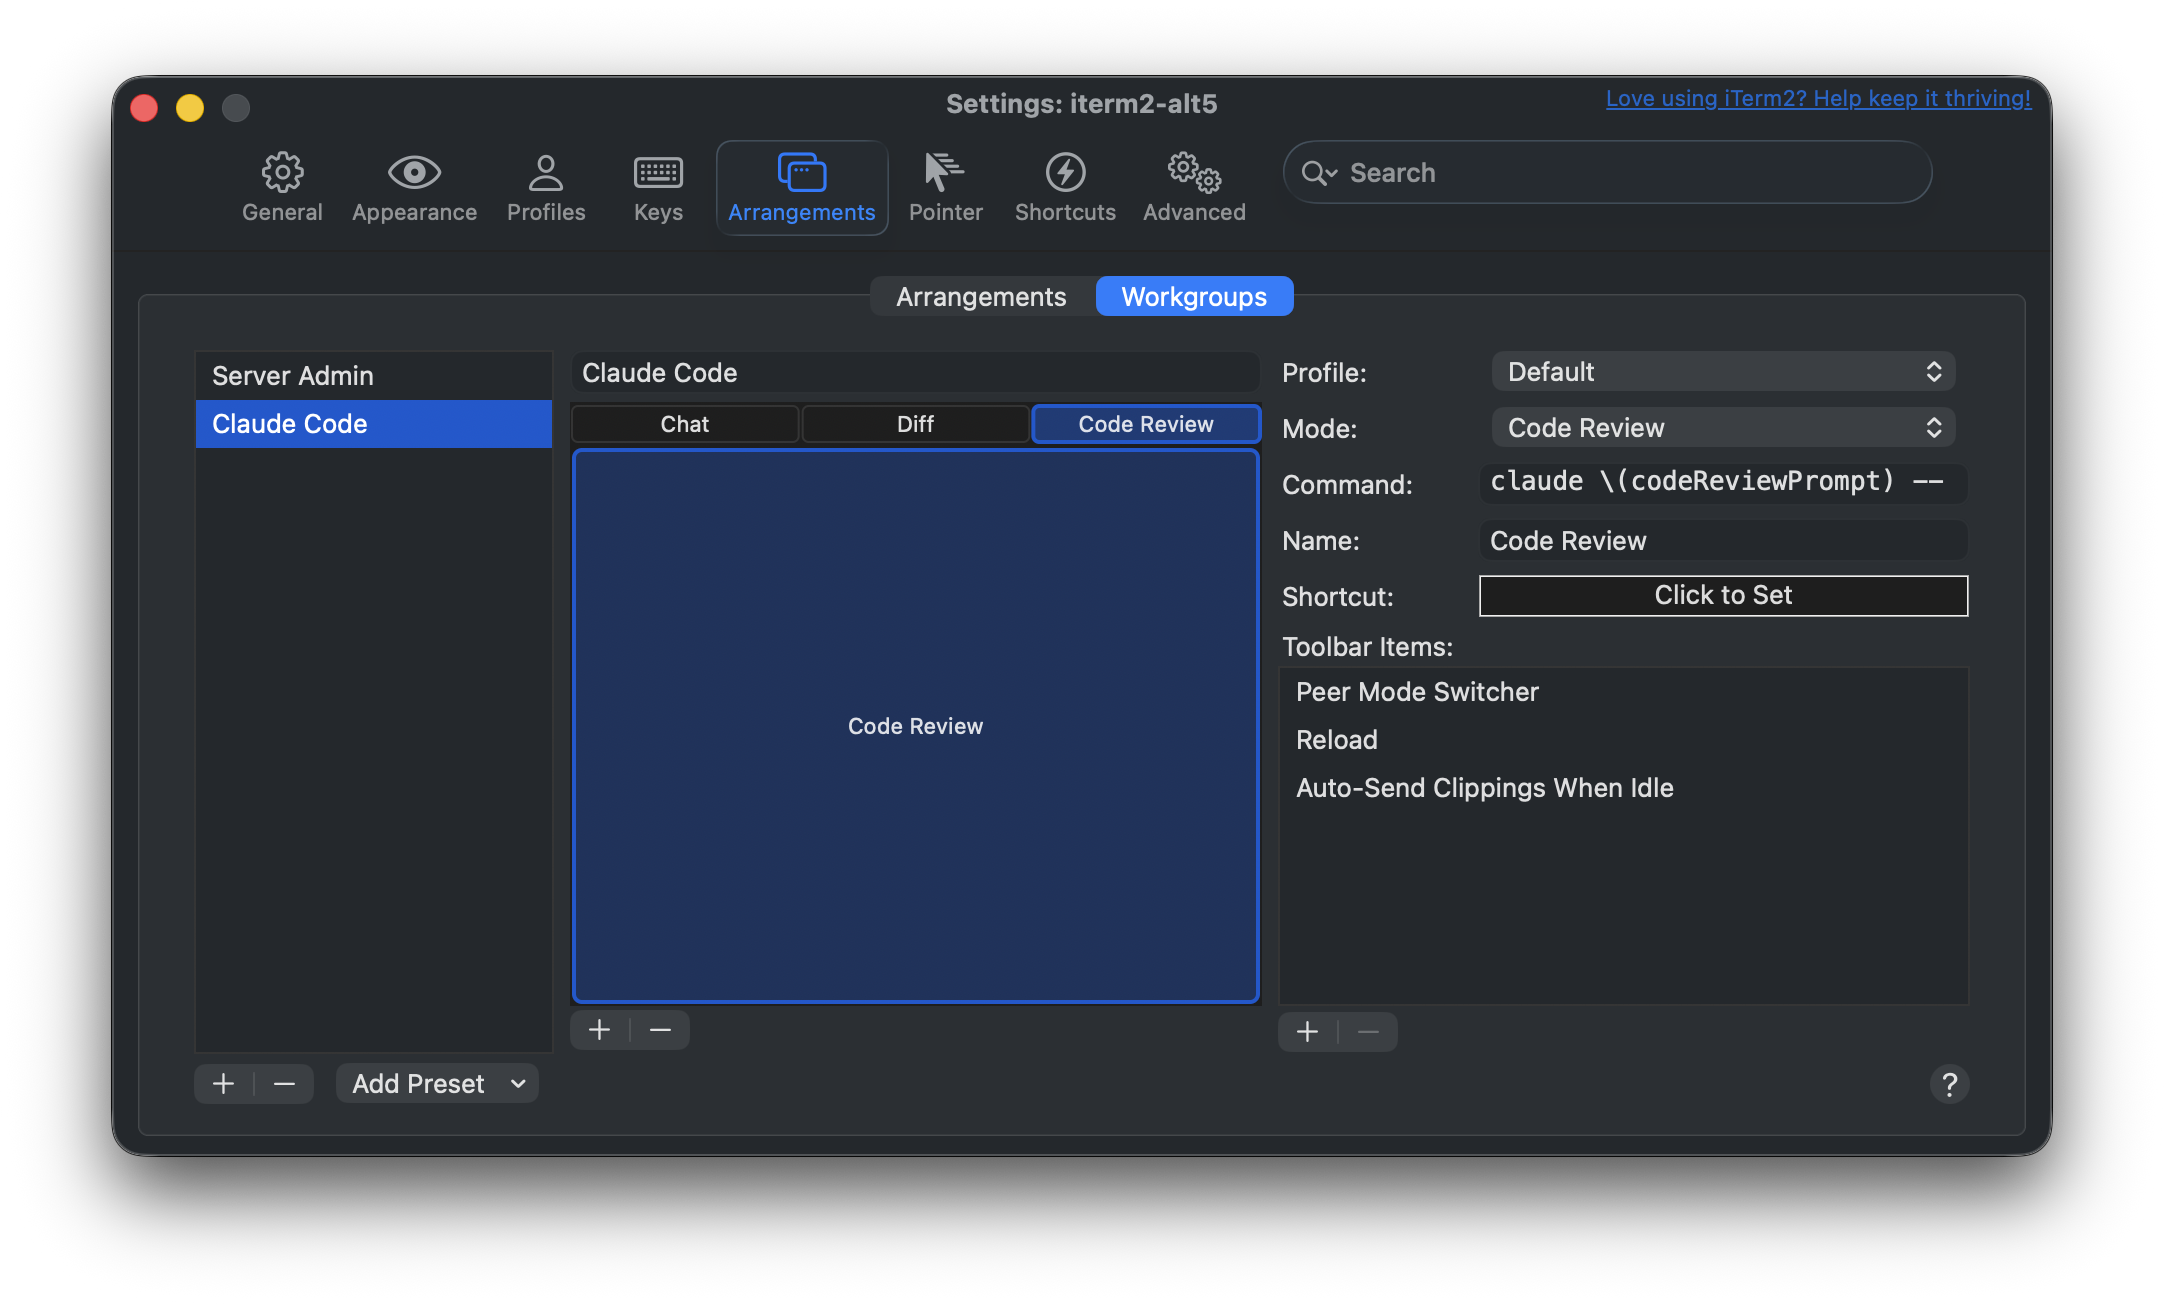
The settings a session can have are:
- Profile: which iTerm2 profile the session uses.
- Mode: Regular, Diff, or Code Review.
- Command: the command to run (for terminal sessions), or a starting URL for browser sessions.
- File command: the command that runs when you pick a file in the Changed File Selector. It can interpolate the picked file and the git base. This setting appears only when the session's toolbar includes the Changed File Selector.
- Name and Shortcut (Peers only): the label that appears on the Peer's switch button and an optional custom keyboard shortcut.
- For splits: orientation, side, and the fraction of the parent the split occupies.
This is also the only place you add or remove sessions in a Workgroup. Membership is fixed by the definition, so ⌘T and ⌘W do not add to or subtract from the group; edit it here instead.
Workgroups you create from a preset are ordinary, fully editable settings; the presets are just starting points.
Presets
Two built-in presets appear in the Add Preset popup:
- Coding Agent + Diff: a main session plus a Diff Peer that shows
git diffof your changes and lets you drill into individual files. - Coding Agent + Diff + Code Review: the same, plus a Code Review Peer that prompts you for a review request and runs a coding agent against it.
Variables
Commands and file commands support iTerm2's interpolated string syntax, \(name). The variables most useful in Workgroups are:
\(gitBase): the revision you choose in the Git Base Selector (defaultHEAD).\(file): the file you pick in the Changed File Selector, for use in a session's file command.\(codeReviewPrompt): the text you enter in a Code Review session's prompt overlay.\(codeReviewSystemPrompt): the reusable system prompt from Settings > General > AI > Prompts > Code Review System Prompt.
iTerm2 shell-escapes file and git-base values before substitution, so names with spaces or special characters are safe.
Automatic Entry with Triggers
Two triggers let a Workgroup come and go on its own:
- Enter Workgroup… enters a Workgroup you choose when its condition matches.
- Exit Workgroup leaves the current Workgroup.
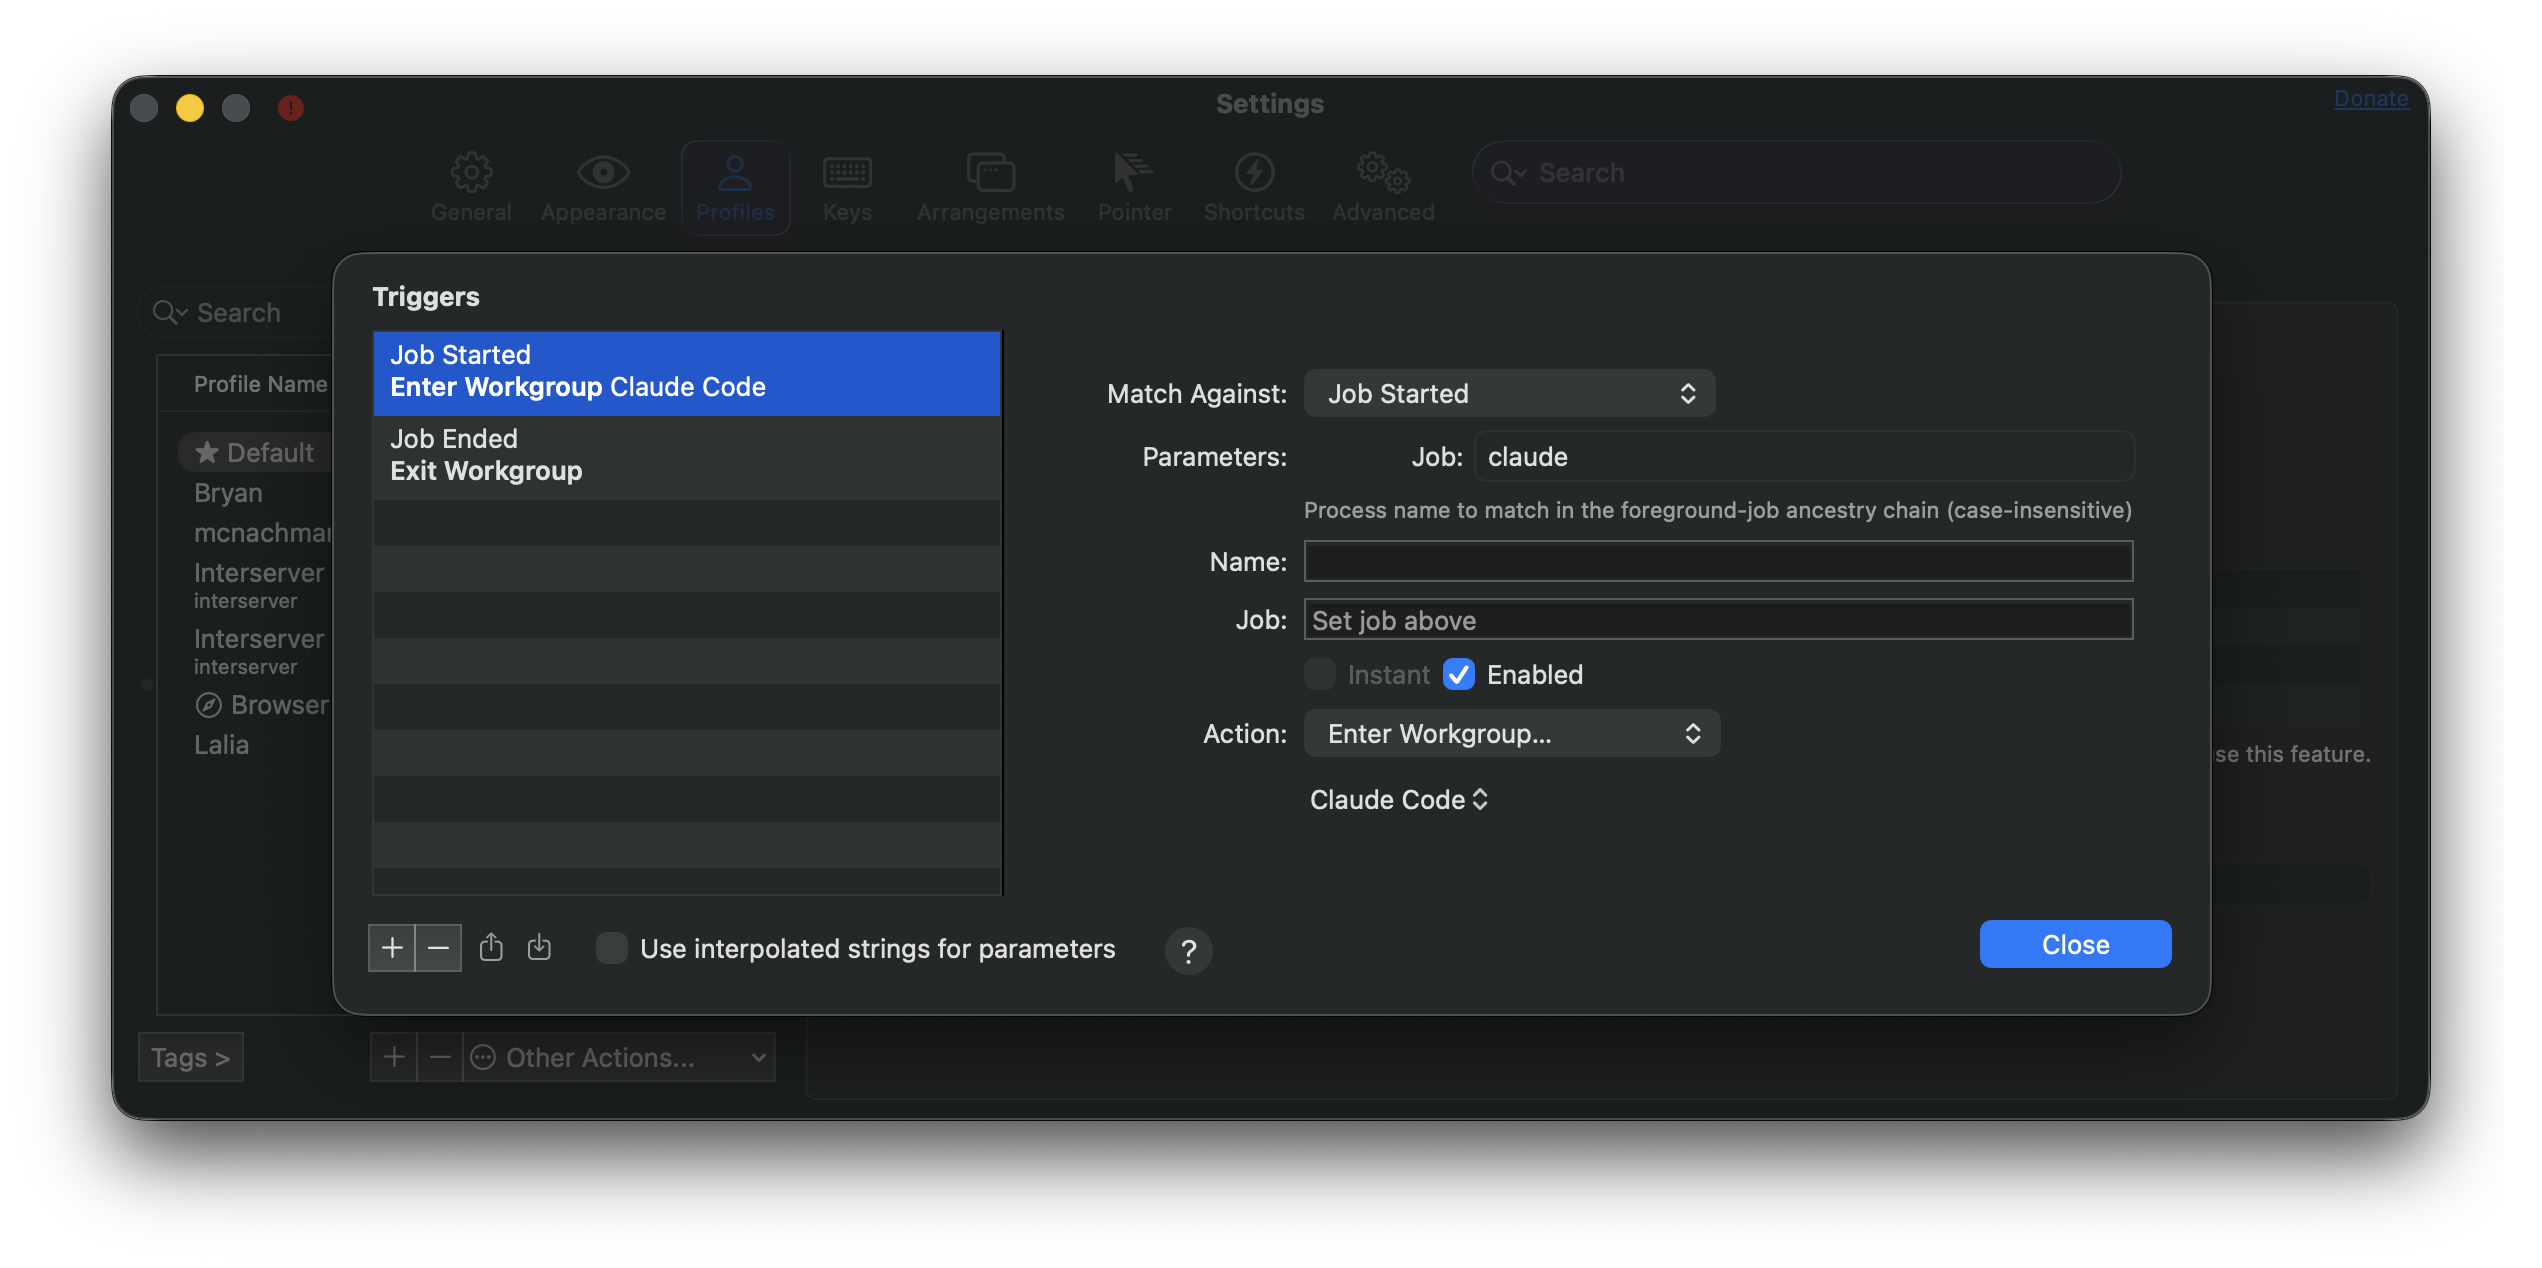
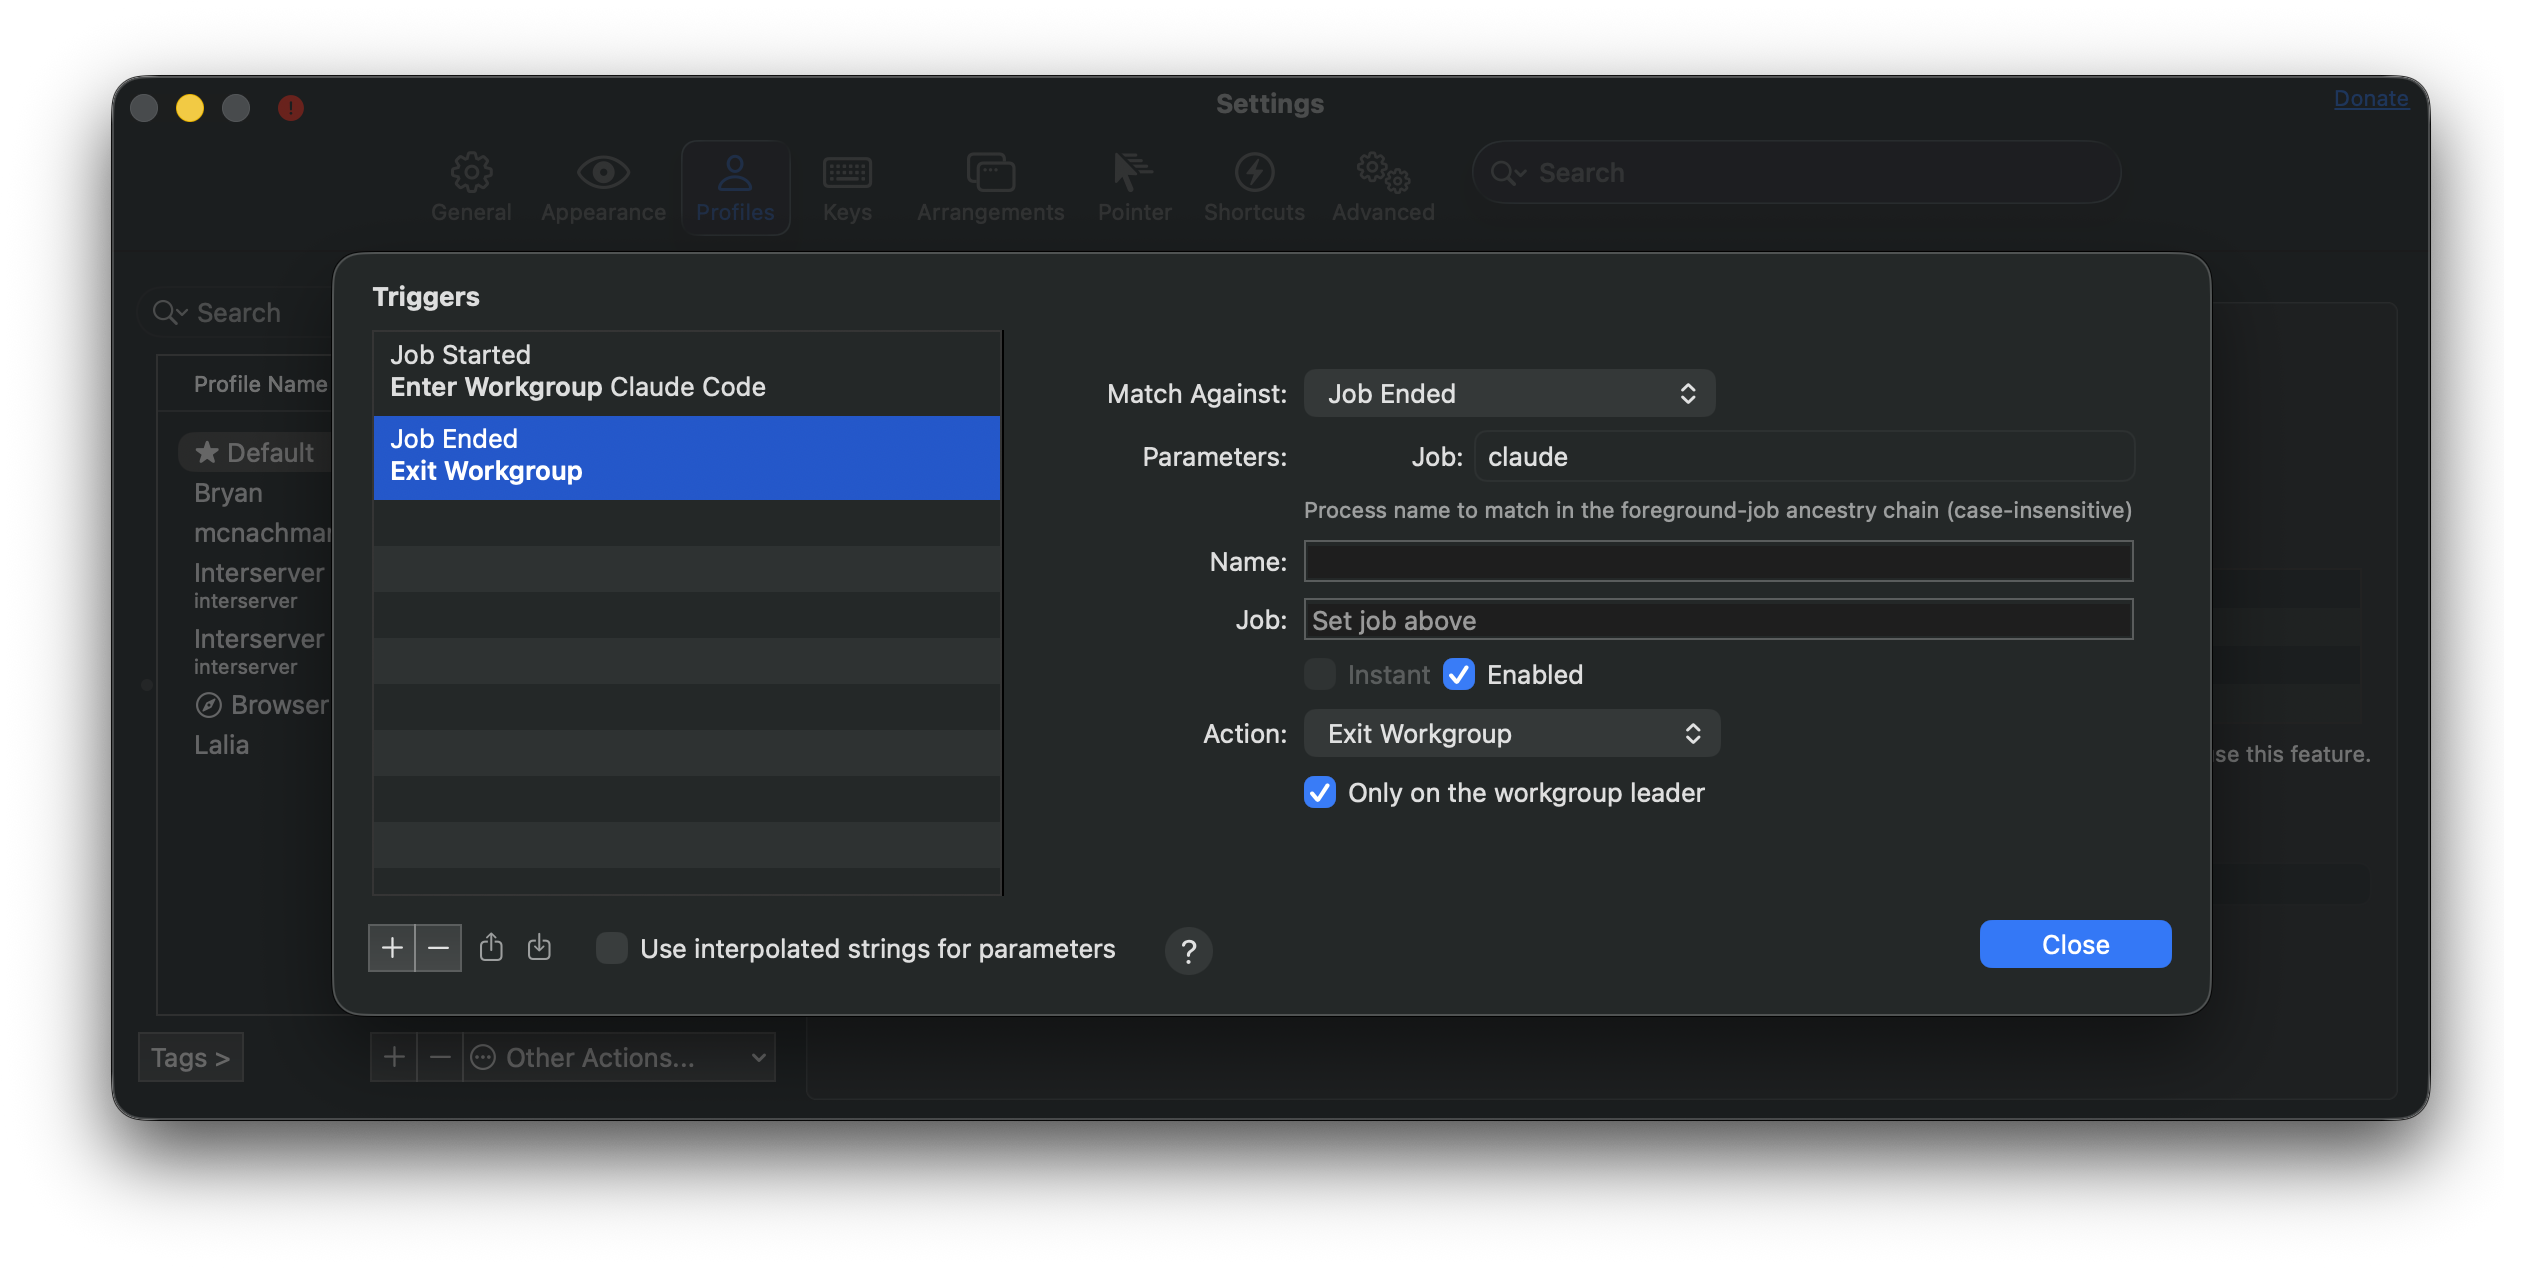
In terminal profiles these fire on matching output or on session events such as a job starting or ending; in browser profiles they fire on a URL matching a regular expression. This is how the Claude Code integration auto-enters its Workgroup: an Enter Workgroup trigger fires when the claude job starts, and an Exit Workgroup trigger fires when it ends. Re-entering a Workgroup you are already in does nothing, so the triggers are safe to fire repeatedly.
A Job Started trigger set to Enter Workgroup "Claude Code" when the claude job begins.
A Job Ended trigger set to Exit Workgroup when claude ends. "Only on the workgroup leader" makes only the main session's exit tear the Workgroup down.
For a concrete, ready-made example of Workgroups in action, see the Claude Code integration.