iTerm2 should require little explanation for users accustomed to terminal emulators. Even if you are an experienced user, take the time to read through the highlights section of this document. It will familiarize you with some features of iTerm2 that you may not have seen in other terminal emulators that can make a real difference in the way you work.
If you're having problems, please use the Bug Reporter.
Table of Contents
- Highlights for New Users
- General Usage
- Menu Items
- Settings
- Touch Bar
- Copy Mode
- Fonts
- Profile Search Syntax
- Command Selection and Command URLs
- Status Bar
- Tab Groups
- Automatic Profile Switching
- Badges
- Buried Sessions
- Captured Output
- Coprocesses
- Hotkeys
- Session Restoration
- Session Archives
- Session Notes
- Session Status
- Shell Integration
- Smart Selection
- tmux Integration
- Triggers
- Utilities
- Web Browser
- AI Chat
- Claude Code Integration
- Companion App (iTerm2 Buddy)
- Workgroups
- Clippings
- Scripting Fundamentals
- Scripting Variables
- Python API
- Scripting with AppleScript (Deprecated)
- Dynamic Profiles
- Inline Images Protocol
- Proprietary Escape Codes
- URL Scheme
Highlights for New Users
This chapter describes features of iTerm2 that go beyond basic usage and are not generally found in other terminal emulators.
Text Selection
There are several ways to select text to copy to the clipboard:
- You can use the mouse.
- You can use the find feature's "mouseless copy" feature.
To select text without using the mouse, press cmd-f to open the find field. Enter the beginning of the text you wish to copy and the find feature will select it in your window. Then press tab and the end of the selection will advance by a word. To move the beginning of the selection to the left, press shift-tab. At most one line of text can be selected this way. - You can use Copy Mode.
- You can bind keystrokes to create and adjust selections.
In Prefs > Profiles > Keys you can assign keys to move the beginning or end of the selection by a single character, word, or line. No such keys are bound by default.
Split Panes
iTerm2 allows you to divide a tab into many rectangular "panes", each of which is a different terminal session. The shortcuts cmd-d and cmd-shift-d divide an existing session vertically or horizontally, respectively. You can navigate among split panes with cmd-opt-arrow or cmd-[ and cmd-]. You can "maximize" the current pane--hiding all others in that tab--with cmd-shift-enter. Pressing the shortcut again restores the hidden panes.
Hotkey Window
iTerm2 offers a special terminal window that is always available with a single keystroke. This window is called the "hotkey window" and is most commonly used for occasional administrative tasks. It is described in Hotkeys.
Swap Cmd and Option
iTerm2 allows you to remap modifiers. You have separate control over left and right command and option keys. One common need is to exchange cmd and option. To do this, go to Settings > Keys. Set Left option key to Left command key and Left command key to Left option key (and do the same for Right command and Right option if you please). You can add exceptions if you don't want certain combinations to be remapped (for example, cmd-tab) by adding a new global shortcut with the action "Do Not Remap" and the keystroke of the (unremapped) key you wish to keep unaffected by modifier remapping.
Save Mark/Jump to Mark
You can mark a location in a session with cmd-shift-M and then jump back to it with cmd-shift-J. This is useful, for instance, if you suspend your editor to compile a program and it emits errors. You can save a mark at that point and then return to your editor to fix the errors. As you work, you can jump back to the compilation errors with cmd-shift-J.
Regular Expression Search
When you open the find field (cmd-f) there is a down-arrow on the left of the field by the magnifying glass. Clicking it opens a menu of options in which you can enable regular expression search. The ICU syntax is used.
Autocomplete
Any text that exists in a tab or its scrollback buffer can be autocompleted in that tab. To use autocomplete, type the beginning of a word and then press cmd-;. An autocomplete window opens showing the top 20 choices for words beginning what you have entered. The list can be filtered by typing a subsequence. The filter can be reset by pressing backspace. If you make a selection and press return, it will be entered for you. If you make a selection and press tab, your autocomplete will be extended with the selection.
Paste History
Whenever text is copied or pasted in iTerm2 it is added to the paste history. You can access paste history with cmd-shift-H. It can be filtered by typing a subsequence, and the filter can be cleared by pressing backspace. You can choose to have your paste history saved to disk by turning that option on under Settings > General > Save copy/paste history to disk.
Instant Replay
Sometimes interactive programs will overwrite something of interest on the screen (for example, top(1) does this all the time). Normally, this would be lost forever. With Instant Replay, you can step back in time to see exactly what was on your screen at some point in the recent past. To enable, press cmd-opt-B. Once you are in instant replay mode, you can use the left and right arrow keys to navigate back and forward through time. Esc exits instant replay mode. By default, each session uses up to 4MB to save its instant replay history, and this can be adjusted under Settings > General > Instant Replay uses __ MB per session.
Another benefit of Instant Replay is that it shows you the exact time that something appeared on your screen down to the second. This is useful when trying to figure out when an error occurred, for example.
Full Screen
You can press cmd-enter and iTerm2 will take up the entire screen. If you had a transparent background configured, it will be turned off upon entering full screen mode to reduce distractions. You can re-enable it with cmd-U. Unlike most macOS apps, iTerm2 can open a fullscreen window in the same desktop with no annoying animation if you disable Settings > General > Native full screen windows.
High-Color Modes
iTerm2 supports 256 color mode. To enable this for csh shells, set your terminal to xterm-256color (under Settings > Profiles > Terminal > Report Terminal Type). Some applications may need to be configured to support this mode. In vim, add this to your .vimrc:
set t_Co=256
iTerm2 also supports 24-bit color.
Focus Follows Mouse
This option is off by default, but can be enabled under Settings > Pointer > Focus follows mouse. It only affects iTerm2 windows.
Middle Button Paste
If you have a three-button mouse, by default the middle button performs "paste". You can configure the behavior of the middle button, as well as many other kinds of clicks and gestures, in Prefs > Pointer.
Cursor Finery
When using a block cursor, it's hard to pick a cursor color that's visible against every background color. If you enable Smart cursor color (under Settings > Profiles > Colors) then the cursor color will be dynamically chosen to be visible against the text it is over and the adjacent cells.
If you prefer a white or black cursor, you can use the "cursor boost" feature (under Settings > Profiles > Colors) to make all colors other than the cursor dimmer.
Do you have trouble finding your cursor? You can turn on the cursor guide by toggling the View > Show Cursor Guide menu item or turning on Settings > Profiles > Colors > Cursor Guide. This can also be toggled by an escape sequence. For example, add this to your .vimrc:
let &t_ti.="\<Esc>]1337;HighlightCursorLine=true\x7"
let &t_te.="\<Esc>]1337;HighlightCursorLine=false\x7"
If you've lost your cursor, press Cmd-/ or select View > Find Cursor and the cursor's position on the screen will be indicated very clearly
Minimum Contrast
Sometimes an application will display text with a color combination that is hard to read. Colorblind users in particular may find certain combinations hard to see if the colors differ only in hue and not brightness. If you enable minimum contrast (under Settings > Profiles > Colors > Minimum contrast, then iTerm2 will guarantee a minimum level of brightness difference between the foreground and background color of every character. If you set this to its maximum value, then all text will be black or white.
Notification Center Support
If you enable notifications (Settings > Profiles > Terminal > Send Notification Center alerts) then you'll receive messages when a terminal beeps, has output after a period of silence, or terminates. There's also a proprietary escape sequence to send a notification. You can adjust the kinds of notifications that get posted in Settings > Profiles > Terminal > Filter Alerts.
Window Arrangements
You can take a snapshot of your open windows, tabs, and panes with the menu option Window > Save Window Arrangement. You can restore this configuration with Window > Restore Window Arrangement, or you can choose to have it automatically restored when you start iTerm2 with Settings > General > Open saved window arrangement.
Smart Selection
Performing a quad-click does a "smart selection," which selects text under the pointer in a way appropriate to its content. For example, URLs, quoted strings, and email addresses (among many other objects) are recognized and selected in their entirety. You can also bind actions to a smart selection rule. The first action takes effect when you cmd-click on text matching the rule. All actions are added to the context menu when you right click on text matching the rule.
Triggers
Triggers are user-configurable actions that run in response to activity in a session. Most fire when received text matches a regular expression, but a trigger can also fire on events such as a command finishing or a job starting. Actions include highlighting the matching text, showing an alert, sending text back, and more. See the Triggers documentation for the full details.
One advanced use of a trigger is to capture output matching a regex and display just those matching lines in the toolbelt. For example, you could create a trigger that matches compiler errors. When you run Make the errors will appear on the side of your window and you can click each to jump right to it. More information is available at the Captured Output manual.
Tmux Integration
iTerm2 is tightly integrated with tmux. The integration allows you to see tmux windows as native iTerm2 windows or tabs. The tmux prefix key is not needed, as native menu commands operate on tmux windows. For more information, please see the iTerm2-tmux Integration document.
Coprocesses
Coprocesses are programs that run alongside iTerm2 and are bound to a single session. All output bound for the session is also routed as input to the coprocess. The coprocess's output acts like the user typing at the keyboard. Coprocesses can be used to automate tasks. For more information, see the Coprocess document.
Dynamic Profiles
If you have hundreds or thousands of profiles, look in to Dynamic Profiles. This feature allows you to define profiles in JSON.
Automatic Profile Switching
You can automatically change the current session's profile using Automatic Profile Switching. For example, this would allow you to change the background color when you are on a production system.
Inline Images
iTerm2 can display images inline, including animated GIFs. The easiest way to use this feature is to install Shell Integration and Utilities, which adds an imgcat script.
Undo Close
If you accidentally close a session, you get five seconds (by default; configurable in Settings > Profiles > Session) to undo it by pressing Cmd-Z.
Shell Integration
Shell Integration is a feature exclusive to iTerm2 that uses knowledge about your shell prompt to help you navigate from one shell prompt to another, record your command history, suggest most used directories, helps you re-run commands, download files from remote hosts with a click, upload files to remote hosts with drag and drop, and more. See the Shell Integration documentation for all the details.
Password Manager
iTerm2 can save your passwords in the Keychain. Use the Window > Password Manager menu item to open the password manager and enter your passwords.
Timestamps
Toggle View > Show Timestamps to indicate the time each line was last modified. This is useful for telling how long operations took or when a message was printed.
Tab Bar on Left
You can position the tab bar on the left side of the window. This is useful if you have a really large number of tabs.
Open Quickly
If you have lots of sessions you can quickly find the one you're looking for with Open Quickly. Select the View > Open Quickly menu item (cmd-shift-O) and then enter a search query. You can search by tab title, command name, host name, user name, profile name, directory name, badge label, and more. Open Quickly also lets you create new tabs, change the current session's profile, and open arrangements. If you start your query with a / then that gives you a shortcut to various commands. Enter a query of / to see them.
Shell Integration and Utilities
Shell integration consists of a shell script that's loaded when you create a new session or ssh to a remote host. It modifies your prompt so iTerm2 knows where it is. This enables a number of features, such as Copy Output of Last Command, Automatic Profile Switching when changing hosts, and more as described in Shell Integration. When you install Shell Integration you'll be prompted to also install its Utilities. The Utilities are a collection of shell scripts that use iTerm2's unique features and make them easy to use. For example, you can upload or download files from a remote host, copy to the pasteboard from the command line (even over ssh!), and make fireworks explode from the cursor. It's described in Utilities.
General Usage
Tabs
When you first start iTerm2, a window opens showing a terminal session. If you want to open more that one session at a time, you have a few options: You can create a new window (Shell > New Window), you can create a new tab (Shell > New Tab), or you can split the current session into two panes (Shell > Split Horizontally, Shell > Split Vertically), each of which is a separate session.
Tabs in iTerm2 behave like tabs in other programs, most notably web browsers like Safari, Firefox, and Google Chrome. Note that you can drag and drop tabs to reorder them within a window. You can drag tabs from one window to another, and you can drag a tab from a window into a new window by dropping it outside any iTerm2 window's tab bar.
By default, the label of each tab is the name of the job that's running in that session. Some systems are configured to augment this with additional information such as the hostname you're logged in to or your current directory (this is done by sending a special code of ESC]0;string ^G).
Tab labels have indicators that tell you their status. A blue dot means new input was received. An activity indicator means new output is being received. When the session ends, a ⃠ icon appears in the tab. You can customize these indicators in Settings > Appearance.
Edit Current Session
The Edit Current Session panel lets you modify the appearance of a single session. If you customize some attribute of the session (for example, by changing the default text color) then subsequent changes to that same attribute in the profile will not affect the customized session. However, changes to other attributes of the profile will affect the customized session.
Pointer
The primary use of the mouse in iTerm2 is to select text, and (by default) text is copied to the clipboard immediately upon being selected. You can click and drag to perform a normal selection. Double-clicking selects a whole word. Triple-clicking selects an entire line. Quadruple-clicking performs a "smart select", matching recognized strings such as URLs and email addresses. You can add custom pointer actions in Settings > Pointer. I recommend using three-finger tap for smart selection, but you must ensure that System Settings > Trackpad does not have any other action already assigned to three-finger tap.
If you hold shift while clicking the existing selection is extended. In fact, you can single click in one location and shift click in an other location to make a selection: no dragging needed.
If you hold cmd while dragging it will create a noncontiguous selection.
If you hold cmd and click on a URL it will be opened. If you hold cmd and click on a filename, it will be opened. There is special support for MacVim, TextMate, and BBEdit when you cmd-click on a text file's name: if it is followed by a colon and line number, the file will be opened at that line number. The current directory is tracked if you have your shell prompt set the window title, as described here, or if you have Shell Integration installed.
If you hold cmd and option while selecting, a rectangular selection will be made.
If mouse reporting is enabled (in Settings > Profile > Terminal) and the currently running terminal application is using it, pressing option will temporarily disable it so you can make a selection.
Right clicking on certain values shows helpful information in the context menu:
- Right-clicking on a number shows its conversion to or from hex, or if it looks like a unix timestamp its representation in local time will be shown.
- Right-clicking on a non-ASCII character shows its code point and UTF-8 representation.
You can configure your pointing device's scroll gesture to send arrow keys in interactive programs by turning on Settings > Advanced > Scroll wheel sends arrow keys when in alternate screen mode, but it will only work if Settings > Profiles > Terminal > Disable save/restore alternate screen is turned off.
A three-finger swipe left or right on a trackpad (if configured to "navigate") will select an adjacent tab.
Middle clicking on a tab (if your pointing device has a middle button) closes it.
Keyboard
Every aspect of the keyboard can be configured in iTerm2. These keystrokes may be useful to remember:
- Cmd+left arrow, Cmd+right arrow navigates among tabs. So does Cmd-{ and Cmd-}.
- Cmd+number navigates directly to a tab.
- Cmd+Option+Number navigates directly to a window.
- Cmd+Option+Arrow keys navigate among split panes.
- Cmd+] and Cmd+[ navigates among split panes in order of use.
You can configure any key combination to perform any action in two places: in Settings > Keys, you can define global key shortcuts that affect all profiles. In Settings > Profiles > Keys, you can define key shortcuts that affect only a single profile.
You can remap modifiers like Option and Cmd within iTerm2. Some users find that pressing Option frequently is uncomfortable, and configure iTerm2 to swap the function of the Option and Cmd keys. This is done in Settings > Keys under Remap Modifier Keys. If there is some key combination that you don't want to be affected by this change (such as Cmd-tab) add a new global shortcut key with the action Do Not Remap.
iTerm2 allows you to define a global hotkey. This is a single keystroke that iTerm2 listens for even when another application has keyboard focus. When it is pressed, iTerm2 comes to the front. Press it again, and iTerm2 goes away. You can choose to bind the hotkey to a single dedicated window. For more on the hotkey window and other uses of hotkeys, see Hotkeys.
Context menus
By right-clicking in a session a context menu opens. You can use it to open a new session, perform various actions on selected text, or access frequently used features to affect the clicked-on session.
Profiles
Many settings are stored in profiles. A profile is a named collection of settings, and you can have as many of them as you like. Most users only have one profile, but if you find that you often connect to different servers, they may be useful for you. A key feature of a profile is that you can associate a command with it that is run when it begins. For instance, if you often ssh to a particular host, you could create a profile with the command "ssh example.com" to automate that process.
General Preferences
General
Startup
Window restoration policy
This setting determines how windows will be opened when iTerm2 is launched. Most users will want Use System Window Restoration Setting as it works best with Session Restoration. Users who exclusively use the Hotkey Window may prefer Only Restore Hotkey Window, which will not restore regular windows but will restore the hotkey window. If you have a default window arrangement saved then Open Default Window Arrangement will be available.
Open profiles window
If selected, the Profiles Window will automatically open when iTerm2 is started.
Restore windows to same Spaces
macOS apps do not typically restore windows to the same Space (aka Desktop) that they were originally on except on system restart. When this setting is enabled, iTerm2 will attempt to restore windows to their original Spaces.
Always open at least one terminal window at startup
If you have a hotkey window defined then iTerm2 won't open a regular window on launch. If you'd prefer to always have a visible window in addition to the hotkey window, enable this setting.
Closing
Quit when all windows are closed
If selected, iTerm2 will automatically quit when its last terminal window is closed.
Confirm closing multiple sessions
If selected, commands that close one session will not be confirmed, but commands that close multiple sessions (such as clicking the red button on a window with two or more tabs) will be confirmed with an alert box.
Confirm Quit iTerm2 Command
If selected, the Quit iTerm2 (cmd-Q) command will be confirmed if any terminal windows are open.
Even if there are no windows
Modifies Confirm Quit iTerm2 COmmand to disable the prompt when there are no open windows.
Disable all confirmations on system shutdown, restart, and log out
When enabled, iTerm2 will never block system shutdown, restart, and log out by asking for confirmation. Enabling this setting could cause you to lose work.
Magic
Add Bonjour hosts to profiles
If selected, all Bonjour hosts on the local network have a profile created for them as long as they're around.
Instant Replay Uses X MB per Session
This setting specifies the maximum amount of memory allocated to instant replay for each tab or split pane. More memory means instant replay is able to go farther back into the past. You can enter instant replay with View > Step Back in Time.
Save copy/paste and command history to disk
If selected, every time text is copied or pasted in iTerm2 it will be saved to disk. The last 20 values are recorded. They can be accessed with Edit > Open Paste History.... If you use Shell Integration then when this is enabled your command history, directory history, and remote hostname and usernames will also be saved to disk. Unchecking this will erase all of the saved information.
Enable Python API
Toggles the availability of the Python API. See Python API Authentication for details on the security model.
Custom Python API Scripts Folder
Normally Python API scripts go in ~/Library/Application Support/iTerm2/Scripts but if you'd prefer to have them elsewhere you can specify the path with this setting.
GPU Rendering
The GPU renderer improves drawing performance, but it may use more energy. You can also configure when it is enabled in Advanced GPU Settings.
The advanced settings are:
- Disable GPU renderer when disconnected from power - Use this to conserve energy when not plugged in and to get the best drawing performance when connected to power.
- Prefer integrated to discrete GPU - If your machine has two GPUs, enable this to use the slower but less power-hungry GPU.
Maximize throughput at the cost of higher latency
When this is enabled:
- The frame rate will be reduced when a lot of data is being received.
- Input handling is prioritized over redrawing, reducing the maximum frame rate.
You probably need to disable this to hit 120 FPS.
Compress scrollback history in the background
When enabled, scrollback history gets compressed when the app is idle. This causes slightly higher CPU utilization when the app is not in use but can significantly reduce memory usage when there are large scrollback buffers.
AI > General
Plugin
To use AI features you must install the AI plugin.
Consent
You must consent to AI features before they can be used. This is a secure user default which requires you to enter an administrator password to change.
API Key
Because AI features depend on your provider's API, users must provide their own API keys. Unlike most settings (which are saved in user defaults), the AI key is stored in the keychain to prevent unauthorized access.
AI Model
Selects the model used for AI features. The menu lists the models iTerm2 knows about, including any you have configured manually.
Manage AI Models…
Opens the Manual AI Models panel where you can add, edit, duplicate, and delete models. You can mark one model as the default and another as the economy model (a cheaper model used for frequent background jobs, such as command safety checks). See Manual AI Models below for the per-model fields.
Automatically update available AI models from live online database
When enabled, iTerm2 periodically refreshes the list of available models from an online database so newly released models appear without waiting for a software update. This is on by default.
Zero Data Retention
Turn this on if your OpenAI organization has Zero Data Retention enabled. iTerm2 then stops sending previous_response_id and sets store=false so that no response state is retained on the server. Leave it off otherwise, since it disables some optimizations.
Use AI to check safety of commands before running them
When enabled, iTerm2 checks a command with AI before it is run automatically. Deterministic rules run first, and a low-cost model is consulted only when those rules are inconclusive: either the economy model or, if you use on-device Apple Intelligence for this, Apple Intelligence. This is opt-in and off by default.
Timeout
The maximum time to wait for a response to an AI query.
AI > General > Manual AI Models
Reached through the Manage AI Models… button. This panel lists your manually configured models and lets you add, edit, duplicate, or delete them. A starred model is the default and another may be marked as the economy model. Each model has the following fields, edited in the add/edit sheet:
Model
The name of the model to use. This value is sent in the API request.
Token Limit
Gives the maximum number of tokens in the context and in a response. If this value is too high your requests may fail.
URL
The URL of the endpoint to send requests to.
API
Which style API to use.
Features
The following features are available. Not all APIs support all features.
- Hosted File Search - OpenAI Responses API only
- Hosted Web Search - OpenAI Responses API only
- Function Calling - Most APIs support this
- Streaming Responses - Most APIs support this
- Code Interpreter - OpenAI Responses API Only
- File Upload and Vector Store -OpenAI Responses API only. Vector store is not currently used.
Supports temperature
Enable this if the model accepts a temperature parameter. Some models reject requests that include one.
Configurable thinking
Enable this if the model supports a configurable thinking (reasoning) effort.
AI > General > Prompts
Here you can edit the prompts. Values in \(...) are substituted. The exact substitutions depend on which prompt it is. For more information on interpolated strings, see Variables.
- Edit > Engage Artificial Intelligence - This prompt is sent when you select the Engage Artificial Intelligence menu item.
ai.promptis replaced with the text at the cursor or the manually entered prompt. - AI Chat + (options) - These prompts are used depending on which permissions are enabled.
AI > Features
Check Terminal State
This exposes information about the linked terminal to AI, including the current directory, user shell, the current or last command and its exit status, the size of the terminal window, the host you are SSHed to (if any), and the current username.
Run Commands
This makes functions available to AI that let it execute commands on your behalf.
Control Terminal
This makes functions available to AI that let it send keystrokes to the terminal. It also lets AI restart a session.
View Contents
This exposes the contents of the linked session to AI, including your command history. When it is set to provide contents automatically, a session-bound chat also includes the terminal's visible screen with each message you send.
View Manpages
This lets AI view manpages. If you are using ssh integration, man pages from the remote host may be viewed by it.
Write to Clipboard
This makes functions available to AI that let it write to the clipboard.
Write to filesystem
This makes functions available to AI that let it write to the filesystem.
Act in Web Browser
This makes functions available to AI that let it view the contents of the current web page (applicable only in browser profiles).
Offer AI command suggestion in Composer and Auto Composer
When enabled, as you type in the composer what you have entered and relevant files or commands are sent to AI so it can make suggested completions. This is disabled by default because it is not very privacy-friendly.
Software Update
Update to Beta test releases
If enabled, iTerm2 will periodically check if a new unstable version of iTerm2 exists, and if so it will prompt you to download and upgrade.
Check for updates automatically
If enabled, iTerm2 will periodically check if a new version of iTerm2 exists, and if so it will prompt you to download and upgrade.
Ignore non-critical shell integration updates
If enabled, you won't be notified of updates to shell integration unless there is a security problem or other critical issue. Shell integration update notificationss are shown when the shell integration script is loaded (when you log in or ssh somewhere that has it installed).
Notify only for cricial shell integration updates
When disabled, iTerm2 will let you know whenever your shell integration scripts are out of date. When enabled, it will warn you only when a very important update is available (e.g., because of a security issue).
Selection
Copy to clipboard on selection
If enabled, text is copied to the clipboard immediately upon selection. If not selected, you must select Edit > Copy to copy it.
Copied text includes trailing newline
If enabled, a terminal newline will be copied to the pasteboard when the selection includes one; otherwise, no selection will ever include a terminal newline.
Applications in terminal may access clipboard
If enabled, clipboard access will be granted via escape code to programs running in iTerm2. They will be able to set the contents of the system pasteboard. For more details, see Shell Integration Utilities.
Allow sending of clipboard contents?
An app running in the terminal can request that the terminal transmit the clipboard contents to it. Since this is a security risk, it normally requires you to consent each time.
Triple-click selects full wrapped lines
If enabled, a triple click selects a whole line, even if it was longer than one row in the terminal. If off, then triple click selects exactly one row.
Double-click performs smart selection
If enabled, double click performs smart selection instead of word selection as is standard on macOS.
Automatically enter copy mode on Shift+Arrow Key with selection
If enabled, pressing shift-left or shift-right will enter copy mode when a selection exists.
Characters considered part of a word for selection
When you double-click in the terminal window, a "word" is selected. The OS's algorithm for word selection is used, but it's extended to also include characters in this set. For example, by adding / to this field, double-clicking on a path/like/this would select the entire path instead of just one component.
Clicking on a command selects it to restrict Find and Filter
When enabled, clicking on a command dims other commands and then Find, Filter, and Select All operate only on the selected command. This requires shell integration.
When pasting a dropped filename, wrap it in double quotes
When enabled, dropping a file into a terminal will ensure that its name is always quoted with ".
Window
Smart window placement
If enabled, new windows will be opened where they least overlap existing windows.
Remember the size and position of previously closed windows
When enabled, new windows use the size and position of recently closed windows. Window frames are now remembered per profile rather than globally, so a new window opens where the last window using its profile was.
Adjust window when changing font size
If enabled, a change to a session's font will cause the window to grow or shrink.
Zoom maximizes vertically only
If enabled, the green "Zoom" button expands a terminal window vertically but does not affect its width. This can be overridden by holding down shift while clicking the zoom button.
Native full screen windows
If enabled, fullscreen windows will animate into a special desktop, as is typical in macOS 10.7 and later. If disabled, fullscreen windows will instantly go fullscreen without changing desktops.
Each tab may have its own window title
The OSC 0 and OSC 2 control sequences set the window title. This setting controls whether such a control sequence changes the window title associated with all sessions in the window, or only with the one in which it was received.
Settings
Load settings from a custom folder or URL:
If enabled, iTerm2 will load its settings from the specified folder or URL. After setting this, you'll be prompted when you quit iTerm2 if you'd like to save changes to the folder. Besides settings, iTerm2 can also sync your snippets, global notes, and session icon customizations through the folder. The first time this happens you'll be asked to consent, and if the same data was changed on more than one machine you'll be asked how to resolve the conflict.
Save changes to folder when iTerm2 quits
When you've turned on Load settings from a custom folder and this is on then any changes you make to your settings will be written to the custom folder.
Export/Import All Settings and Data
If you need to back up/restore all of your settings, such as when moving to a new computer, use these buttons. The following are included:
- Python API Runtimes
- Secure user defaults (settings that require your password to change)
- Everything in the Settings window
- The contents
~/.iterm2, such as shell integration scripts. - The contents of
~/Library/Application Support/iTerm2which has your toolbelt notes, dynamic profiles, and more. - Python API scripts
Erase All Settings and Data…
Offers to export your settings and data first, then erases everything: your preferences, profiles, saved sessions, scripts, and the contents of ~/.iterm2 and ~/Library/Application Support/iTerm2. iTerm2 quits immediately afterward. Items stored in the macOS Keychain (such as the AI API key and Password Manager entries) are not erased.
tmux
When attaching, restore windows as…
The first dropdown box in the tmux Integration section allows you to define how tmux windows should be mapped to native constructs. When attaching to a new tmux session with the tmux integration, tmux windows not seen by iTerm2 before will open in either new windows or tabs, as specified by this preference.
Automatically bury the tmux client session after connecting
When the tmux integration is entered by running tmux -CC, the window in which that command was run will be buried.
Use "tmux" profile rather than profile of connecting session
This used to on by default, but is no longer so as of version 3.3. When enabled, a copy of the Default profile is created, called tmux. When using tmux integration all tmux sessions will use this profile.
When disabled, the profile of the session in which you ran tmux -CC will be used for all tmux sessions.
Status bar shows tmux status bar content, not native components.
When enabled, the status bar will contain the same content as the tmux status bar in its text-mode UI. When disabled, the status bar defined in the profile used for a tmux integration session will be used.
Pause a pane if it would take more than X seconds to catch up.
When both a tmux integration and tmux text-mode UI client are attached to the same tmux session, the text-mode UI can sink data much faster than tmux integration can because it drops information between frames. In this case, a large buffer can grow in the tmux integration window. Once the time to catch up exceeds this number of seconds, the tmux integration session will be paused. That means it stops receiving new data. While paused, no more data will be added to its buffer and may be lost forever. You will be prompted by a notification at the top of the window to unpause the session. This feature is only available in tmux 3.2 and later.
Warn Before Pausing
If enabled, a notification is shown when a pause is projected to occur within half of the pause deadline. See Pause a pane if it would take more than X seconds to catch up for more detail on pausing.
Unpause Automatically
When enabled, this unpauses the tmux session as quickly as possible after it is paused by tmux. It does not completely eliminate the possibility of data loss.
Mirror tmux paste buffer to local clipboard
tmux has a "paste buffer" which acts like its clipboard. When this option is enabled, the contents of the tmux paste buffer and copied into the system clipboard.
Experimental
Enable support for right-to-left scripts
When enabled, right-to-left scripts such as Arabic and Persian are reordered for display (bidi reordering) and their letters are joined in cursive form, instead of being drawn as plain left-to-right text. This is on by default.
Use SSH integration for ssh: URLs
If enabled, use SSH integration when opening an SSH URL.
Appearance Preferences
Appearance
General
Theme
Allows you to select the theme. The theme affects how the areas outside the main terminal view are drawn, including colors and fonts.
The options are:
- Regular - The standard macOS theme. Switches between dark and light mode automatically based on the system setting.
- Minimal - This is inspired by the appearance of Electron apps. It is modern and streamlined.
- Compact - A combination of Regular and Minimal. The standard colors are used, but the title bar is eliminated to save space.
- Light - Regular theme but ignores system light/dark mode.
- Dark - Regular theme but ignores system light/dark mode.
- Light High Contrast - High contrast version of Light
- Dark High Contrast - High contrast version of Dark
In Minimal and Compact, tabs go in the title bar if the tabs are on top. The area between the red, yellow, and green buttons and the first tab can be used to drag the window. If tabs are on the bottom or the left, you can move the mouse to the top left of the window to reveal the red, yellow, and green buts. The area around them, when revealed, can be used to drag the window.
Tab Bar Location
Defines whether tabs appear at the top, bottom, left, or right side of your windows.
Status Bar Location
Defines where the status bar appears, if enabled.
Auto-hide menu bar in non-native fullscreen
When native fullscreen mode is disabled (in Prefs > General), this option is available. If you'd like the menu bar to remain visible when a fullscreen window is present on a screen with a menu bar, turn this on.
Exclude from Dock and Cmd-Tab Application Switcher
When this setting is enabled, iTerm2 will disappear from the dock and you won't be able to switch to it with Cmd-Tab. An icon will be added to the right side of the menu bar that lets you get back to iTerm2's Settings. This is useful if you only use hotkey windows and you want iTerm2 to keep a low profile. You should be warned that this is a buggy part of macOS and sometimes things misbehave in small ways when this is enabled.
When selected, you can also enable but only if all windows are hotkey windows to bring back the dock icon when a non-hotkey window exists.
Windows
Show window number in title bar
If selected, window titles include the window number. You can navigate to a window by pressing cmd-opt-N where N is the window number. You can also change which modifiers are used in Settings > Keys.
Heavy border around windows in light mode
In light mode (or when there is a pane with transparency), window borders can be hard to see. Enabling this setting draws a thicker border around windows.
Hide scrollbars
If selected, scrollbars will be hidden in terminal windows.
Disable transparency for fullscreen windows by default
If enabled, entering fullscreen mode will automatically turn off transparency for that window.
Show line under title bar when tab bar is not visible
Turn this off for a sleek appearance with the dark theme.
Show proxy icon in window title bar
When enabled, an icon representing the current directory is added to the window's title bar. You can drag it. This also works in the Compact and Minimal themes, where the icon appears next to the window's stoplight buttons.
Tabs
Show tab bar even when there is only one tab
If selected, the tab bar will remain visible when a window contains exactly one tab.
Preserve window size when tab bar shows or hides
When enabled, the window will not change size as the tab bar is shown or hidden. Instead, the number of rows of text inside the window may change.
Show tab numbers
If selected, tabs will indicate their keyboard shortcut.
Tabs have close buttons
If selected, tabs show close buttons. If not selected, the close buttons only appear when the mouse hovers over the tab.
Show activity indicator
If selected, the activity indicator in each tab will be displayed when new output is received and the tab is not selected.
Show new-output indicator
If selected, non-selected tabs will indicate they have unseen output with a blue circle in the tab.
Flash tab bar when switching tabs in fullscreen
If selected, the tab bar will show briefly when switching tabs in a fullscreen window. It will also show briefly when the number of tabs changes.
Show tab bar in fullscreen
If selected the tab bar will be visible in fullscreen windows.
Stretch tabs to fill bar
If selected, tabs will grow large enough to fill the entire tab bar, like system native tab bars. This is on by default.
Tab bar scrolls when tabs don't fit
When there are more tabs than fit in the tab bar, this option keeps the extra tabs in the bar and lets you scroll to reach them instead of moving them into an overflow menu. It works for tab bars on the top, bottom, left, or right. This is on by default.
Support basic HTML tags in tab titles
When enabled the following HTML tags are supported in tab titles: <b>, <i>, <u>.
Panes
Show per-pane title bar with split panes
When a tab has split panes, this option controls whether each split pane will have its own title bar.
Separate status bars per pane
When enabled, each pane gets its own status bar. When disabled, the window has a single status bar that shows information pertaining to the current pane.
Separate background images per pane
When disabled, the current pane's background image fills the window, spanning all panes.
Side/Top & Bottom margins
Margins are the area around terminal content that is usually empty. This values are in points. Note that the right and bottom margins may be larger than the value you specify here if the window size is not evenly divisible by the size of a single character. These values are in points.
Dimming
Dimming amount
This slider controls how much to dim inactive windows or panes.
Dim inactive split panes
If selected, split panes that do not have keyboard focus will be slightly dimmed.
Dim background windows
If enabled, windows in the background (that is, those not receiving keyboard input) are dimmed according to the above settings.
Dimming affects only text, not background
When a window or pane is dimmed, this option controls whether the background color is dimmed or only the text colors.
General Profile Preferences
Profiles
General
Name
Gives the name of the profile which is shown in menus, Settings, and the profiles window. This serves as the default session name for sessions created with this profile, which is an interpolated string.
Profile Type
If the browser extension is installed this lets you define whether this session is for a terminal emulator or web browser session. See Web Browser for more information.
Shortcut key
This shortcut can be used to open a new window or tab. By default, it opens a new tab, but if you hold down the option key while pressing the shortcut, a new window will be opened instead.
Tags
Tags are a collection of words or phrases that annotate a profile. When you search your profiles (for instance, in the profiles window), the tag names are searched in addition to the profile name. If a tag name contains a slash that defines a hierarchy of menu items in the Profiles menu.
Badge
The badge is a large label visible in the top right of a terminal session behind its text. For more information see Badges. This is an interpolated string.
Click the Edit... button to configure the position, maximum size, and typeface of the badge.
Title
This menu contains items which may be separately enabled. They are combined to form the session's title. The session's title is shown in per-pane title bars, when visible; it is also the default tab title. The current tab title also serves as the window title. The standard items in this menu are:
- Session Name - The session name defaults to the profile name but may be changed later through the Edit Session dialog.
- Profile Name - Gives the current name of the profile the session uses. If the session's profile changes, this profile name will be updated.
- Profile & Session Name - Shows both names if they are different or just the shared name if they are the same.
- Job - The name of the foreground job.
- User - The current user name. Use Shell Integration to enable this to work when connected to a remote machine.
- Host - The current host name. Use Shell Integration to set the host name.
- PWD - The present working directory. Use Shell Integration to enable this to work when connected to a remote machine.
- TTY - The path to the TTY device associated with this session.
If a script that installs a custom title provider is running, its offerings will be added to the bottom of the list. For a working demo, see the George's Title Algorithm example.
Learn more about session titles.
Applications in terminal may change the title
When enabled, a control sequence can change a session's or window's title.
Subtitle
A tab's subtitle is a second line in a smaller typeface beneath the main title. It can be set by a control sequence or you can define it as an interpolated string. If your configuration has a legacy "short tabs" setting then you'll be prompted to enable "tall tabs" first, to make room for subtitles. That makes room for the second line of text and brings tab height up to the standard used by the most recent version of macOS.
Icon
You may assign an icon to the profile, elect to use the built-in icon (which is based on the foreground application), or to have no icon at all. Icons appear in the tab bar and the window title bar.
Command
This is the command that is executed when a new session with the profile is created. If login shell is chosen, then login is invoked. You can put special terms surrounded by $$ in this field (example: $$USERNAME$$). When a new session is created, you will be prompted to enter a value for each such term. See the description of URL Schemes below for details about the special "$$" value that can go in this field.
When custom shell is selected, you should enter the path to a shell (e.g., /usr/local/bin/bash) and it will be run as a login shell.
If Command is set to SSH then SSH Integration will be used. SSH integration adds some features that regular SSH does not have:
- Set environment variables automatically
- Load shell integration automatically
- Copy over local files to remote host
- Features like CPU utilization in the status bar will show values from the remote host.
Consider SSH integration to be a beta quality feature.
To take full advantage of it the remote host must have Python 3 installed.
It is not recommended for SSHing to non-Unix hosts.
When you have selected SSH you can click the Configure button to further configure the SSH connection.
In this configuration window you can turn off SSH Integration to fall back to the system ssh command. You can also list environment variables to copy to the remote host. The values come from the current session. You can also edit the list of files to copy upon connection and where to place them on the remote host.
Run command through your shell
When the profile uses a custom Command (rather than a login shell), this option runs that command through your login shell first. Your dotfiles get a chance to run, so $PATH and any variables you export (API keys, GEM_HOME, and the like) are in place before the command starts. This option is only shown when a custom command is configured.
Load shell integration automatically
When enabled, Shell Integration will be loaded into your shell when a new session is created. This is available for zsh, bash, and fish.
Send Text at Start
This text will be sent when a session begins. If it is not empty then a newline will be sent afterwards. It does not accept any special characters or require any escaping.
Initial Directory
Normally, new sessions begin in your home directory. You can choose to open new sessions in the same directory as the current session (but only when creating a new tab), or you can specify a starting directory.
URL Schemes
You can configure a profile to handle a URL scheme, such as ssh. When a hyperlink is clicked on with that scheme, a new tab is opened with the selected profile. It is recommended that you set the command to "$$", in which case an ssh command line will be auto-generated. For other schemes, you can uses these variables in the Command field and they will be replaced with the appropriate part of the URL:
- $$URL$$ The complete url
- $$HOST$$ The host portion of a url like scheme://host/
- $$USER$$ The username portion of a url like scheme://user@host/
- $$PASSWORD$$ The password portion of a url like scheme://user:password@host/
- $$PORT$$ The port number of a url like scheme://host:port/
- $$PATH$$ The path portion of a url like scheme://host/path
- $$RES$$ The portion of a url following the scheme.
Color Profile Preferences
Profiles
Modes
Profiles may have different colors configured for light and dark mode. If you select Use separate colors for light and dark mode then you can switch between modes using the Editing control. Otherwise, only one set of colors will be assigned to this profile.
Color Presets...
iTerm2 ships with some color presets, which you may load from this popup menu. You can import and export color presets to files with the extension "itermcolors". There is an online color gallery where users may share color presets, and a link to it is provided in this menu. When importing a color preset, the name it is assigned is based on the filename imported.
Colors
Clicking on any of the color wells opens a color picker that lets you change the setting for the selected color. iTerm2 has a custom color picker. If you don't like it you can revert to the system color picker by clicking the rectangular icon to the right of the eyedropper.
Context-aware cursor color
When selected, a box cursor will be displayed in reverse video. If this would result in confusion because nearby background colors would be very similar to the cursor's color, then a different color is chosen that will be most visible.
Cursor Boost
Cursor Boost dims all colors other than the cursor colors to make the cursor stand out more.
Cursor Guide
The cursor guide is a horizontal rule that indicates the vertical position of the cursor. You can adjust its color, including alpha value, to make it more visible against your background color.
Bold
When enabled, this color is used for bold text.
Underline Color
If enabled, this color will be used for all underlining, independent of the color that underlined characters have themselves.
Use ANSI colors for mark indicators
When enabled, the command-prompt mark indicators are drawn using the color preset's ANSI blue, red, and yellow instead of the built-in mark colors. This lets the indicators match the rest of your theme. Off by default.
Faint text opacity
Selects how prominent "faint" text is. The minimum value is 0.1; lower values are clamped to that floor.
Minimum Contrast
Sometimes text in a terminal can be hard to read because the background and text colors are too similar. Because ANSI colors are configurable, apps have a hard time avoiding this problem. To ensure legibility, you can increase the Minimum Contrast setting. It has the effect of shifting text colors that are similar to their background colors closer to black or white. As this setting is increased, more colors are affected and the effect is greater. At 100, all text will be pure black or pure white. Minimum contrast never modifies background colors.
Selection
When enabled, you can specify a color for selected text. When disabled, the regular color is used (which may be difficult to read if the text color is similar to the selection color).
Use custom color for selected text
When enabled, the color you specify here for Foreground will be used for selected text. Otherwise, text color won't change when a selection is made.
ANSI Colors
These are the 16 standard colors most often used in terminal emulators. To the right is a visualization in polar coordinates where the angle gives the hue and the distance from center gives the saturation. This can help you configure colors that cover the color space consistently.
Tab Color
If enabled, this color will decorate the tab control. Tabs indicate the color of their current session if there is more than one split pane.
Text Profile Preferences
Profiles
Text
Cursor
This lets you select a cursor shape.
Shadow
This option is available for the underline and vertical bar cursors. It improves their visibility by adding a second line in a constrasting color next to the regular cursor.
Blink
If checked, the cursor will blink slowly to improve visibility.
Smooth blink
When enabled, the cursor fades smoothly in and out instead of toggling abruptly on and off. Click Configure to tune the fade-in and fade-out durations, the easing, and how long the cursor dwells fully visible and fully hidden. This is distinct from the Blink checkbox and is off by default.
Animate movement
If enabled, cursor movement in interactive apps will use a stretching animation to make it easier to follow. This applies to the box cursor.
Smooth-typing animation
Available for the underline and vertical bar cursors, this makes the cursor slide smoothly to its new position as you type. It is distinct from Animate movement, which stretches the box cursor.
Hide when keyboard focus lost
If enabled, the cursor will become invisible when the terminal does not have keyboard focus.
Italic text
If selected, text with the italic attribute set will be rendered in italics. The font you select must have an italic face.
Blinking text
If selected, text with the blink attribute set will actually blink. Oh, the humanity.
Draw bold text in bold font
If selected, bold text will be drawn in a bold version of the selected font. If the font does not have a bold version, then a bold appearance is simulated by "double striking" the text: that is, drawing it twice, shifting it one pixel horizontally the second time.
Use built-in Powerline glyphs
When enabled, iTerm2 renders Powerline glyphs itself rather than using what is built-in to the font. These glyphs tend to line up better with other elements than font-provided glyphs.
Use thin strokes for anti-aliased text
Anti-aliased text will be drawn with thinner strokes by default on Retina displays when the background color is darker than the foreground color. The effect may be more or less visible depending on your particular hardware and OS version. You can configure when thin strokes are used depending on display type and colors.
Use Unicode Version 9+ Widths
Unicode version 9 offers better formatting for Emoji. If your applications have been updated to use these tables, you should enable this setting.
Ambiguous characters are double-width
Some characters (e.g., Chinese ideograms) are double-width, and take two cells to display. Other characters (e.g., Latin letters) are single width and take only one cell to display. There is another category of characters known as "ambiguous width". One example of ambiguous-width characters are Greek letters. Depending on your application, you may prefer to display them as double-width or single-width. If most of the text you deal with is double-width, then you should enable this setting as it will help things to line up correctly in that context.
Normalization
This affects how text is processed on input. Most users will want no normalization. HFS+ normalization preserves the fullwidth attribute of composed characters.
Regular font
ASCII text (latin letters, numbers, and some symbols) will be drawn using this font. Select "Anti-aliased" to draw the text with smooth edges.
Non-ASCII font
All non-ASCII text (many accented Latin letters, non-Latin text, less-common symbols, and thousands of miscellaneous unicode characters) will be drawn with this font. It is recommended that you use the same point size for both regular and non-ASCII fonts. Select "Anti-aliased" to draw the text with smooth edges.
Ligatures
When enabled and you have a font that supports ligatures (such as FiraCode) then text will be rendered with ligatures. This makes drawing much slower for two reasons: first, it disables the GPU renderer. Second, it uses a slower API. Users on less-than-stellar hardware may not want to enable it.
Contextual Alternates
For ligature-capable fonts, the font picker's options menu includes a Contextual Alternates (calt) toggle. Some fonts use contextual alternates to produce substitutions you may not want (for example, Monaspace renders [] as a checkbox). Turning this off for the profile disables those substitutions while leaving ordinary ligatures alone.
Special Exceptions
When the non-ASCII font is enabled you'll have the option to manage special exceptions. A special exception is a rule that maps a range of codes from another font into the terminal, possibly at a different range. This is useful if you work in multiple languages. For example, if you want to use a different font for Korean versus Chinese, you could create special exceptions for Korean characters to pull from a different font.
This is more frequently used by Powerline (or "nerd font") users to mix graphical characters from different fonts. After opening the Special Exceptions panel, you can use the Install Nerd Font Bundle to get a good default configuration of powerline glyphs from a number of fonts.
You can import and export special exceptions to share them with others.
Window Profile Preferences
Profiles
Window
Transparency
This sets the transparency of the window background. It can be temporarily disabled with View > Use Transparency.
Keep background colors opaque
If selected, non-default background colors will be opaque. This is only available when transparency is greater than zero.
Blur
If selected, the window background is blurred provided the background has some transparency. Selecting a large radius will blur the background more, but (especially on Retina displays on older machines) comes with a performance penalty.
Rows/Columns
When creating a new window with this profile, it will be created with this many rows and columns. For most window types you can instead express the initial size as a percentage of the screen: switch the units control from cells to percentage and enter the width and height you want the new window to occupy.
Lock window size automatically
When enabled, the window created with this profile cannot be resized. This is the per-profile counterpart to the Window > Lock Size menu item.
Hide after opening
If enabled, a window created with this profile will immediately miniaturize after its creation.
Open Toolbelt
If enabled, a window created with this profile will feature an open toolbelt.
Custom window title
New windows created with this profile will use this title by default, overriding the default behavior of using the current tab's title as the window's title. This is an interpolated string.
Force this profile to always open in a new window, never in a tab.
If you ask for a new tab with this profile, it will just open in a window instead. This is for people who hate tabs.
Use Transparency
Sets whether the transparency setting is respected for new windows created with this profile. It can then be toggled with View > Use Transparency.
Custom Tab Title
New tabs created with this profile will use this tab title by default. This is an interpolated string.
Background Image
This allows you to select an image to display behind the terminal's text. Instead of a single file you can choose a folder of images: the profile then rotates through the images in that folder, changing at the rotation interval you specify.
Mode
This allows you to select how the image is scaled to fit the window:
- Stretch - The image is distorted to exactly fill the window.
- Tile - The image is not scaled. It is tessellated.
- Scale to Fill - The image is scaled up or down preserving the aspect ratio so that it completely fills the window. Parts of the image may be cropped out.
- Scale to Fit - The image is scaled to exactly fill the window either horizontally or vertically. Its aspect ratio is preserved. Letterboxes or pillarboxes may be added.
See also: Settings > Appearance > Panes > Separate background images per pane.
Blending
The blending slider determines how strongly the image dominates over the text's background color.
Style
This defines the window style.
- Normal - A regular window with a title bar.
- Full Screen - A full screen window. See Settings>General>Window>Native full screen windows.
- Maximized - The window has a normal title bar but is forced to be as large as possible on the the screen it is on.
- No title bar - A window without a title bar. It is hard to move but is as minimal as can be.
- Full-width bottom/left/top/right of screen - A window that fills the display edge-to-edge along one dimension and is stuck to one edge of the screen. The rows or columns setting will be disregarded.
- Bottom/left/top/right of screen - A window that is stuck to one edge of the screen.
Screen
If you have more than one screen connected, this lets you select the screen on which a new window should open. It is particularly useful for fullscreen and top-of-screen window styles. The Screen with Cursor option affects the initial screen of the window, but it won't follow your cursor from screen to screen.
Space
If you have enabled Spaces (or your OS uses Desktops instead of spaces) and have set Spaces/Mission Control to use Control+Number to switch spaces/desktops, then you can use this setting to select the initial space/desktop to open a new window using this profile.
Current Space means the window opens on the visible Space at the time it was created. For hotkey windows, Current Space causes them to move to the current Space each time they are opened.
All Spaces means the window follows you around from Space to Space.
Terminal Profile Preferences
Profiles
Terminal
Scrollback lines
The number of lines of scrollback buffer to keep above the visible part of the screen. Unlimited scrollback will allow it to grow indefinitely, possibly using all available memory.
Save lines to scrollback when an app status bar is present
Some programs (such as vim or tmux) keep a status bar at the bottom of the screen. For some applications (like vim) it is undesirable to save lines to the scrollback buffer when the application scrolls. For others (like tmux) you may want to save scrolled-off lines into the scrollback buffer. When this setting is enabled, lines scrolled off the top of the screen in the presence of a status bar are added to the scrollback buffer. The screen is considered to have a status bar if it has a scroll region whose top is the first line of the screen and whose bottom is above the bottom of the screen.
Save lines to scrollback in alternate screen mode
When in alternate screen mode, lines that scroll off the top of the screen will be saved to the scrollback buffer only if this option is enabled.
Drag-to-scroll disabled in alternate screen mode
Normally you can use the mouse to scroll by starting a selection and moving the pointer above or below the session's bounds with the button pressed. Interactive apps (like vim or emacs) signal their interactivity by entering alternate screen mode. When this setting is enabled, you won't be able to accidentally scroll by dragging in an interactive app.
Character encoding
The encoding to send and receive in. For most people, "Unicode (UTF-8)" is the right choice.
Report terminal type
The TERM variable will be set to this value by default. If xterm-256color is selected and your system is missing the terminfo file, you will be prompted to install it when you open a new session.
ENQ answer back
Text to send when the ENQ sequence is received. Not normally used.
Enable mouse reporting
If selected, applications may choose to receive information about the mouse. This can be temporarily disabled by holding down Option.
Report mouse wheel events
If disabled, the mouse wheel will always perform its default action (such as scrolling history) rather than being reported to an app that has enabled mouse reporting.
Report mouse clicks & drags
If disabled, the mouse buttons will always perform their default action (such as making a selection) rather than being reported to an app that has enabled mouse reporting.
Terminal may enable alternate mouse scroll
Alternate mouse scroll is a feature where the scroll wheel sends arrow up/down keys rather than navigating history. If enabled, a program may switch into alternate mouse scroll.
Automatically enable alternate mouse scroll
When enabled, alternate mouse scroll will be turned on any time you're in an interactive application.
Restrict alternate mouse scroll to vertical scrolling
When enabled, a horizontal scroll gesture will never send arrow keys when alternate mouse scroll is on.
Restrict mouse reporting to alternate screen mode
When enabled, mouse movements or clicks will be reported only when in an interactive application.
Terminal may report window title
Programs running in a terminal may send an escape code to request the current window title. You may disable this feature by enabling this option. It should be disabled if you're communicating with an untrusted party, as there are possible injection attacks.
Terminal may change cursor blink
If enabled apps running in the terminal can cause the cursor to start or stop blinking with a control sequence.
Disable session-initiated printing
If enabled, escape codes that initiate printing will be ignored.
Disable save/restore alternate screen
Some programs (such as vim, tmux, and less) switch into a so-called "alternate screen". A characteristic of this behavior is that when these programs terminate the screen's contents are restored to their state from before the program was run. If this option is selected, alternate screen mode is disabled and the screen cannot be restored by an application.
A session may cause the window to resize
If enabled, the window size can be changed by a program sending a control sequence.
...even if it is in an unselected tab or split pane
If enabled, programs running non-selected tabs or split panes without keyboard focus may resize the window.
Terminal may enable paste bracketing
Paste bracketing is a feature that can be enabled by an app running in iTerm2 by sending a control sequence. When enabled, iTerm2 transmits a control sequence before and after paste operations (e.g., pressing Cmd-V). This can be useful because editors like vim may disable auto-indenting when pasting already-indented code. Sometimes paste bracketing can be left on, causing unexpected behavior when you paste. For example, if a program running in an ssh session enables paste bracketing and then your ssh connection ends unexpectedly it won't have a chance to turn it off. Your next paste will include the bracketing control sequences, which will be mishandled by whatever program receives them. For that reason, some people prefer to disable paste bracketing. If you install Shell Integration it can detect when this occurs and automatically disable paste bracketing for you, making it safe to leave it enabled here.
Silence bell
If selected, the bell (control-G) will not make an audible sound.
Flash visual bell
If selected, a bell graphic will be flashed when the bell character is received.
Show bell icon in tabs
If selected, tabs will indicate that a bell has rung by displaying a bell graphic.
Notification Center alerts
If selected, iTerm2 will post a notifications when sessions receive output, become idle, ring the bell, close, or get a proprietary escape sequence to post a notification.
Filter Alerts
This button opens a panel that lets you customize which notifications will be posted.
Suppress alerts from active session
Found in the Filter Alerts panel. When enabled, alerts are not posted for the session that currently has keyboard focus, so you're only notified about activity you aren't already watching.
Send alerts to paired iPhone
Found in the Filter Alerts panel. When enabled, this profile's alerts (such as alert on next mark and Post Notification triggers) are delivered to a paired companion iPhone. This is opt-in.
Environment
You have the following options:
Set locale environment variables automatically- If enabled, LANG and LC_CTYPE environment variables will be set based on your machine's language settings.Do not set locale environment variables- LANG and LC_CTYPE will be unset.Use custom locale...- Lets you specify the locale variables you wish to use. You will be limited to those that are supported by your Mac.
The current locale is shown beneath this setting.
Insert newline before start of command prompt if needed
If you have Shell Integration installed and a command's output does not end in a newline, this setting will ensure your prompt does not begin in the middle of the line.
Show mark indicators
If you have Shell Integration and this setting is selected then a blue or red arrow appears next to each shell prompt. Turn this off to hide the arrow.
Show offscreen command line at top of session
When the session shows part of a command's output but the command is above the top of the screen, the command can be shown in a box at the top when this is enabled.
Click on a path in a shell prompt to open Navigator
If enabled and your shell prompt contains something directory-like (for example, /Users/george%) then clicking on that directory opens a Navigator window that lets you browse the file system.
Send newline rather than carriage return to terminal commands
Some obscure or ancient systems expect newlines as line terminators. Unfortunately there is no way to detect this automatically. If tmux integration simply hangs for you on certain hosts, enabling this setting may fix it.
Session Profile Preferences
Profiles
Session
Warn about short-lived sessions
When enabled, you'll be given a warning if a session ends within a short time after it starts. This gives you a chance to see what went wrong and fix it.
"Undo" can revive a session that has been closed for up to X seconds
When you close a session, window, or tab the shell is not terminated until X seconds pass. While that time period has not elapsed, Undo will reopen the session, tab, or window.
After a session ends
Defines what happens when a session ends.
- No Action - The session stays open and you will be prompted to restart it.
- Close - The session is automatically closed.
- Restart - The session is automatically restarted with the same command that launched it.
Prompt before closing
When a session will close, you can choose when to be prompted with a modal alert. If you select If there are jobs besides then the prompt will only be shown when an app besides those specified (which are often present when nothing is happening) is running.
Enable automatic session logging
If enabled, every session's output will be logged to a file in the specified directory. The filename format can also be specified here as an interpolated string.
Log format
You can log in the following formats:
- Raw data - An exact copy of the input that was received including control sequences.
- Plain text - Excludes control sequences. Just text and newlines. This is very readable when running CLI apps but becomes utter chaos for interactive programs like vim or emacs.
- HTML - Like Plain text, it excludes control sequences. Colors and various font attributes are preserved. The resulting file can be viewed in a web browser.
- asciinema - Produces a file viewable with asciinema, which preserves time as well as more font attributes.
Folder
The folder in which to place logs. This is an interpolated string.
Filename
The name to give the log file. This is an interpolated string.
Open password manager automatically
If enabled the password manager will be opened when a session with this profile is created.
Timestamps
When enabled, the last modified date and time of each line is shown on the right-hand side of the terminal. You can also select whether timestamps should overlap contents or sit next to them.
Status bar enabled
See Status Bar for details on the status bar.
When idle, send ASCII code X every Y seconds.
If selected, the specified ASCII code "X" (a number from 0 to 255) will be transmitted every Y seconds while nothing is happening. Don't use this unless you know what you're doing as it can have unexpected consequences. Seriously, it's probably not what you want.
Avoid repainting while cursor is hidden to reduce flicker while scrolling
When selected, the screen will slightly delay redraws while the cursor is hidden. This improves the visual appearance of scrolling in many programs but might introduce noticeable delays for some users.
Archive sessions on closure
When enabled, an archive of the session is saved automatically when it closes. Use the accompanying directory picker to choose where the archives are written. See Session Archives for details on what is captured and how to open an archive later.
Buffer input by default
When enabled, text you type in a new session with this profile is stored rather than sent, until you turn buffering off with Shell > Toggle Buffer Input (or a Buffer Input... trigger configured to stop buffering).
Keys Profile Preferences
Profiles
Keys > General
Allow Application Keypad Mode
Some full-screen programs (like emacs) switch the keyboard into application keypad mode, which changes how the numeric keypad behaves. Disabling this option causes iTerm2 to never enter application keypad mode.
Report modifiers using CSI u
Enables a more powerful keyboard reporting algorithm that some applications may use to enable the use of modifiers on more keys and more combinations of modifiers. This is not recommended. Applications should use the Kitty keyboard protocol instead.
Apps can change how keys are reported
When enabled apps running in the terminal can change the key reporting mode.
Page up, page down, home and end scroll outside interactive apps
When enabled, these keys move the viewport unless you are running an interactive application.
Treat option as Alt for special keys like arrows
When reporting function keys (such as arrows) to apps running in the terminal, the specifications are ambiguous about whether the Mac Option key should behave like Alt or Meta. When this setting is enabled, it is treated as alt. When disabled, it is treated as Meta.
Left/Right Option Key
It is common to use a modifier to send so-called "meta keys". For most users, selecting "+Esc" here is the right choice. The "Meta" option sets the high bit of the input character, and is not compatible with modern systems.
The corresponding Apps can change this setting can be disabled to prevent apps in the terminal from modifying your setting with a control sequence.
Left/Right Control/Command, fn key
Some programs support extended modifier keys of Hyper, Meta, and Super. You can configure existing modifier keys to act as these extended keys. This setting will be in effect only when running a program that uses the Kitty keyboard protocol; otherwise, they will act like regular control, command, and fn keys.
A hotkey opens a dedicated window with this profile
When enabled, a dedicated hotkey window is attached to this profile. The Configure Hotkey Window button lets you configure the hotkey and other attributes of the window. For more information, see Hotkey Windows.
Keys > Key Mappings
This panel shows key mappings. You can double-click on a mapping to edit it. When the "Keyboard Shortcut" field has focus, you should press the keystroke that you want to modify (even if it involves modifiers like Cmd). The following actions are available:
- Ignore - The keypress will do nothing.
- Bypass Terminal - Prevents the keystroke from being sent to the terminal while allowing macOS to handle it normally. For example, if F1 triggers a macOS Shortcut, binding F1 to Bypass Terminal stops it from sending a control sequence to the terminal but still lets the system shortcut work.
Select Menu Item... - This action allows you to enter the name of an iTerm2 menu item. It must be entered exactly the same as it appears in the menu. Ellipses can be typed with option-semicolon.
Do not remap modifiers - This action lets you exempt a keystroke from modifier remapping. For example, if you remap ⌘ to ⌥ but you want ⌘-Tab to work as though ⌘ were unmapped just for that keystroke, you would use this action and set the keyboard shortcut to ⌘-Tab.
Remap modifiers in iTerm2 only - This action applies modifier remapping but prevents other programs from seeing the keystroke. For example, if you've swapped ⌘ and ^ and want physical ^-tab to switch tabs in iTerm2 instead of triggering the app switcher: bind ^-tab to this action. The system won't see the remapped ⌘-tab (so no app switcher), but iTerm2 receives it and can switch tabs.
Cycle Tabs Forward/Backward - This implements tab switching the same way Cmd-Tab (or Cmd-Shift-Tab) switches windows, with the most-recently-used stack.
Run Coprocess - This action launches a Coprocess. Learn more about coprocesses.
- Start Instant Replay - This is equivalent to the menu item View > Start Instant Replay.
- Undo - Invokes the Undo action. Could be used to undo closing a session/tab/window.
- Send tmux command - Used in tmux integration to send a command directly to the tmux server of the current session.
Alert on next mark - Toggles the Alert on next mark feature.
New Window with Profile - Creates a new window with a profile you specify here.
- New Tab with Profile - Creates a new tab with a profile you specify here.
Duplicate Tab - Creates another tab exactly like the current one.
Split horizontally/vertically with Profile - Creates a new split pane by cleaving the current session. Uses the profile you specify here.
Split/New Window/Tab with Profile - These actions allow you to create a new session with a specified profile when a key is pressed.
Change Profile - This action changes the profile of the current session.
Load Color Preset - This action changes the colors of the current session using the specified preset.
Next/Previous Tab/Window/Pane - These actions navigate among tabs, windows, and split panes.
- Move tab left/right - Changes the tab's position in the order.
- Next/Previous Window - Selects the next or previous window in window order.
- Next/Previous Pane - Selects the next or previous pane in left-to-right, top-to-bottom order.
Select Split Pane Above/Below/Left/Right - These actions navigate split panes.
Increase/Decrease Width/Height - Changes the size of the current session.
Scroll to End/Top/Up/Down - These actions move through the scrollback buffer.
Scroll one Line/Page Up/Down - These actions move through the scrollback buffer.
Swap with Split Pane Above/Below/Left/Right - Exchanges the current session with an adjacent session in a split pane in the same tab.
- Swap with Next/Previous Pane - Exchanges the current session with the next/previous pane in the same tab.
Move Session to Split Pane - After invoking this, click a different session. The current pane will be moved to share half its former space.
Send ^? / ^H Backspace - Modern systems use ^? for backspace, while some legacy systems use ^H.
- Send Escape Sequence - This action allows you to enter some text that will be sent when the associated key is pressed. First, the ESC character is sent, and then the text you entered is sent. There are no special characters and no escaping is necessary.
- Send Hex Code - This action allows you to enter a sequence of hex codes that will be sent. Each value should begin with "0x" followed by one or two hex digits (0-9, a-f, or A-F). Each code should be separated by a space. You can see a list of hex codes on http://asciitable.com/ in the "Hx" column.
- Send Text - This action allows you to enter a text string that will be sent when the associated key is pressed. The following escape characters are supported: \n (newline), \e (escape), \a (bell), \t (tab).
- Send Text with "vim" Special Characters - This action allows you to enter a text string that will be sent when the associated key is pressed. The following special sequences are supported, where the "." characters are placeholders: ... (three-digit octal number), .. (two-digit octal number; must be followed by non-digit), . (one-digit octal number; must be followed by non-digit), \x.. (two-digit hex number), \x. (one-digit hex number), \u.... (four-digit hex number), \b (backspace), \e (escape), \f (form feed), \n (newline), \r (carriage return), \t (tab), \ (backslash), \" (double quote), \\
(control key), \\ (meta key) - Send Snippet - You can choose a snippet to send.
Compose... - Open the Composer.
Find Regular Expression - Performs a search for a saved regular expression.
Find Again Up/Down - Repeats the search, finding the next result at an earlier/later position.
Paste - Like Edit > Paste, but you can set advanced paste settings to use.
- Paste From Selection - Like Edit > Paste and Edit > Paste Special > Paste Selection, but you can set advanced paste settings to use.
- Copy or send ^C - If there is a selection, copy it. Otherwise, send the literal Control-C keystroke.
- Paste or send ^V - If there is text in the pasteboard, paste it. Otherwise, send a literal Control-V keystroke.
- Copy Interpolated String - Evaluates the interpolated string you provide it and copies it to the clipboard.
- Copy Mode Commands - Takes as a parameter a sequence of commands that you would normally use interactively in Copy Mode. For example, you could give it
<space>k<space>yto select the line above the cursor. - Toggle Fullscreen - This action enters or exits full screen mode
- Toggle Pin Hotkey Window - Toggles whether the hotkey window hides when it loses focus.
Toggle Mouse Reporting - Temporarily enable or disable mouse reporting.
Move Start/End of Selection Back/Forward - Adjusts the range of selected text.
Invoke Script Function - Calls a function registered by a script. See Scripting Fundamentals for details on functions.
Sequence... - Lets you create a keybinding from a sequence of key bindings.
You can add a new keymapping by pressing "+". You can remove an existing mapping by selecting it and pressing "-". Three presets are provided: "Xterm defaults" is the normal key mappings, while "Xterm defaults with numeric keypad" disables the "application keypad" in favor of the numbers and symbols that the numeric keypad typically emits. "Terminal.app Compatibility" tries to emulate the way that Terminal.app sends keys by default.
You can also import and export your key bindings to share with others.
Delete sends ^H
If you are on a legacy system that does not accept ^? for backspace, select this and it will add a key mapping for you.
Advanced Profile Preferences
Profiles > Advanced
Triggers
Triggers are actions that are performed when text matching a regular expression is received. Each trigger has a regular expression, which defines when it runs. It has an action, which defines what it performs, and it has an optional parameter, whose meaning depends on the action. When the parameter is textual, \0 is replaced with the entire match, and \1...\9 are replaced with match groups. Each trigger has a checkbox in the "Instant" column. Instant triggers run as soon as text matching the regular expression is matched; triggers that are not instant only match after the cursor moves off the current line (such as when a newline is received).
Full details can be found at Triggers.
Smart Selection
Smart Selection defines regular expressions that are used to select text on quad-click.
Automatic Profile Switching
You can specify rules that, when satisfied, changes any session's profile to this one. See Automatic Profile Switching for all the details.
Snippets Filter
The Snippets feature lets you save a collection of strings to re-send later on. Each snippet may have one or more tags associated with it. If you would like to show only certain snippets when working in a particular profile, you can name tags in the Snippets Filter that are required for a snippet to be available in the context of a session with this profile.
Semantic History
Semantic history is used to open a file when you Cmd-Click on it. The current working directory for each line in the terminal is tracked to help find files. If Semantic History is set to "Open with default app," then files are passed to the OS to be opened with whatever is associated. Alternatively, you can choose "Open URL..." to open a specific URL (with \1 replaced with the filename and \2 replaced with the line number, if applicable). If you choose "Open with editor..." then text files will be opened with the designated editor, while other files are opened with the default app for their file type. For more flexibility, choose "Run command..." and specify a command to execute. \1 will be replaced with the file name, \2 will be replaced with the line number (if applicable), \3 with text in the line prior to the click location, \4 with text in the line subsequent to the click location, and \5 for the working directory of the line clicked on. Finally, "Always run command..." is like "Run command...," but takes effect even if the object clicked on is not an existing filename.
Keys Preferences
Keys
Key Bindings
This interface works like the keyboard shortcut system in profiles (described above) but it affects all profiles. Settings here are overridden by those in a profile's key mappings.
See the list of key binding actions at Settings > Profiles > Keys.
Add Touch Bar Item
This button is only visible if your OS version supports touch bars. By pressing this button, you can define a new custom touch bar button with any of the actions you can assign to a key (see below). You can then add the custom button to your touch bar with View > Customize Touch Bar.
Touch Bar Mitigations
This opens a panel with these options:
- Haptic feedback when pressing esc When you press esc on a touchbar, this makes the trackpad vibrate to provide feedback.
- Key click for virtual esc key When you press esc on a touchbar, this causes a click sound to be played.
- Visual esc key indicator When you press esc on a touchbar, make the cursor change shape briefly to provide feedback.
Repair
This button appears only when iTerm2 detects key bindings that were corrupted by a migration bug present in versions 3.4.x through 3.5.x. Such bindings still work but display incorrectly. Pressing Repair fixes them so they display correctly again.
Presets > Factory Defaults
Restores key bindings to the iTerm2 defaults.
Presets > Import/Export
Lets you share key bindings with others.
Interpret key bindings based on physical key, ignoring input language
When enabled key bindings refer to a particular key rather than a particular character. For example, suppose you have bound Cmd-Opt-A to perform some action while using a US keyboard and then switch to an AZERTY layout. With this setting enabled, you'd press Cmd-Opt-Q to invoke the action since the AZERTY Q is where the QWERTY A goes.
Note that only key bindings created with iTerm2 version 3.5.0beta19 or later will adapt to different keyboard layouts. Older key bindings did not store the keycode and will continue to behave as though this setting was not enabled.
Leader
By defining a "leader" key you can create shortcuts that consist of two keystrokes. Command-B is the recommended leader. After setting the leader, you can define a new keybinding by pressing Leader followed by another keystroke. For example, if your leader is Command-B, you could define a key binding as the sequence Command-B N.
In tmux integration key bindings are automatically created for you based on tmux's configured command key bindings. For example, if tmux is configured for C-b c to create a new window, then in tmux integration [leader] c will do the same.
Navigation Shortcuts
Shortcut to activate a tab
Tabs are normally navigated with cmd+number, but you can change the modifier used for that function here.
Shortcut to activate a window
Windows are normally navigated with cmd+opt+number, but you can change the modifier used for that function here.
Shortcut to choose a split pane
You can use this to configure a modifier+number shortcut to select a split pane in the current tab.
Emulate US Keyboard
If your keyboard layout requires you to hold Shift (or some other modifier) to press a number, enable this to treat the top row of keys as number keys even when Shift is not pressed. This only affects switching panes, tabs, and windows by keyboard as configure in the preceding settings.
Hotkey
Create a Dedicated Hotkey Window
Sets up a new hotkey window profile if you don't already have one. For more information, see Hotkey Windows.
Show/Hide iTerm2 all windows with a system-wide hotkey
When enabled, you can focus the Hotkey: field and press a keystroke. From then on, pressing that keystroke (even when iTerm2 is not the front application) will cause iTerm2 to come to the front. If it is the foreground app, it will be sent to the back. This requires that you enable access for assistive devices in the Universal Access panel of System Settings. For more information, see Hotkey Windows.
Open Quickly hotkey
Focus this field and press a keystroke to assign a system-wide hotkey for Open Quickly. Pressing it while another application is in front invokes Open Quickly without activating iTerm2. iTerm2 comes to the front only once you commit a selection.
Remap Modifiers
iTerm2 allows you to change the meanings of the modifier keys only within iTerm2. This is useful, for example, if you find it difficult to press "option" for "meta" and would prefer to use "command" for that purpose.
Input Locale
Force keyboard
You can enable this setting to force iTerm2 to use a specific keyboard layout rather than the current system keyboard.
Arrangement Preferences
Arrangements
This tab lets you view saved window arrangements. You can delete them with the minus button and select the default arrangement.
Pointer Preferences
Pointer
General
Cmd-Click Opens Filename/URL
If enabled, then clicking on a filename (of an existing file on the local machine) or a URL will open it.
Ctrl-click reported to apps, does not open menu
If enabled, ctrl-click will be sent to applications that support Xterm mouse reporting (if mouse reporting is enabled).
Option-Click moves cursor
If enabled, option-click will move the cursor to where the mouse pointer is. If you install shell integration, this will be well-behaved at the shell prompt by not sending up and down arrow keys.
Three-finger tap reports middle click to apps
If enabled, a three-finger tap acts like a middle click for the purposes of mouse reporting.
Focus follows mouse
If enabled, moving the mouse over an inactive window will cause it to receive keyboard focus.
Focus window after right or middle click
When enabled, right-clicking or middle-clicking on a window will give it keyboard focus.
Bindings
Mouse Button and Trackpad Gesture Actions
You may assign custom actions to mouse clicks and trackpad gestures. The left mouse button is not configurable because its behavior is rather complex, however. This is especially useful if you have a mouse with many buttons. Any combination of mouse button + number of clicks + modifiers may be assigned an action. For gestures, three finger taps and swipes may be configured in combination with modifiers. The following actions are available:
- Copy Link Address - Copies the address of the link under the pointer.
- Copy or Paste - Copies the selection if there is one; otherwise, pastes.
- Extend selection - The text selection will grow, either from its beginning or end, to the location of the pointer.
- Ignore - Perform no action
- Invoke script function - Call a Python API-defined function.
- Move pane - The current pane will turn green. Click in another window's tab bar or in another pane to split to move the now-green pane.
- New Horizontal/Vertical split with profile - The pane under the pointer will be split and the new split will use the specified profile.
- New Split/Tab/Window With Profile - A new split pane/tab/window will be opened with the specified profile.
- Next/Previous Tab/Window - Navigates through tabs and windows.
- Open Context Menu - Opens the menu normally opened by a right click.
- Open URL in background - Opens the URL under the pointer in your web browser without bringing the browser to the foreground.
- Open URL/Semantic History - Opens the URL under the pointer, bringing the web browser to the foreground. If what's under the cursor is a filename on the local machine, it will be opened with Semantic History.
- Paste from Clipboard - Pastes the contents of the pasteboard (like Edit > Paste) but you can also configure advanced paste settings.
- Paste from Selection - Pastes the most recent selection made in iTerm2, even if it's not what's in the pasteboard. Allows you to configure advanced paste settings.
- Quicklook - Defines the word under the cursor or, if it's a URL, opens it in a web browser popover.
- Select Next/Previous Pane - Navigates panes according to how recently they were used.
- Select menu item - Select an item from the app's main menu.
- Select pane Above/Below/Left/Right - Navigates panes by their layout.
- Send Escape Sequence... - This action allows you to enter some text that will be sent when the associated key is pressed. First, the ESC character is sent, and then the text you entered is sent.
- Send Hex Code - This action allows you to enter a sequence of hex codes that will be sent. Each value should begin with "0x" followed by one or two hex digits (0-9, a-f, or A-F). Each code should be separated by a space. You can see a list of hex codes on http://asciitable.com/ in the "Hx" column.
- Send Text - This action allows you to enter a text string that will be sent when the associated key is pressed. The following escape characters are supported: \n (newline), \e (escape), \a (bell), \t (tab).
- Smart Selection - Performs smart selection on the text under the pointer.
- Smart Selection ignoring Newlines - Performs smart selection on the text under the pointer, ignoring newlines (e.g., if a URL is split by a hard newline, it can still be selected as a single item).
Advanced Preferences
Advanced
Advanced Settings are self-documenting. Use the search field to find what you're looking for, as there are quite a few of them. Some work better than others. Proceed with caution.
Scripting
iTerm2 features AppleScript support which allows you to automate many aspects of its behavior. Quite a bit of customization is also possible by writing shell scripts.
AppleScript
iTerm2 has sophisticated AppleScript support allowing one to write stand-alone scripts to launch the application and open multiple sessions with profiles into either new tabs or new windows. You can also set some other parameters for a session such as foreground and background colors, and transparency.
These scripts can then be saved as stand-alone executable applications.
Autolaunching Scripts
iTerm2 also supports autolaunching of an AppleScript on startup. On startup, iTerm2 looks for an AppleScript file in "~/Library/Application Support/iTerm2/Scripts/AutoLaunch.scpt". If it is found, the "AutoLaunch.scpt" script is launched and executed.
If that folder does not exist, the legacy path of "~/Library/Application Support/iTerm/Scripts/AutoLaunch.scpt" will be used.
User-Defined Scripts
iTerm2 also supports launching of user defined scripts from the "Scripts" menu. The scripts need to be stored under the ~/Library/Application Support/iTerm/Scripts directory. You can create this directory if it does not already exist. iTerm2 checks this directory on startup. Scripts must be named with the extension .scpt or .app.
Reference
Objects
The basic objects are: window, tab, and session. The application has zero or more windows, each window has one or more tabs, and each tab has one or more sessions. Multiple sessions in a tab happen when there are split panes.
Application
The application exposes various properties and provides functions that are described in this section. For example:
tell application "iTerm2"
  create window with default profile
end tell
create hotkey window with profile "name"
Creates a hotkey window with the specified profile. The profile must be configured to have a hotkey.
Example:
create hotkey window with profile "Hotkey Window"
create window with default profile
create window with default profile command "command"
create window with profile "name"
create window with profile "name" command "command"
current window
A reference to the window that most recently had keyboard focus. tell current window ... end tellwindows
A windows property exposes an array of terminal windows. Other windows, like the Settings panel, are not included.
The following are standard AppleScript idioms for accessing elements of an array of objects:
tell first window
...
end tell

repeat with aWindow in windows
...
end repeat
Windows
These functions and properties are provided by windows. For example:
tell application "iTerm2"
  tell current window
    create tab with default profile
  end tell
end tell
There are many standard AppleScript functions (e.g., to get the window's size and position) that are not documented here.
create tab with default profile
create tab with default profile command "command"
create tab with profile "name"
create tab with profile "name" command "command"
Creates a tab with the default profile or a profile by name. If the command is specified, it is run instead of the profile's command/login shell.
Returns a reference to the new tab.
current session
The current session is the session that would receive keyboard input if the window had keyboard focus.
current tab
The current tab is the tab that is selected in the window.
hide hotkey window
If this is a hotkey window, it hides it with the standard hotkey window animation and makes the previously active application active, if appropriate.
hotkey window profile
Returns the name of the hotkey window profile associated with this window, if any.
id
The window ID. Useful for commands like screencapture.
is hotkey window
Returns a boolean value which is true if the window is a hotkey window associated with a profile.
name
The window's name, as appears in the title bar.
reveal hotkey window
If this is a hotkey window, it reveals it with the standard hotkey window animation and makes it key and the application active.
select
Gives the window keyboard focus and brings it to the front.
tabs
An array of tabs. See the methods on Tab, below.
toggle hotkey window
Either shows or hides the hotkey window, if this is a hotkey window, using the standard animation. May make the app active or inactive.
Sessions
These functions and properties are provided by sessions. For example:
tell application "iTerm2"
  tell current session of current window
    split horizontally with default profile
  end tell
end tell
background image
This is a string property that gives a path to the background image of the session.
close
Terminates the session and closes its pane.
Color properties
Various properties which are readable and settable affect the session's colors:
- background color
- bold color
- cursor color
- cursor text color
- foreground color
- selected text color
- selection color
- underline color
- ANSI black color
- ANSI red color
- ANSI green color
- ANSI yellow color
- ANSI blue color
- ANSI magenta color
- ANSI cyan color
- ANSI white color
- ANSI bright black color
- ANSI bright red color
- ANSI bright green color
- ANSI bright yellow color
- ANSI bright blue color
- ANSI bright magenta color
- ANSI bright cyan color
- ANSI bright white color
An example:
set foreground color to {65535, 0, 0, 0}
Because AppleScript is kind of a dumpster fire, the standard syntax for a color is {red, green, blue, alpha} where each value is a number between 0 and 65535.
There is also a boolean use underline color property that controls whether the underline color is applied, and a color preset property that you can set to the name of a color preset to apply it.
answerback string
The string sent when the ENQ escape sequence is received.
columns
The width of the session in character cells.
contents
Returns the visible contents of the session as a string. Each row is terminated with a newline.
id
Returns the session's unique identifier.
is at shell prompt
Indicates if the session is at a shell prompt accepting a command. Only works if Shell Integration is installed; if not it will return false.
is processing
Returns a boolean indicating if the session received output recently.
name
A string property with the session's name as seen in its title bar.
profile name
The name of the profile the session was created with. A string. Read-only.
rows
The height of the session in character cells.
set columns to number
set rows to number
Changes the size of the session.
split horizontally with default profile
split vertically with default profile
split horizontally with default profile command "command"
split vertically with default profile command "command"
Splits the session either horizontally or vertically. If the optional command is provided then it is run in place of the profile's command. A horizontal split has a horizontal divider, while a vertical split has a vertical divider.
Returns a reference to a session.
split horizontally with profile "name"
split vertically with profile "name"
split horizontally with profile "name" command "command"
split vertically with profile "name" command "command"
Like the "default profile" commands, but uses a named profile instead of the default profile.
split horizontally with same profile
split vertically with same profile
split horizontally with same profile command "command"
split vertically with same profile command "command"
Like the "default profile" commands, but uses the current session's profile.
select
Makes the session active in its tab. Does not affect which tab is selected or which window has keyboard focus.
text
A synonym for contents.
transparency
A floating-point value from 0 to 1 giving how transparent the session is.
tty
The name of the session's tty (e.g., /dev/ttys01). Returns a string.
unique id
A string uniquely identifying the session.
variable "name"
set variable named "name" to "value"
Gets and sets the value of a variable by name. Variables are described in Badges. You may only set user-defined variables, whose names always begin with "user.".
write text "text"
write text "text" newline NO
Writes text to the session, as though you had typed it. Optionally without a newline.
write contents of file "filename"
Writes the contents of a file to the session as though you had typed it.
Tabs
These functions and properties are provided by tabs. For example:
tell application "iTerm2"
  tell current tab of current window
    select
  end tell
end tell
close
Closes the tab.
current session
The session in this tab that most recently had keyboard focus.
index
The index of the tab in the window, starting from 0.
select
Selects the tab, making it the current tab for the window.
sessions
An array of sessions.
sessions
An array of sessions in this tab.
The index from 0 of the tab in its window.
Supporting both old and new versions of iTerm2
If your application needs to support both the old and new AppleScript syntax, this is the recommended technique:
on theSplit(theString, theDelimiter)
    set oldDelimiters to AppleScript's text item delimiters
    set AppleScript's text item delimiters to theDelimiter
    set theArray to every text item of theString
    set AppleScript's text item delimiters to oldDelimiters
    return theArray
end theSplit

on IsModernVersion(version)
    set myArray to my theSplit(version, ".")
    set major to item 1 of myArray
    set minor to item 2 of myArray
    set veryMinor to item 3 of myArray

    if major < 2 then
        return false
    end if
    if major > 2 then
        return true
    end if
    if minor < 9 then
        return false
    end if
    if minor > 9 then
        return true
    end if
    if veryMinor < 20140903 then
        return false
    end if
    return true
end IsModernVersion

on NewScript()
    -- Return the modern script as a string here; what follows is an example.
    return "create window with default profile"
end NewScript

on OldScript()
    -- Return the legacy script as a string here; what follows is an example.
    return "
    set myTerm to (make new terminal)
    tell myTerm
        launch session \"Default\"
    end tell"
end OldScript

tell application "iTerm"
    if my IsModernVersion(version) then
        set myScript to my NewScript()
    else
        set myScript to my OldScript()
    end if
end tell

set fullScript to "tell application \"iTerm\"
" & myScript & "
end tell"

run script fullScript
AppleScript Examples
This is an example of the AppleScript syntax available in version 3.0 and later.
Note: AppleScript support is no longer receiving improvements. Use the Python API instead.
tell application iTerm2
  -- application-level commands
  -- These commands return a window.
  set newWindow to (create window with default profile)
  set newWindow to (create window with default profile command "ls -l -R /")

  select first window
  set newWindow to (create window with profile "Default")
  set newWindow to (create window with profile "Default" command "ls -l -R /")

  -- window-level commands
  repeat with aWindow in windows
    tell aWindow
      tell current session
        set newSession to (split horizontally with default profile)
        -- Optional command argument added 12/5/2015
        set newSession to (split horizontally with default profile command "ssh example.com")
      end tell
    end tell
  end repeat
  tell current window
    -- These commands return a tab
    set newTab to (create tab with default profile)
    set newTab to (create tab with profile "Projection")
  end tell
  tell current window
    tell current session
      set columns to 40
      set rows to 40
    end tell
  end tell

  -- tab-level commands
  tell current window
    tell second tab
      select
    end tell
    tell first tab
      close
    end tell
    tell current tab
      log title
      repeat with aSession in sessions
        tell aSession
          write text "Hello"
        end tell
      end repeat
       end tell
   end tell

  -- session-level commands
  tell current session of first window
    write text "cat > /dev/null"
    write text "cat > /dev/null" newline NO
    write contents of file "/etc/passwd"
    -- Get the path to the current session's tty and write it
    write text (tty)
    -- Get the content of the session and write it back
    write text (text)
    -- Get the session's unique identifier and write it back
    write text (unique ID)

    -- These commands return a session
    set newSession to (split vertically with default profile)
    set newSession to (split vertically with profile "Default")
    set newSession to (split vertically with same profile)

    -- Optional command argument added 12/5/2015
    set newSession to (split vertically with default profile command "ssh example.com")
    set newSession to (split vertically with profile "Default" command "ssh example.com")
    set newSession to (split vertically with same profile command "ssh example.com")

    set newSession to (split horizontally with default profile)
    set newSession to (split horizontally with profile "Default")
    set newSession to (split horizontally with same profile)

    -- Optional command argument added 12/5/2015
    set newSession to (split horizontally with default profile command "ssh example.com")
    set newSession to (split horizontally with profile "Default" command "ssh example.com")
    set newSession to (split horizontally with same profile command "ssh example.com")

    set foreground color to {65535, 0, 0, 0}
    set background color to {65535, 0, 0, 0}
    set bold color to {65535, 0, 0, 0}
    set cursor color to {65535, 0, 0, 0}
    set cursor text color to {65535, 0, 0, 0}
    set selected text color to {65535, 0, 0, 0}
    set selection color to {65535, 0, 0, 0}
    set underline color to {65535, 0, 0, 0}
    set ANSI black color to {65535, 0, 0, 0}
    set ANSI red color to {65535, 0, 0, 0}
    set ANSI green color to {65535, 0, 0, 0}
    set ANSI yellow color to {65535, 0, 0, 0}
    set ANSI blue color to {65535, 0, 0, 0}
    set ANSI magenta color to {65535, 0, 0, 0}
    set ANSI cyan color to {65535, 0, 0, 0}
    set ANSI white color to {65535, 0, 0, 0}

    set ANSI bright black color to {65535, 0, 0, 0}
    set ANSI bright red color to {65535, 0, 0, 0}
    set ANSI bright green color to {65535, 0, 0, 0}
    set ANSI bright yellow color to {65535, 0, 0, 0}
    set ANSI bright blue color to {65535, 0, 0, 0}
    set ANSI bright magenta color to {65535, 0, 0, 0}
    set ANSI bright cyan color to {65535, 0, 0, 0}
    set ANSI bright white color to {65535, 0, 0, 0}

    set background image to "/usr/share/httpd/icons/small/rainbow.png"
    set name to "New Name"
    set transparency to 0.5
    -- The name of the session's profile (different from the
    -- session's name, which can be changed by editing the Session
    -- Title field in Edit Session or by an escape sequence).
    -- Added 10/6/15.
    write text (profile name)

    -- is processing means it has received output in the last two seconds.
    if (is processing) then
      set foreground color to { 65535, 65535, 65535, 65535 }
    end if

    -- This will only work if shell integration is installed.
    -- Otherwise it always returns false.
    if (is at shell prompt) then
      set background color to { 65535, 0, 65535, 65535 }
    end if

    -- New in 2.9.20160104
    set answerback string to "Hello world"

    -- New in 2.9.201601. See https://iterm2.com/badges.html for more on variables.
    variable named "session.name"
    set variable named "user.phaseOfTheMoon" to "Gibbous"
  end tell
end tell
Supporting both old and new versions of iTerm2
If your application needs to support both the old and new AppleScript syntax, this is the recommended technique:
on theSplit(theString, theDelimiter)
    set oldDelimiters to AppleScript's text item delimiters
    set AppleScript's text item delimiters to theDelimiter
    set theArray to every text item of theString
    set AppleScript's text item delimiters to oldDelimiters
    return theArray
end theSplit

on IsModernVersion(version)
    set myArray to my theSplit(version, ".")
    set major to item 1 of myArray
    set minor to item 2 of myArray
    set veryMinor to item 3 of myArray

    if major < 2 then
        return false
    end if
    if major > 2 then
        return true
    end if
    if minor < 9 then
        return false
    end if
    if minor > 9 then
        return true
    end if
    if veryMinor < 20140903 then
        return false
    end if
    return true
end IsModernVersion

on NewScript()
    -- Return the modern script as a string here; what follows is an example.
    return "create window with default profile"
end NewScript

on OldScript()
    -- Return the legacy script as a string here; what follows is an example.
    return "
    set myTerm to (make new terminal)
    tell myTerm
        launch session \"Default\"
    end tell"
end OldScript

tell application "iTerm"
    if my IsModernVersion(version) then
        set myScript to my NewScript()
    else
        set myScript to my OldScript()
    end if
end tell

set fullScript to "tell application \"iTerm\"
" & myScript & "
end tell"

run script fullScript
Legacy Note
Note: in iTerm2 3.0.0, sessions had a property called contents. That conflicted with a reserved word, and has been renamed to text. The example below reflects proper usage for version 3.0.1 and up.
Buried Sessions
A buried session is a session that continues to run but is not a part of any window. If you have a long-running job that you want out of the way, it can be convenient to bury its session. It is used by default for the session where you initiate a tmux integration client using tmux Integration.
To bury the current session, select Session > Bury Session. To restore a session, select it from the list of buried sessions in Session > Buried Sessions.
Copy Mode
Copy Mode allows you to make selections using the keyboard. To enter or exit Copy Mode, select Edit > Copy Mode. You can also enter copy mode by pressing Shift+Arrow key immediately after making a selection with the mouse. A special cursor rendered as a downward-pointing arrow is visible while in Copy Mode.
While in Copy Mode, the session's contents will not change. You can use the keyboard to move the cursor and modify the selection using these keystrokes:
Changing Modes
| Keystroke | Action |
|---|---|
| C-space | Stop selecting |
| Esc, q, C-c, C-g | Exit copy mode |
| C-v | Toggle rectangular selection |
| Space, v | Toggle selection by character |
| V | Toggle selection by line |
Basic Movement
| Keystroke | Action |
|---|---|
| h, Left arrow | Move left |
| j, Down arrow | Move down |
| k, Up arrow | Move up |
| l, Right arrow | Move right |
Content-Based Movement
| Keystroke | Action |
|---|---|
| Meta-Left arrow, M-b, Shift-tab, b | Move back one word, treating symbols as word breaks. |
| M-Right arrow, M-f, Tab, w | Move forward one word, treating symbols as word breaks. |
| B | Move back one word, treating symbols as part of a word. |
| W | Move forward one word, treating symbols as part of a word. |
| [ | Move to previous mark |
| ] | Move to next mark |
Screen Movement
| Keystroke | Action |
|---|---|
| C-b, Page Up | Move up one screen |
| C-f, Page Down | Move down one screen |
| H | Move to top of visible area |
| M | Move to middle of visible area |
| L | Move to bottom of visible area |
Line Movement
| Keystroke | Action |
|---|---|
| ^, M-m | Move to start of indentation |
| 0 | Move to start of line |
| $ | Move to end of line |
| Return | Move to start of next line |
Document Movement
| Keystroke | Action |
|---|---|
| g | Move to start |
| G | Move to end |
Other Commands
| Keystroke | Action |
|---|---|
| o | Swap cursor and other selection endpoint |
| C-k, y | Copy selection |
Menu Items
iTerm2 Menu
iTerm2 > Show Tip of the Day
When you start using iTerm2 it will offer to show you a daily tip describing a feature. You can show a tip immediately by selecting this item.
iTerm2 > Companion Device Settings
Opens the pairing window for the companion app (iTerm2 Buddy). See Companion for details.
iTerm2 > Suppressed Alerts...
Lists warnings that are being answered automatically because you chose to remember a response. From here you can un-suppress them so they will prompt you again.
iTerm2 > Check for Updates
Checks to see if a new version of iTerm2 is available. If Settings > General > Prompt for test-release updates is turned on then this includes beta versions; otherwise only stable versions are downloaded.
iTerm2 > Toggle Debug Logging
This saves helpful debugging information in memory. When it is toggled off it is saved to /tmp/debuglog.txt.
iTerm2 > Save Retrospective Debug Logs
Writes recently captured low-frequency diagnostic information to a file, even if debug logging was never turned on. This is useful for reporting issues you did not anticipate.
iTerm2 > Copy Performance Stats
This copies information about drawing speed to the pasteboard. This is useful when reporting issues relating to poor performance.
iTerm2 > Capture GPU Frame
This saves information about how the current session is drawn. This is useful when reporting issues relating to drawing errors in the GPU renderer.
iTerm2 > Secure Keyboard Entry
When this is enabled, the operating system will prevent other programs running on your computer from being able to see what you are typing. If you're concerned that untrusted programs might try to steal your passwords, you can turn this on, but it may disable global hotkeys in other programs.
iTerm2 > Make iTerm2 Default Term
Makes iTerm2 the default terminal for opening .command, .tool, .zsh, .csh, and .pl files.
iTerm2 > Make Terminal Default Term
You must hold down Option for this entry to be visible. Makes Terminal.app the default terminal for opening .command, .tool, .zsh, .csh, and .pl files.
iTerm2 > Install Shell Integration
This opens a window that guides you through the installation of the Shell Integration features.
iTerm2 > Install Claude Code Integration
This opens a window that guides you through setting up the Claude Code Integration. Once the integration is installed, this item is replaced by Reinstall and Uninstall entries.
iTerm2 > Reinstall Claude Code Integration
Reopens the Claude Code Integration setup window, for example if Claude Code has rewritten its settings and dropped the status hook. This item is visible only when the integration is installed.
iTerm2 > Uninstall Claude Code Integration
Removes the Claude Code Integration: the status hook it added to Claude Code's settings, the Claude Code Workgroup, and the Enter/Exit Workgroup triggers. This item is visible only when the integration is installed.
Shell Menu
Shell > New Window/Tab
This creates a new window or tab with the default profile. If the current session is a tmux integration session, then you will be prompted for whether to create a local or tmux session.
Shell > New Window/Tab with Current Profile
This creates a new tab using the same profile as the current session rather than the default profile.
Shell > Duplicate Tab/Window
Creates another tab with the same arrangement of split panes, profile, etc.
Shell > Split Vertically/Horizontally
These menu items allow you to divide a tab into two or more split panes. The panes can be adjusted by dragging the line that divides them. They will use the default profile.
Shell > Split Vertically/Horizontally with Current Profile
These menu items allow you to divide a tab into two or more split panes. The panes can be adjusted by dragging the line that divides them. They will use the profile of the current session.
Shell > Save Contents
Save the entire contents of the current session to a file.
Shell > Save Selected Text
Saves the selected text to a file.
Shell > Close
Terminates the current session.
Shell > Close Terminal Window
Terminates all sessions in the current window.
Shell > Close All Panes in Tab
Terminates all sessions in the current tab.
Shell > Undo Close
Undoes closing a session, tab, or window if the time limit has not expired yet. You can set the limit under Settings > Profiles > Session > Undo can revive a session that has been closed for up to X seconds.
Shell > Archives > ...
Lets you save and restore session archives. See Session Archives for details.
- Save Archive of Current Session...: Writes an archive of the current session to a file.
- Restore Archive...: Opens an archive file, recreating the saved session.
- [Recent archives]: The most recently saved archives are listed for quick restoration.
Shell > Toggle Buffer Input
Starts or stops buffering typed input. While buffering, keystrokes are held rather than sent to the session; toggling it off sends the buffered input.
Shell > Broadcast Input > ...
These options allow you to send keyboard input to more than one session. Be careful.
- Send input to current session only: The default setting.
- Broadcast to all panes in all tabs: Anything you type on the keyboard goes to all sessions in this window.
- Broadcast to all panes in current tab: Anything you type on the keyboard goes to all sessions in this tab.
- Toggle broadcast input to current session: Toggles whether this session receives broadcasted keystrokes within this window.
- Show Background Pattern Indicator: If selected, sessions receiving broadcast input get an obnoxious red-stripe background.
Shell > tmux > ...
These commands let you interact with the tmux integration
- Detach: Detaches from the tmux session associated with the current pane. It remains running in the tmux server.
- New tmux Window/Tab: Creates a new tmux window, which appears in either a native window or tab, as requested. 8 Dashboard: The tmux dashboard is a view that lets you see all your tmux sessions and windows at a glance, adjust which are visible, rename them, and change the current tmux session.
Shell > ssh > Disconnect
Closes an SSH integration SSH connection.
Shell > ssh > Download files
Available when SSH Integration is in use. Opens a file picker showing files on currently connected remote hosts. Selecting one or more files downloads them.
Shell > ssh > Remote host can control iTerm2
A per-connection permission that lets the it2 command-line tool running on the remote host drive your local iTerm2. A checkmark is shown while the permission is granted.
Shell > Workgroups > ...
A Workgroup builds a set of related sessions from the current one. This submenu lists your configured Workgroups along with a command to leave the current one:
- [Workgroup name]: Enters that Workgroup, spawning its Peers, splits, and tabs from the current session.
- Exit Workgroup: Leaves the current Workgroup, closing the sessions it created and leaving the main session running.
Shell > Print
Edit Menu
Edit > Undo Close Session/Tab/Window
After you close a session, tab, or window then you have five seconds to undo it. The amount of time is configurable in Settings > Profiles > Session.
Edit > Copy (With Styles)
Hold down Option to turn Copy into Copy With Styles, which includes fonts and color information in the copied text.
Edit > Copy with Control Sequences
Copies the selected text, including control sequences that will reproduce the appearance (bold, colors, etc.) of the copied text when pasted into a terminal. Note that these will not be exactly the control sequences that were originally received, but instead a reconstruction that has the same effect.
Edit > Copy Mode
Enters Copy Mode which lets you make selections using the keyboard. See Copy Mode for details.
Edit > Paste Special > Advanced Paste
This opens the Advanced Paste window which lets you select a string from the pasteboard in recent history, select different representations of the current pasteboard, and modify the string before pasting it. You can modify it by applying a regex substitution, using various built-in modifiers (such as base-64 encoding), or edit it by hand.
Edit > Paste Special > Paste Selection
Pastes the currently selected text (which may differ from the text in the pasteboard).
Edit > Paste Special > Paste File Base64-Encoded
If there is a file on the pasteboard then this is enabled. When invoked, it base64-encodes the file and pastes the encoded value.
Edit > Paste Special > Paste Slowly
"Paste Slowly" pastes the current string in the clipboard, but it doesn't send the whole string at once. It is sent in batches of 16 bytes with a 125ms delay between batches.
Edit > Paste Special > Paste Faster/Slower
Adjusts the speed of pasting to be faster or slower.
Edit > Paste Special > Paste Slowly Faster/Slower
Adjusts the speed of slow pasting to be faster or slower. You must hold down option for this menu item to be visible.
Edit > Paste Special > Warn Before Multi-Line Paste
When enabled, you'll be warned before pasting more than one line.
Edit > Paste Special > Limit Multi-Line Paste To Shell Prompt
If Warn Before Multi-Line Paste is on, then this restricts it to warn only when you're at the shell prompt. It only works if shell integration is installed, since otherwise iTerm2 cannot tell when you're at the shell prompt.
Edit > Paste Special > Prompt to Convert Tabs to Spaces when Pasting
If Prompt to Convert Tabs to Spaces when Pasting is enabled, you'll be asked whether to convert tabs to spaces when pasting text containing tab characters.
Edit > Paste Special > Warn Before Pasting One Line Ending in a Newline at Shell Prompt
This requires shell integration to be installed to work. If you try to paste one line that ends in a newline while at the shell prompt and this is enabled, you'll get a confirmation dialog before the text is pasted.
Edit > Replace Selection > Render Selection Natively
Replaces the selection with a native rendering. For example, Markdown is replaced with formatted text with different font sizes, weights, etc.
Edit > Replace Selection > Replace with Pretty-Printed JSON
Replaces the selection with nicely formatted JSON. You can click in the margin to collapse sections.
Edit > Replace Selection > Replace with Base 64-Encoded/Decoded Value
Replaces the selection by encoding or decoding its value. Note the selection must be an entire line, not a portion of a line.
Edit > Engage Artificial Intelligence
Passes the value at the cursor to AI as a prompt. If there is no value, you'll be asked to provide a prompt. If you have shell integration installed and keyboard focus is on the terminal, then iTerm2 will use what you've typed so far at the command prompt as the input to the AI.
Edit > Explain Output with AI
This is available when there is a selection or a selected command. That text will be sent to AI to explain. The terminal contents will be modified, adding annotations detailing what parts of the text mean. The chat window will open so you can drill down more.
Edit > Snippets
Gives access to Snippets, which are saved bits of text that can be pasted quickly. You can change snippets in Prefs>Shortcuts>Snippets.
Edit > Actions
Gives access to Actions, which are user-defined actions similar to those that can be bound to a keystroke. You can change actions in Prefs>Shortcuts>Actions.
Edit > Open Selection
Opens the selected text using semantic history or as a URL, if it is URL-like.
Edit > Jump to Selection
Scrolls the selection to be visible.
Edit > Selection Respects Soft Boundaries
When enabled, vertical lines of pipe characters | will be interpreted as pane dividers (as in vim or emacs) and selection will wrap at them.
Edit > Select Output of Last Command
Requires shell integration to be installed. Selects the output of the last command.
Edit > Select Current Command
Requires shell integration to be installed. Selects the text of the current command entered at the command prompt.
Edit > Find > Find
Opens or focuses the find panel. Select the down arrow to the left of the search field to open the options menu, which lets you select case insensitivity and regular expression options. The default case sensitivity option of "Smart Case Sensitivity" performs a case-sensitive search if the search query contains any upper case letters. Otherwise, a case-insensitive search is performed.
Edit > Find > Find Next/Previous
Next and previous are, by default, reversed from the macOS standard because in a terminal you generally want to search backwards. You can use Settings > Advanced > Swap Find Next and Find Previous to get the standard behavior.
Edit > Find > Find Globally
Opens a window that lets you search all tabs at once.
Edit > Find > Select Matches
Converts Find matches into selections.
Edit > Find > Find URLs
Searches the current session for URLish looking strings.
Edit > Find > Find All Smart Selection Matches
Searches for all smart selection regular expressions at once.
Edit > Find > Pick Result to Open
Shows a shortcut next to each find match. Typing the shortcut opens it using smart selection or, if it is URL-like, using the default URL handler.
Edit > Find > Filter
Opens a panel where you can enter text to filter by. Non-matching lines are temporarily hidden until the filter panel is closed.
Edit > Marks and Annotations > Set Mark
Records the current scroll position. Use Edit > Jump to Mark to restore the scroll position.
Edit > Marks and Annotations > Jump to Mark
Makes the last mark (either created by Set Mark or by shell integration) visible by scrolling to it.
Edit > Marks and Annotations > Next/Previous Mark
Reveals the next/previous mark by scrolling and highlighting it in blue or red (red if it was tagged as a failing command).
Edit > Marks and Annotations > Add Annotation at Cursor
Adds an annotation to the word beginning at the cursor. An annotation is a scratchpad for you to write notes about a chunk of text in your history.
Edit > Marks and Annotations > Annotate Selection
Adds an annotation to the current selection. This item has no keyboard shortcut by default, but you can assign one under Settings > Keys.
Edit > Marks and Annotations > Next/Previous Annotations
Reveals the next/previous annotation.
Edit > Marks and Annotations > Alerts > Alert on Next Mark
When a mark is set (typically by Shell Integration when the currently running shell command terminates) then show an alert.
Edit > Marks and Annotations > Alerts > Alert on Marks in Offscreen Sessions
When disabled, Alert on Next Mark alerts even if the session is not currently visible. When enabled, only visible sessions (those that are in a non-hidden window in a selected tab) will alert.
Edit > Fold Selected Lines
Folds the selected lines, collapsing a block of output into a single foldable line. Click the fold to expand it again.
Edit > Fold All
Folds everything in the session, aside from folds at the very top of history.
Edit > Clear Buffer
Clears the entire terminal history and the mutable area.
Edit > Clear Instant Replay
Erases instant replay history for the current session.
Edit > Clear Scrollback Buffer
Clears scrollback history, preserving the mutable area.
Edit > Clear to Start Of Selection
Erases text between the start of the selection and the end.
Edit > Clear to Last Mark
Erases text between the last mark and the end.
View Menu
View > Show Tabs in Fullscreen
If enabled, tabs are shown in fullscreen windows.
View > Toggle Full Screen
Enters or exists full screen mode. iTerm2 supports both the standard macoS full screen mode, where the window occupies its own Space, and its traditional full screen mode that shares a Space with other windows. You can control which is used in Settings > General > Native full screen windows.
View > Toolbelt > Set Default Width
Saves the current window's toolbelt width as the default width for new windows' toolbelts.
View > Toolbelt > Show Toolbelt
This toggles the visibility of the Toolbelt on the right side of all windows.
View > Toolbelt > Actions
This toggles the visibility of the Actions tool, which shows actions you have configured under Settings > Shortcuts > Actions.
View > Toolbelt > Captured Output
This toggles the visibility of the Captured Output tool. It shows captured output located with the Capture Output trigger. See Captured Output for more information.
View > Toolbelt > Codecierge
This toggle the visibility of an AI assistant that helps you complete tasks in the terminal.
View > Toolbelt > Command History
This toggles the visibility of the Command History tool. It shows recently used commands. You must install Shell Integration for this to know your command history.
View > Toolbelt > Jobs
This toggles the visibility of the Jobs tool, which shows the running jobs in the current session, and allows you to send them signals.
View > Toolbelt > Named Marks
This toggles the visibility of the Named Marks tool, which helps you navigate to saved locations in the current session's history. In browser sessions, named marks take you to saved locations on a web page.
View > Toolbelt > Notes
This toggles the visibility of the Notes tool, which provides a freeform scratchpad in the toolbelt. Notes persist across restarts of the app and are saved in ~/Library/Application Support/iTerm2/notes.rtfd.
View > Toolbelt > Paste History
This toggles the visibility of the Paste History tool, which shows recently pasted strings in the toolbelt.
View > Toolbelt > Profiles
This toggles the visibility of the Profiles tool, which lets you select profiles to open new windows, tabs, and split panes.
View > Toolbelt > Recent Directories
This toggles the visibility of the Recent Directories tool. It shows recently used directories sorted by a combination of recency and frequency of use. You must install Shell Integration for this to know your directory history. You can right click a directory to open a context menu that allows you to "start" a directory. This keeps it pinned at the bottom of the list so it's easy to find.
View > Toolbelt > Session Status
This toggles the visibility of the Session Status tool, which lists your sessions along with the status each one reports. A session can report a status such as "working," "waiting," or "idle" from a trigger, from the OSC 21337 control sequence, or from an integration like Claude Code. The tool sorts sessions by priority so the ones that need attention rise to the top. Click the gear icon to reorder the priorities, and click a row to jump to that session.
View > Toolbelt > Snippets
This toggles the visibility of the Snippets tool, which helps you send frequently used text strings.
View > Use Transparency
This toggles transparency. It only has an effect if you have configured your session to be transparent under Settings > Profiles > Window > Transparency. When Full Screen mode is entered, transparency is turned off by default, but you can select this menu item to re-enable it.
View > Disable Transparency for Active Window
When enabled, the active window will never be transparent. Inactive windows will respect the transparency setting from Settings > Profiles > Window > Transparency.
View > Zoom In on Selection
When a selection is present this is enabled. Zooming on a selection removes all other text from the session and lets you focus on just the zoomed-in-on text. Pressing escape will invoke Zoom Out when you are in the Zoom In state.
View > Zoom Out
Exits the Zoom In on Selection mode.
View > Find Cursor
Reveals the current cursor position.
View > Show Cursor Guide
Toggles the visibility of the cursor guide which is a horizontal rule showing the location of the cursor.
View > Show Timestamps
Indicate the time of last modification of each line on the screen.
View > Show Annotations
Toggles the visibility of annotations.
View > Show Clippings
Toggles a panel in the session's right margin that lists clippings, bits of text collected for the session and shared with its Workgroup peers, which can be sent to the terminal.
View > Show Inline Chat
Toggles an AI chat panel hosted in the session's right margin, letting you converse with AI without opening a separate chat window.
View > Show Session Note
Shows, creating it if necessary, the session's floating note (opt-cmd-G). This is a freeform scratchpad attached to the session, distinct from the Notes toolbelt tool.
View > Show Composer
Toggles the visibility of the Composer, a text area that you can edit using native macOS keystrokes. This is convenient for preparing complex inputs.
View > Auto Command Completion
Automatically shows a window with command completion suggestions as you type. Only usable when you have command history built up with Shell Integration.
View > Auto Composer
Replaces the shell prompt with a macOS native text editing control. It offers filename and command completion, including over ssh when using SSH Integration. It requires Shell Integration to be installed in order to work.
View > Open Quickly
If you have lots of sessions you can quickly find the one you're looking for with Open Quickly. Select the View > Open Quickly menu item (cmd-shift-O) and then enter a search query. You can search by tab title, command name, host name, user name, profile name, directory name, badge label, and more. Queries are scored according to relevance and sorted by score. Open Quickly also lets you create new tabs, change the current session's profile, and open arrangements. If you start your query with a / then that gives you a shortcut to various commands. /a followed by an arrangement name restores the arrangement. /f restricts the query to existing sessions, excluding options to open new tabs, etc. /p restricts the query to profile names to switch the current session to. /t restricts the results to "open new tab" for matching profile names.
View > Maximize Active Pane
When there are split panes present, this toggles whether a given pane expands to fill the tab. When a maximized pane is present, the tab will be inscribed with a dotted outline.
View > Size Changes Update Profile
If enabled, modifying the text size using View > Make Text Bigger or View > Make Text Smaller will cause the session's profile to be updated with the new font size.
View > Start Instant Replay
Stepping through time allows you to see what was on the screen at a previous time. This is different than going back through the scrollback buffer, as interactive programs sometimes overwrite the screen contents without having them scroll back. Once in this mode, you can use the left and right arrow keys to step back and forward, respectively. The "esc" key exits this mode, as does clicking the close button in the bar that appears on the bottom. You can adjust the amount of memory dedicated to this feature in Settings > Instant Replay uses xx MB per session. The more memory you assign, the further back in time you can step.
View > Tab Color
Allows you to select a tint color for the tab, to make it easier to distinguish. You can also change the tab color in Settings > Profiles > Colors.
Session Menu
Session > Edit Session
This opens a window that lets you change the settings of the current session without affecting any other sessions. Changes made in this panel will not be overridden by subsequent changes to the profile. Settings not changed in this panel will be affected by changes to the profile.
Session > Run/Stop Coprocess
Allows you to start and stop a coprocess linked to the current session. Learn more about coprocesses.
Session > Restart Session
After a session ends (e.g., because the shell exits) this menu item becomes enabled. It will re-run your profile's command in the same viewport as the terminated session.
Session > Duplicate Session
Creates a new session as similar as possible to the current session. The current directory is preserved and if you are using ssh integration it will connect to the same host.
Session > Open Autocomplete...
Shows the autocomplete window, which offers to finish typing a word that you've begun. Learn more about autocomplete on highlights page.
Session > Open Command History...
If you use Shell Integration then Open Command History presents a list of recently used commands to select from.
Session > Open Recent Directories...
If you use Shell Integration then Open Recent Directories presents a list of recently used directories to select from.
Session > Open Paste History...
"Open Paste History" opens a window showing up to the last 20 values that were copied or pasted in iTerm2. You can search its contents by typing a (non-necessarily-consecutive) subsequence of characters that appear in the value. You can use arrow keys and enter to make a selection, or you can click on an item to choose it, and it will be pasted. If you enable the Save copy/pate history to disk preference then these values will persist across sessions of iTerm2.
Session > Open AI Chat
Creates a new AI chat and offers to link the current session to it.
Session > Triggers
The submenu contains the triggers defined for this session. You can enable or disable them by selecting a menu item. You can also add or edit triggers from here as well as control whether they are enabled for interactive applications. For more information see Triggers.
Session > Reset
Resets the internal state of the emulator and clears the screen. Use this if you get wedged in a bad state, like the wrong character set or mouse reporting mode is stuck.
Session > Log > Log to File
Logging saves all input received in a session to a file on disk.
Session > Log > Import/Export Recording
Lets you save or view an instant replay recording.
Session > Make Screenshot...
Creates a screenshot of the current session, including any highlights and redactions.
Session > Bury Session/Buried Sessions
Buries or unburies a session. See Buried Sessions for details.
Scripts Menu
If you have scripts located in $HOME/Library/Application Support/iTerm2/Scripts they'll be added to this menu.
For backward compatibility, $HOME/Library/Application Support/iTerm/Scripts will be used if $HOME/Library/Application Support/iTerm2/Scripts does not exist.
Scripts > Manage > New Python Script
Opens a UI to help you create a new Python API script. See the Python API for more information.
Scripts > Manage > Open Python REPL
Opens a window with a Python REPL to facilitate working with the Python API.
Scripts > Manage > Manage Dependencies
Opens a window that lets you adjust dependencies of Python API scripts. This is meant for people authoring a script who need to bring in a new PyPI dependency.
Scripts > Manage > Install Python Runtime
Downloads and installs the Python API Runtime used by Python API scripts. If a runtime is already installed, this checks for and installs any available update. Hold the Option key to change this item to Install Already-Downloaded Python Runtime, which installs a previously downloaded runtime without fetching it again.
Scripts > Manage > Reveal Scripts in Finder
Opens a Finder window in the Scripts folder.
Scripts > Manage > Import
Opens a file picker so you can pick a script file to import. It should have the extension .its.
Scripts > Manage > Export
Opens a file picker so you can pick a script file to export. This is used for sharing scripts with others. The export file will have the extension .its.
Scripts > Manage > Console
Opens the Script Console which shows which scripts are running, lets you view their logs, and has other developer tools for authors of Python API scripts. If you are using browser profiles then Javascript logs appear here as well.
Profiles Menu
This menu contains a list of profiles. Selecting one opens it in a new tab. Hold option while selecting a profile to open it in a new window, instead.
Profiles > Open Profiles...
This opens the "Profiles Window" which allows you to create new windows, tabs, or panes from one or more profiles. You can perform a search by entering text in the search field. Profile names and tags are searched, and the listed profiles are filtered as you type. You can use the up and down arrow keys to make a selection. Pressing enter will open a new tab, while shift-enter will open a new window. You can make multiple selections by holding down shift or cmd and clicking on profiles. The "New Tabs in New Window" button is enabled only when more than one profile is selected: it will open a new window and create a new tab for each profile selected.
Profiles > Open All
Opens all profiles in tabs (or in windows, if Option is pressed).
Web Menu
The Web menu is only visible when the current session is a web browser profile.
Web > Open Location
Puts the cursor in the URL bar.
Back/Forward
Standard web back/forward navigation.
Web > Reload Page
Reloads the current p age.
Web > History
Opens the history page, which shows the sites you have visited in chronological order.
Window Menu
Window > Arrangements > Save Window Arrangement
Saves all of the window's positions, tabs, and split panes. You can opt to save them with contents to a file or to save them to the collection of window arrangements (without content) that can be restored later from Window > Arrangements > Restore Window Arrangement (as Tabs) > (arrangement name).
Window > Arrangements > Load Arrangement From File...
Loads a saved arrangement file, which includes window contents.
Window > Change Profile in Arrangement
Use this to edit an existing arrangement. First, restore the arrangement. Then activate one of the sessions from the restored arrangement. Select Change Profile in Arrangement and you'll be asked to choose a profile. The arrangement will then be updated to use the selected profile for the corresponding session.
Window > Edit Window Title
Opens a dialog that lets you specify a window title as an interpolated string.
Window > Tab > Edit Tab Title
Opens a dialog that lets you specify a tab title as an interpolated string.
Window > Split Pane > Lock Split Pane Width
Toggles whether the active session's width is locked. A locked split pane does not change its width as the window is resized horizontally.
Window > Password Manager
Opens the password manager.
Window > AI Chat
Opens the AI Chat window.
Window > Lock Size
Prevents the window from being resized.
Window > Lock Layout
Freezes the window's layout. While enabled, you cannot split panes, add, close, or reorder tabs, close or drag panes, or move panes and tabs to other windows. Resizing panes, opening new windows, and closing the window itself still work.
Window > Notify on Status Change
Shows an alert when the session's reported status changes. See Session Status for details.
Window > Cockpit
Opens the Cockpit window, which lets you browse the status each session reports across all your windows. See Session Status for details.
Hotkeys
A hotkey is a keypress that iTerm2 responds to even if another application is active. iTerm2 recognizes three kinds of hotkeys: Toggle All Windows, Session Hotkeys, and Profile Hotkeys.
Toggle All Windows
This hotkey shows or hides all iTerm2 windows. It does not change their positions. It is meant for quickly switching between iTerm2 and other applications. Configure this in Settings > Keys > Show/hide all windows with a system-wide hotkey. Turn on the checkbox and then click in the text field beneath it and type the hotkey you'd like to use.
Session Hotkeys
You can assign a hotkey to a particular session. Select Session > Edit Session to modify properties of the current session. The preference window will open, and at the bottom of the General tab is a field where you can set a hotkey that opens iTerm2 to reveal that session.
Dedicated Hotkey Windows
A dedicated hotkey window is a window that is associated with a profile and has a hotkey attached to it. By pressing the hotkey, the window opens or closes. This is similar to the old Visor app. In its simplest form, it's a system-wide terminal window that you can open with a hotkey. iTerm2 allows you to assign multiple hotkeys to a single profile or even a single hotkey to multiple profiles. You can also assign the double-tap of a modifier.
To create your first dedicated hotkey window, go to Settings > Keys and click Create a Dedicated Hotkey Window. This will create a new profile called Hotkey Window. You'll be prompted to configure the window. The following settings are available:
- Pin hotkey window: If selected, the hotkey window remains open when another window gets keyboard focus. When off, the window will automatically hide when you select another window (whether in iTerm2 or another app)
- Automatically reopen on app activation: If selected, this dedicated hotkey window will reveal itself when iTerm2 is activated (such as by clicking the dock icon or another iTerm2 window).
- Animate showing and hiding: Controls whether hotkey windows animate in and out or quickly jump-cut in and out.
- Floating window: When selected, the dedicated hotkey window can appear over other apps' full screen windows (provided the profile's Window > Space setting is All Spaces). Floating windows overlap the dock.
- On Dock icon click: This setting configures what happens when the dock icon is clicked.
If you want to assign multiple hotkeys to a single dedicated hotkey window, add them by clicking Additional Hotkeys.
You can configure an existing hotkey window by clicking Configure Hotkey Window in Prefs > Profiles > Keys.
tmux Integration
iTerm2 is integrated with tmux, allowing you to enjoy a native user interface with all the benefits of tmux's persistence.
Introduction
Normally, when you use tmux, multiple virtual windows are displayed in a single "physical" window. You can manipulate the environment by issuing commands to tmux. This poses a few problems:
- Some keystroke must be dedicated to tmux to enter its command mode (^B, by default, which means moving the cursor to the left in emacs or an interactive shell becomes more difficult).
- You have to ssh to the remote host more than once to get more than one view of your tmux session's window.
- You have to learn tmux commands.
- To adjust split panes, you have to enable mouse reporting, even if you don't want it otherwise.
- Some built-in features of your terminal emulator don't work as well as they would if you weren't using tmux: for instance, you can't access tmux's scrollback history as easily or quickly as you can in a normal terminal window. Also, tmux's find feature isn't as good as iTerm2's.
For many users, a terminal multiplexer would be a great way to work, but they don't want to accept the drawbacks.
iTerm2's tmux integration solves these problems.
When you run "tmux -CC", a new tmux session is created. An iTerm2 window opens and it acts like a normal iTerm2 window. The difference is that when iTerm2 quits or the ssh session is lost, tmux keeps running. You can return to the host you were ssh'ed into and run "tmux -CC attach" and the iTerm2 windows will reopen in the same state they were in before. A few use cases come to mind:
For users who do most of their work in ssh:
- Restore the environment you had at work when you get home.
- No more anxiety about letting System Update reboot!
For everyone:
- Collaborate with another user by having two people attach to the same tmux session.
Usage
You should be able to use tmux as always. Just add the -CC argument to its invocation. In practice, this means running one of these commands:
- tmux -CC
- tmux -CC attach
When you run tmux -CC, what you'll see on that terminal is a menu:
** tmux mode started **

Command Menu
----------------------------
esc    Detach cleanly.
  X    Force-quit tmux mode.
  L    Toggle logging.
  C    Run tmux command.
- If you press esc, the tmux windows will close and the tmux client will exit.
- If you press esc and nothing happens, then the tmux client may have crashed or something else has gone wrong. Press "X" to force iTerm2 to exit tmux mode. You may need to run "stty sane" to restore your terminal's state if the tmux client did crash.
- If you want to report a bug, press L and reproduce the issue. The tmux protocol commands will be written to the screen.
- If you want to run a tmux command that isn't available through the menus, you can press C. A dialog box opens and you can enter a command. For example, "new-window".
In general, you don't need to run commands to perform the most common actions. The following iTerm2 actions affect tmux:
- Close a session, tab, or window: Kills the tmux session or window.
- Split a pane: Splits the tmux window using the split-window command.
- Resize a split pane: Resizes tmux split panes using the resize-pane command.
- Resize a window: Tells tmux that the client size has changed, causing all windows to resize. Windows are never larger than the smallest attached client. A gray area on the right or bottom of a window indicates that a physical window is larger than the maximum allowed tmux window size. One consequence of this rule is that all tmux windows/tabs will contain the same number of rows and columns.
- Create a window or tab using the Shell->tmux menu: Creates a new tmux window.
- Detach using Shell->tmux->Detach: Detaches from the tmux session. All tmux windows are closed. You can get them back with tmux -CC attach.
Limitations
There are a few limitations of tmux integration which are related to the design of tmux.
- A tab with a tmux window may not contain non-tmux split panes.
- A tab with split panes may have "empty" areas. This is because tmux wants every tmux window to be the same size, but our split pane dividers are not exactly one cell by one cell in size.
Configuration
Check Settings > General > tmux for configuration settings. You can also adjust whether to open the tmux Dashboard when connecting to a session with a large number of windows. You can open the tmux Dashboard by selecting the menu item Shell > tmux > Dashboard.
See also the tmux section of General Settings.
Improvements in 3.7
iTerm2 3.7 brings several enhancements to tmux integration:
- An advanced setting, Open tmux windows and tabs in the background?, reveals a newly attached or created tmux window or tab without moving keyboard focus to it. Focus stays on the session you were already using.
- When a tmux window is created outside iTerm2 (for example, by running
tmux new-windowin another client), an advanced setting now lets you choose where it opens: in a new window, in the window that currently has keyboard focus, or in the topmost window that already shows a tab from that tmux session. - OSC 52 clipboard query responses now work with tmux 3.6 and later in tmux integration.
- Per-pane key reporting (modifyOtherKeys) state is now restored when you reattach, using formats available in tmux 3.5 and later. Reattaching while an app such as nvim is running keeps the correct key reporting mode. Bracketed-paste state is restored the same way where your tmux build reports it.
Best Practices
For practical tips on how to configure iTerm2 for use with tmux integration in the real world, please see tmux Integration Best Practices.
Touch Bar
As with many applications, you may customize the controls on the touch bar with View > Customize Touch Bar. The following controls are available:
Man Page
Opens the manpage for the command behind the cursor.
Color Preset
When selected, this opens a scrollable list of color presets. Choosing one changes the current terminal's colors to use the preset.
Function Keys
There are two function keys controls. The first, labeled Function Keys Popover, opens a scrollable list of function keys when pressed. It is compact but requires two taps to press a function key. The second, labeled Function Keys, shows a scrollable list of function keys at all times. It takes more space but is quicker to use.
If you install Shell Integration and Utilities, then you'll get a command it2setkeylabel that lets you configure what each function key's label says. You can configure each application you use (such as vim or emacs) to set the labels appropriately.
Add Mark
The Add Mark touch bar control saves the current location in history. You can navigate among marks with Cmd-Shift-Up and Cmd-Shift-Down. There are also touch bar controls to navigate marks.
Next/Previous Mark
Navigates to the next or previous mark. If you have Shell Integration installed, each command prompt inserts a mark, so the previous mark is usually the previous shell prompt.
Autocomplete Suggestions
If you have Shell Integration installed, iTerm2 can remember you command history. That history is used to make suggestions for commands, which appear in this touch bar control.
Status
The status touch bar control shows a user-configurable message. If you install Shell Integration and Utilities, then you'll get a command it2setkeylabel that lets you configure what the status control says. For example, it could display the git branch of the current directory. Tapping it scrolls to the location where the status was last changed.
For example, suppose you want to show your current git branch in the touch bar.
- Select the menu item View > Customize Touch Bar
- Drag "Your Message Here" button into the touch bar
- Modify PS1 to include
\[$(it2setkeylabel set status "$message")\]. For example:
PS1='\s-\v\$\[$(~/.iterm2/it2setkeylabel set status \
"$(test -d .git && (git rev-parse --abbrev-ref HEAD) || (echo -n "Not a repo"))")\] '
Custom Buttons
You can define custom touch bar buttons in Prefs > Keys > Add Touch Bar Item. You can then add the item to your touch bar from View > Customize Touch Bar.
Shell Integration
iTerm2 may be integrated with the unix shell so that it can keep track of your command history, current working directory, host name, and more--even over ssh. This enables several useful features.
Shell integration is compatible with bash, fish (2.3 and later), tcsh, xonsh (iTerm2 3.6.10 and later), and zsh.
How To Enable Shell Integration
This section describes the four ways to enable shell integration:
- Load it automatically.
- Use the Install Shell Integration menu item.
- Install it by hand.
- Configure triggers appropriately.
Load Automatically
In iTerm2 version 3.5 and later you can enable shell integration by enabling Load shell integration automatically in Settings > Profiles > General in the Command section. This is available if your Command is set to SSH or if it's set to Login Shell and your shell is supported.
Install Shell Integration Menu Item
To modify your shell's dotfiles to load shell integration, you can select the menu item iTerm2 > Install Shell Integration. You'll first be asked whether you wish to install the Utilities. Utilities consist of a number of shell scripts that provide useful functionality, such as displaying inline images, performing file transfer, or customizing the display.
Next you can choose to download and run an installer or to do an internet-free install.
The download-and-run option will type this command for you:
curl -L https://iterm2.com/shell_integration/install_shell_integration.sh | bash
Alternately, select Internet-Free Install. This runs a sequence of commands to determine your shell, install files, and modify your dotfiles to load shell integration automatically.
Install By Hand
If you prefer to have control over the process of modifying your environment, you can manually install shell integration by creating files and editing your shell's configuration. Select your shell to see the appropriate instructions:
bash | fish | tcsh | xonsh | zsh
curl -L https://iterm2.com/shell_integration/bash \
-o ~/.iterm2_shell_integration.bash
Next, you need to load the script at login time. You need to add the following command to ~/.bash_profile or ~/.profile. If you already have .profile then add it there, otherwise add it to .bash_profile. Put it at the end because other scripts may overwrite the settings it needs, such as `PROMPT_COMMAND`.
source ~/.iterm2_shell_integration.bash
Triggers
Installing a login script on every host you connect to is not always an option. To be sure, modifying root's login script is usually a bad idea. In these cases you can get the benefits of shell integration by defining triggers. The following triggers are of interest:
- Report User & Host
- Report Directory
- Prompt Detected
Use these triggers to tell iTerm2 your current username, hostname, directory, and the location of the shell prompt. Suppose you have a shell prompt that looks like this:
[email protected]:/home/george%
It exposes the username, hostname, and working directory. We can harvest those with a regular expression. First, define a trigger with this regex:
^(\w+)@([\w.]+):.+%
It captures the username and hostname from the example prompt above. Select the action "Report User & Host". Set the trigger's parameter to:
\1@\2
Then create another trigger with the action Report Directory. This regular expression will extract the directory from the example prompt:
^\w+@[\w.]+:([^%]+)%
Set this trigger's parameter to
\1
Make sure both triggers have their Instant checkbox enabled so they'll take effect before a newline is received.
Finally, add a regular expression that matches the start of your prompt and give the "Prompt Detected" action. This causes a "mark" to be added, which is a blue triangle visible to the left of this line (or a horizontal line above, if Auto Composer is enabled).
You may specify a user name or host name alone to Report Host & User. If you give just a user name then the previous host name will be preserved; if you give just a host name then the previous user name will be preserved. To change the user name only, give a parameter like user@. To change the host name only, give a parameter like example.com.
Features
Shell Integration enables numerous features:
Marks
These are saved locations in history. They make it easy to navigate to previous shell prompts or other locations of interest.
Select Output of Last Command
The menu item under Edit selects the output of the last-run command.
Alert when current command finishes running.
iTerm2 will present a modal alert when a long-running command finishes, if you ask it to.
View information about commands.
You can see the return status code, working directory, running time, and more for shell commands entered at the prompt in the past.
Download files from remote hosts with a click.
You can right click on a filename (e.g., in the output of ls) to download it.
Drag-drop files to upload with scp.
Hold down option and drag-drop a file from Finder into iTerm2 to upload it.
View command history.
It can be seen and searched in the toolbelt or quickly accessed in a popup window.
Easy access to recently and frequently used directories.
iTerm2 remembers the directories you use, sorting them by "frecency" (frequency and recency of use) and giving you access to them in the toolbelt and in a popup window.
Assign profiles to hostnames, usernames, or username+hostname combinations.
Sessions will automatically switch profiles as you log in and out according to rules you define.
Ensures the command prompt always starts at the left column, even when the last command didn't end in a newline.
Each of these features are described in more detail below.
Offscreen Command Line
When part of a command's output is scrolled off the top of the screen, the originating prompt is shown there.
Auto Composer
Auto Composer replaces your shell's prompt with a macOS-native text view that uses native editing conventions.
Command Selection
Click on a command to select it; then Find, Filter, and Select All will be restricted to that command's output.
How it works
Shell Integration works by configuring your shell on each host you log into to send special escape codes that convey the following information:
- Where the command prompt begins and ends.
- Where a command entered at the command prompt ends and its output begins.
- The return code of the last-run command.
- Your username.
- The current host name.
- The current directory.
How to use it
Marks
When shell integration is enabled, iTerm2 automatically adds a mark at each command prompt. Marks are indicated visually by a small blue triangle in the left margin.

You can navigate marks with Cmd-Shift-Up and Down-arrow keys.
If you have a multi-line prompt and would like to customize the mark's location, add this to your PS1 at the location where the mark should appear:
For zsh:
%{$(iterm2_prompt_mark)%}
For bash:
\[$(iterm2_prompt_mark)\]
Fish users can place this line somewhere in their fish_prompt function:
iterm2_prompt_mark
Xonsh users can put marks to PROMPT in xonsh RC file explicitly:
$PROMPT = '{iterm2_prompt_start}' + $PROMPT + '{iterm2_prompt_end}'
This feature is not supported in tcsh.
For zsh and bash users: if you are unable to modify PS1 directly (for example, if you use a zsh theme that wants to control PS1), you must take an extra step. Add export ITERM2_SQUELCH_MARK=1 before the shell integration script is sourced. Add the iterm2_prompt_mark as directed above to your prompt through those means available to you.
Alert on next mark
iTerm2 can show an alert box when a mark appears. This is useful when you start a long-running command. Select Edit>Marks and Annotations>Alert on next mark (Cmd-Opt-A) after starting a command, and you can go do something else in another window or tab. When the command prompt returns, a modal alert will appear, calling attention to the finished job.
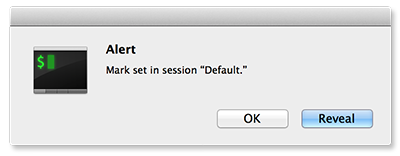
Command status
The mark on a command line will turn red if a command fails. You can right click the mark to view its return code.
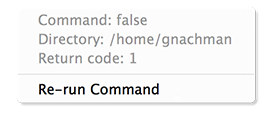
Download with scp
You can right-click on a filename (e.g., in the output of ls) and select Download with scp from hostname, and iTerm2 will download the file for you.
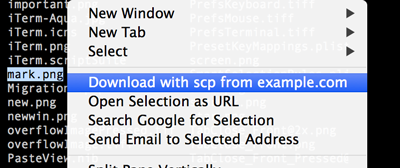
A new menu bar item will be added called Downloads that lets you view downloaded files and track their progress.
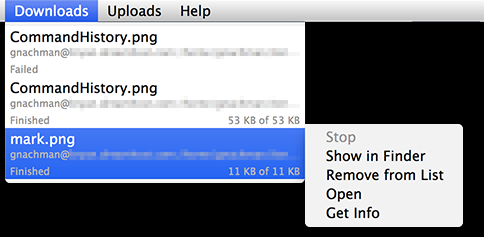
Upload with scp
If you drop a file (e.g., from Finder) into iTerm2 while holding the option key, iTerm2 will offer to upload the file via scp to the remote host into the directory you were in on the line you dropped the file on. A new menu bar item will be added called Uploads that lets you view uploaded files and track their progress.
Command history
With shell integration, iTerm2 can track your command history. The command history is stored separately for each username+hostname combination. There are four places where this is exposed in the UI:
Command history popup
You can view and search the command history with Session>Open Command History... (Shift-Cmd-;).
Autocomplete
Commands in command history are also added to Autocomplete (Cmd-;). If Settings>General>Save copy/paste history and command history to disk is enabled, then command history will be preserved across runs of iTerm2 (up to 200 commands per user/hostname).
Toolbelt
A command history tool may be added to the toolbelt by selecting Toolbelt>Command History.
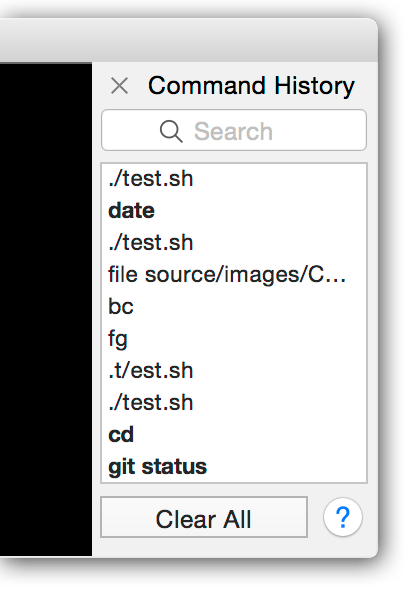
Bold commands are from the current session. Clicking on one will scroll to reveal it. Double-clicking enters the command for you. Option-double-clicking will output a "cd" command to go to the directory you were in when it was last run.
Command Completion
iTerm2 will present command completion suggestions automatically when View>Auto Command Completion is selected.
Recent Directories
With shell integration, iTerm2 will remember which directories you have used recently. The list of preferred directories is stored separately for each username+hostname combination. It is sorted by "frecency". There are two places it is exposed in the UI:
Recent Directories popup
You can view and search your recently and frequently used directories in Session>Open Recent Directories... (Cmd-Opt-/).
Toolbelt
A Recent Directories tool may be added to the toolbelt by selecting Toolbelt>Recent Directories.
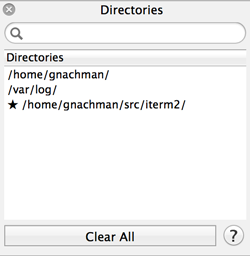
Double-clicking a directory will type its path for you into the current terminal. Option-double-click will enter a "cd" command for you. You can also right-click on a directory to toggle its "starred" status. A starred directory will always appear at the bottom of the list so it is easy to find.
Automatic Profile Switching
Please see the documentation at Automatic Profile Switching.
Shell Integration for root
If you'd like to be able to use shell integration as root, you have two
options. The first option, presuming you use bash, is to become root with sudo
-s (which loads your .bashrc as root) and add this to your .bashrc:
test $(whoami) == root && source "${HOME}/.iterm2_shell_integration.bash"
The alternative is to use Triggers to emulate shell integration as described above.
Limitations
By default, shell Integration does not work with tmux or screen. If you'd like to use it with tmux, add this to your login script prior to loading shell integration:
export ITERM_ENABLE_SHELL_INTEGRATION_WITH_TMUX=1
It works well with tmux integration (tmux -CC) but not with the regular tmux UI.
A Note on SCP
iTerm2 can do uploads and downloads with scp as described above. There are a few things you should know.
iTerm2 links in libssh2, and does not shell out to scp. It respects /etc/known_hosts and ~/.ssh/known_hosts, and will update the latter file appropriately. Host fingerprints are verified. Password, keyboard-interactive, and public-key authentication are supported. Private keys by default come from ~/.ssh/id_rsa, id_dsa, id_ed25519, or id_ecdsa, and may be encrypted with an optional passphrase.
iTerm2 respects ssh_config files, but only a subset of the commands are understood:
- Host
- HostName
- User
- Port
- IdentityFile
Settings pulled from ssh_config override the hostname and user name provided by shell integration. The shell integration-provided host name is used as the text against which Host patterns are matched.
The following files are parsed as ssh_config files, in order of priority:
- ~/Library/Application Support/iTerm/ssh_config
- ~/.ssh/config
- /etc/ssh_config
If you have trouble, see SCP Not Connecting on the wiki.
If you use SSH Integration then file transfer happens over the SSH Integration framing protocol rather than by using scp. This is generally more reliable because it doesn't require opening a new connection.
In iTerm2 3.7 and later, SSH Integration runs the ssh command through your login shell, so your dotfiles run first and ssh sees your exported environment. One benefit is that a custom SSH_AUTH_SOCK pointing at an agent that holds your keys is now honored.
Smart Selection
iTerm2 offers a Smart Selection feature that simplifies making selections on semantically recognizable objects.
How do I use Smart Selection?
A quad-click (four clicks of the left mouse button in quick succession) activates Smart Selection at the mouse cursor's position. By default, the following kinds of strings are recognized:
- Words bounded by whitespace or line boundaries.
- C++-style pairs of identifiers separated by double colons, such as "namespace::identifier".
- Filesystem paths, such as "/foo/bar/baz.txt".
- Quoted strings such as "foo bar".
- Java or Python-style include paths, such as "foo.bar.baz".
- URIs with the schemes: mailto, http, https, ssh, or telnet.
- Objective-C selectors like "@selector(foo:bar:)".
- Email addresses.
How do I Change Smart Selection Rules?
Under Settings>Profiles>Advanced, you may edit the smart selection rules. In addition to a regular expression, each rule also has a Precision attribute, which takes a value of Very Low, Low, Normal, High, or Very High. Intuitively, it refers to how sure one can be that when a rule's regular expression finds a match that it is what the user intended. For example, the "Word" rule is low precision (it matches almost every time), while the "HTTP URL" rule is very high precision (it almost never produces false positives). This allows the "HTTP URL" rule to take precedence when both match, unless the "Word" rule matches a much longer string. That might happen, for instance, if there were a non-URL character after a URL followed by a lot more text. The precision levels have a very strong effect, so it's very rare for a lower precision rule to take precedence over a higher precision rule.
When editing rules, it is advised that you experiment with different precision levels and different kinds of strings to find one that works well. A collection of test cases may be found at smart_selection_cases.txt.
When Smart Selection is activated, iTerm2 tries each regular expression. For a given regex, various strings on the screen are tested until the longest match is found. Only matches that include the character under the cursor are of interest. The longest such match is added to a pool of "selection candidates". Each candidate is assigned a score equal to its length in characters. Among the candidates in the highest precision class (where Very High is the highest class and Very Low is the lowest) with any matches, the higheset scoring one is used as the selection.
Actions
Actions may be associated with smart selection rules. When you right click in a terminal, smart selection is performed at the cursor's location. Any smart selection rule that matches that location will be searched for associated actions, and those actions will be added to the context menu. A cmd-click on text matching a smart selection rule will invoke the first rule.
The following actions are defined:
- Open File: Opens the file using the default system application.
- Open URL: Opens the URL using the default system browser.
- Run Command: Runs the command using
/bin/sh -cin the background. Output goes to the Script Console. - Run Coprocess: Starts a coprocess.
- Send Text: Sends text as though it was typed by the user.
- Run Command in Window: Opens a new window and runs the command in it.
- Copy: Copies the string to the pasteboard.
Each action has a parameter. The meaning of the parameter depends on the action. For example, for the Open URL action the parameter should be a URL. The value you put in the Parameter field may contain special substrings which get substituted with values determined at runtime. By default, a legacy syntax is used with the following substitutions:
\0: The full text of the match.\1: The first match group (captured using parentheses in the regular expression).\2...\9: Subsequent match groups.\d: The current directory.\u: The current user name. If you're sshed then you must install Shell Integration for this to be known.\h: The current host name. If you're sshed then you must install Shell Integration for this to be known.\n: Newline\\: Backslash
If you check the Use interpolated strings for parameters checkbox, then a more modern syntax is used. See the interpolated string documentation for details. For example, a parameter of \(path) is equivalent to the legacy syntax \d. In addition to the standard variables that are available in an interpolated string evaluated in a Session context, an array of strings called matches is defined. matches[0] is the full text of the match and matches[i] is the ith capture group for i > 0.
When using interpolated strings, the usual escaping rules apply.
Regular Expressions
Regular expressions conform to the ICU regular expressions rules.
Triggers
A trigger is an action that is performed when something happens in a terminal session. Most often the something is text matching a regular expression being received, but triggers can also fire in response to events such as a command finishing, the working directory changing, or a particular job starting.
How to Create a Trigger
To create a trigger, open the Settings panel. Select the Profiles tab. Choose the profile to which you wish to add a trigger. Then select the Advanced tab. Click the Edit button in the Triggers section. A panel opens that displays any existing triggers. You can click the + button to add a new trigger.
Every trigger has a match type, an action, and an optional parameter. The match type determines what causes the trigger to fire. When you add a trigger you choose its match type from a popup menu. There are two broad categories:
- Regular Expression: the trigger fires when received text matches a regular expression. This is the default and most common kind of trigger. Regex triggers may also be marked as Instant.
- Events: the trigger fires when a session event occurs, independent of any text on the screen. See Event Triggers below.
Regular Expression
Regular expressions conform to the ICU regular expressions rules. Text that is written to the screen including the BEL control code are sent to the regex matcher for evaluation. Only one line at a time is matched. By default, matching is performed when a newline or cursor-moving escape code is processed. If a line is very long, then only the last three wrapped lines are used (that is, the last three lines as seen on the display). This is done for performance reasons. You can change this limit in Advanced Settings > Number of screen lines to match against trigger regular expressions. Null bytes in received text are treated as spaces for the purpose of trigger regex matching.
Actions
The following actions are available:
- Annotate: Associates a note with a matching text.
- Bounce Dock Icon: Makes the dock icon bounce until the iTerm2 window becomes key.
- Buffer Input: Starts or stops buffering typed input. See the Buffer Input feature.
- Capture Output: Save the line to the Captured Output toolbelt tool. See Captured Output. The parameter is a coprocess command to run when you double-click an entry in the Captured Output tool.
- Change Style: Modifies the style of matching text.
- Enter Workgroup: Turns the session into a Workgroup, a cluster of related sessions.
- Exit Workgroup: Leaves the current Workgroup. A leader-only option makes only the main session leaving tear the workgroup down.
- Fold to Named Mark: Collapses all lines between the matching line and a preceding named mark with a given name.
- Highlight Line: The entire line containing text matching the regex in the trigger will change color. The parameter sets the color.
- Highlight Text: The text matching the regex in the trigger will change color. The parameter sets the color.
- Inject Data: Inserts bytes into the input stream. These can be text or control sequences.
- Invoke Script Function: Executes a function call defined using the Python API.
- Make Hyperlink: The text matching the regex in the trigger will become a hyperlink which you can open with Cmd-Click. The parameter sets the URL.
- Open Password Manager: Opens the password manager. You can specify which account to select by default.
- Post Notification: Posts a notification with Notification Center.
- Prompt Detected: Informs iTerm2 that the shell prompt begins at the start of the match. Used to emulate Shell Integration features. If the prompt is one line long then use Instant.
- Report Directory: Tells iTerm2 what your current directory is. You can use this to enable Shell Integration features without installing the scripts. The parameter is your current directory.
- Report User & Host: Tells iTerm2 what your user or host name is. You can use this to enable Shell Integration features without installing the scripts. To specify just a user name, say `user@`. For just a host, say `@host`. For both, say `user@host`.
- Ring Bell: Plays the standard system bell sound once.
- Run Command: Runs a user-defined command.
- Run Coprocess: Runs a Coprocess.
- Run Silent Coprocess: Runs a Coprocess but do not show text that's being received (it only goes to the coprocess).
- Send Text: Sends user-defined text back to the terminal as though the user had typed it.
- Set Mark: Sets a mark. You can specify whether you'd like the display to stop scrolling after the trigger fires.
- Set Named Mark: Associates a name with the matching range. Various features help you navigate to named marks such as the Toolbelt tool and Open Quickly.
- Set Tab Status: Sets the session's status (dot indicator, subtitle, and subtitle color) shown on its tab. Part of the Session Status feature.
- Set Title: Sets the session's title.
- Set User Variable: Assigns a value to a user-defined [variable](https://iterm2.com/documentation-variables.html).
- Show Alert: Shows an alert box with user-defined text.
- Stop Processing Triggers: When this action is invoked no triggers further down the list will be invoked for the current text.
Parameter?
Various actions (Run Command, Run Coprocess, Post Notification, Send Text, and Show Alert) require additional information. This is specified in the "Parameters" field. When the parameter is a text field with freeform entry, some special values are defined:
For event triggers, \0 is not defined (there is no matched text), but \1, \2, and so on refer to values captured from the event as described in the Event Triggers table.
| Value | Meaning |
|---|---|
| \0 | The entire value matched by the regular expression. |
| \1, \2, ..., \9 | The nth value captured by the regular expression. |
| \a | A BEL character (^G). |
| \b | A backspace character ^H. |
| \e | An ESC character (ascii 27). |
| \n | A newline character. |
| \r | A linefeed character. |
| \t | A tab character. |
| \xNN | A hex value NN (for example: \x1b sends ascii code 27, an ESC). |
Instant
When Instant is set, the trigger will fire once per line as soon as the match occurs, without waiting for a newline. This was added for the benefit of the Open Password Manager trigger, since password prompts usually are not followed by a newline. This may cause certain regular expressions (for example, ".*") to match less than they otherwise might. Instant applies only to regular-expression triggers.
Job
Every trigger has an optional Job field. When it is set, the trigger is active only while a foreground job of that name is running (the match is case-insensitive). Leave it empty to keep the trigger active at all times. This makes it possible to write triggers that apply only while a particular program is running, for example Claude Code.
The Job field is distinct from the Job Started and Job Ended events: those events fire once when a job begins or ends, whereas the Job field gates whether a trigger is considered at all.
Event Triggers
Instead of matching a regular expression, a trigger can fire in response to a session event. Choose an event from the match-type popup when creating or editing a trigger. Any trigger action may be used with any event.
Most events have an optional filter so the trigger fires only for events you care about (for example, only when a command exits non-zero, or only when a process named claude starts). Leave a filter blank to match every occurrence. Each event also provides captured values that you can reference in the action's parameter as \1, \2, and so on.
The available events are:
| Event | Fires when | Filter | Captures |
|---|---|---|---|
| Prompt Detected | Shell integration detects a new prompt. | None | None |
| Command Finished | A command exits. Requires shell integration. | Exit code: any, zero (success), non-zero (failure), or a specific value. | \1 = exit code |
| Directory Changed | The working directory changes. | Regular expression matching the directory path. | \1 = new directory |
| Host Changed | You connect to a different host (for example, via SSH). | Regular expression matching the hostname. | \1 = new host |
| User Changed | The current user changes (for example, su or sudo). | Regular expression matching the username. | \1 = new user |
| Idle (Silence) | No output is received for the specified duration. | Timeout in seconds (default 30). | \1 = timeout in seconds |
| Activity After Idle | Output resumes after the session was idle. | Timeout in seconds that defines "idle" (default 30). | None |
| Session Ended | The session terminates. | None | None |
| Bell Received | A terminal bell (\a) is received. | None | None |
| Long-Running Command | A command has been running longer than the threshold. | Threshold in seconds (default 60) and an optional regular expression matching the command line. | \1 = command, \2 = elapsed seconds |
| Custom Escape Sequence | A custom escape sequence is received. | Regular expression matching the sequence identifier. | \1 = identifier, \2 = payload |
| Notification Posted | A notification is posted by a control sequence (OSC 9). | Regular expression matching the notification message. | \1, \2, ... = notification text values |
| Progress Bar Changed | A progress bar appears or disappears. | Fire when the bar appears, disappears, or either. | \1 = "appeared" or "disappeared" |
| Job Started | A process matching the job filter enters the foreground-job ancestry chain. | Job: process name to watch for (case-insensitive). Required. | \1 = job name |
| Job Ended | A process matching the job filter leaves the foreground-job ancestry chain. | Job: process name to watch for (case-insensitive). Required. | \1 = job name |
| Variable Changed | A session variable changes value. | Variable name to watch, plus an optional regular expression the new value must match. | \1 = new value, \2 = variable name |
Importing and Exporting Triggers
You can move triggers between profiles or share them with other people. In the trigger editor, select one or more triggers and click the share button. It offers Export to File, which writes an .it2triggers file, and Copy Trigger as URL to Clipboard, which puts a link to the selected triggers on the clipboard. Use the Import button to load triggers from an .it2triggers file.
Example
The iTerm2-zmodem project demonstrates hooking up iTerm2 to zmodem upload and download.
Captured Output
iTerm2 has a feature called "Captured Output" which helps you find and track important lines of output from logs, build processes, and such.
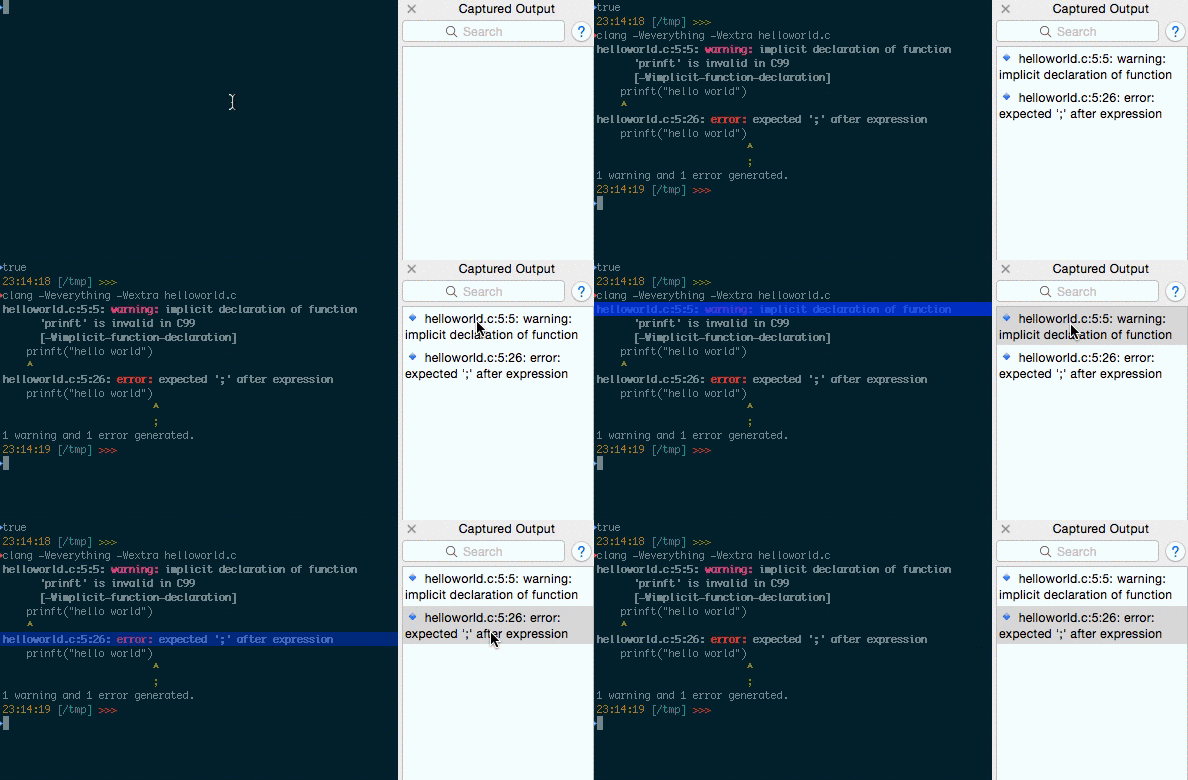
What does it do?
Captured Output is a tool that may be added to iTerm2's toolbelt (a view on the right side of terminal windows). It works in conjunction with user-defined Triggers. A Trigger whose action is Capture Output looks for lines of output that match its regular expression. When one is found, the entire line is added to the Captured Output tool. When the user clicks on a line in the Captured Output tool, iTerm2 scrolls to reveal that line. Double-clicking on a line in the Captured Output tools run a user-defined Coprocess.
Shell Integration Required
Shell Integration must be installed because Captured Output ties in to command history.
Ensure you have enough scrollback history to contain the full output of your build command. The default of 1000 may not be sufficient. You can adjust this in Prefs > Profiles > Terminal > Scrollback lines.
Example
One way to use Captured Output is to view compiler output. Suppose you run make and get thousands of lines of output, some of which may contain errors or warnings. You'd like to examine each one and take some action on it. Here's how you would use Captured Output to assist with this task:
Step 1: Create Triggers
Create a Trigger with the Capture Output action that matches your compiler's errors and warnings. Clang's errors look like this:
filename.c:54:9: error: use of undeclared identifier 'foo'
The following regular expression matches errors and warnings from Clang:
^([_a-zA-Z0-9+/.-]+):([0-9]+):[0-9]+: (?:error|warning):
There are two capture groups defined. We'll come back to those later.
Step 2: Open the Toolbelt
Open the Toolbelt by selecting the menu item Toolbelt > Show Toolbelt. Enable the Toolbelt > Captured Output menu item to ensure it is visible.
Step 3: Run make
Kick off the build by running make. It spits out thousands of lines of output.
Step 4: Examine the Captured Output tool
Any errors or warnings that appear in the compiler output will appear in the Captured Output tool.
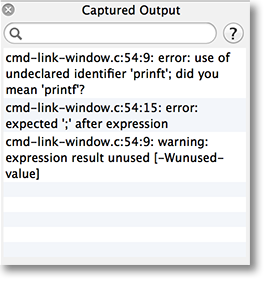 Select an entry in the tool. iTerm2 scrolls to display the line and briefly highlights it in blue.
Step 5: Open the file containing the error
The Trigger created in step 1 takes an optional parameter. It is a command for iTerm2 to execute as a Coprocess when you double-click an entry in the Captured Output tool. An example command is:
echo vim \1; sleep 0.5; echo \2G
This coprocess command assumes you are at the command line, and it enters a command to open the offending file to the line number with an error. This is where the capture groups in the regular expression from step 1 become useful. For example, if the filename was "filename.c" and the error was on line 20, as in this error message:
filename.c:20:9 error: use of undeclared identifier 'foo'
The coprocess would:
Step 6: Check it off the list
You can right-click on an entry in Captured Output to open a menu, which contains a single item: "Toggle Checkmark". This helps you remember which entries have been dealt with as you go through errors and warnings in your compiler output.
Navigation
Captured Output is linked to the Command History tool. If no command is selected in the Command History tool, then the most recent captured output is displayed. Otherwise, the captured output from the selected command is displayed. You can remove a selection from the Command History tool by cmd-clicking on it.
Clearing Captured Output
You can use the ClearCapturedOutput control sequence to remove captured output. This is useful to do before starting a compilation which may produce errors. Doing so ensures the only captured errors are from the most recent build. Use the following command in bash to produce the control sequence:
printf "\e]1337;ClearCapturedOutput\e\\"
Fonts
While iTerm2 does not require monospaced fonts, they look much better than proportionately spaced fonts.
iTerm2 has the capability of rendering text with thin strokes to improve readability. You can change how this works in the Text panel of the Profiles tab of Settings.
You can also specify a "non-ASCII" font in the Text panel of profile Settings. This font will be used for all code points greater than or equal to 128 or for characters with combining marks.
Some fonts, such as FiraCode, support ligatures if enabled in iTerm2. You can enable ligatures in Prefs > Profiles > Text. Ligatures are rendered using CoreText, which is significantly slower than Core Graphics. NOTE: Ligatures are not supported by the GPU renderer and will reduce performance.
Inline Images
iTerm2 is able to display images within the terminal. Using a similar mechanism, it can also facilitate file transfers over any transport (such as ssh or telnet), even in a non-8-bit-clean environment.
Example: imgcat
Using the imgcat script, one or more images may be displayed in a terminal session. For example:
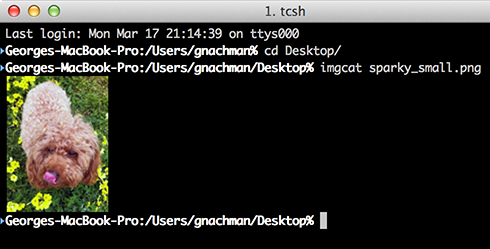
Critically, animated GIFs are supported as of version 2.9.20150512.
Retina
Starting in iTerm2 version 3.2.0, Retina displays are properly supported. Previously, they would be double-size (one display "point" per image pixel rather than one display pixel per image pixel). If you prefer the old behavior, change Prefs > Advanced > Show inline images at Retina resolution.
Protocol
This document describes iTerm2's own inline image protocol. In addition to it, iTerm2 also supports the Kitty graphics protocol (using APC G escape sequences), which is documented separately by its authors.
iTerm2 extends the xterm protocol with a set of proprietary escape sequences. In general, the pattern is:
ESC ] 1337 ; key = value ^G
Whitespace is shown here for ease of reading: in practice, no spaces should be used. ^G is the BEL character. You can use ST in place of ^G anywhere it is mentioned in this document. ST is the standard terminator for OSC sequences, and is formed by ESC \.
For file transfer and inline images, there are two control sequences. The original one, which works on all remotely modern versions of iTerm2 is:
ESC ] 1337 ; File = [optional arguments] : base-64 encoded file contents ^G
The optional arguments are formatted as key=value with a semicolon between each key-value pair. They are described below.
A new way of sending files was introduced in iTerm2 version 3.5 which works in tmux integration mode by splitting the giant control sequence into a number of smaller ones:
First, send:
ESC ] 1337 ; MultipartFile = [optional arguments] ^G
Then, send one or more of:
ESC ] 1337 ; FilePart = base64 encoded file contents ^G
What size chunks should you use? Older versions of tmux have a limit of 256 bytes for the entire sequence. In newer versions of tmux, the limit is 1,048,576 bytes. iTerm2 also imposes a limit of 1,048,576 bytes.
Finally, send:
ESC ] 1337 ; FileEnd ^G
| Key | Description of value | |
|---|---|---|
| name | base-64 encoded filename. Defaults to "Unnamed file". | |
| size | File size in bytes. Optional; this is only used by the progress indicator. | |
| width | Width to render. See notes below. | |
| height | Height to render. See notes below. | |
| preserveAspectRatio | If set to 0, then the image's inherent aspect ratio will not be respected; otherwise, it will fill the specified width and height as much as possible without stretching. Defaults to 1. | |
| inline | If set to 1, the file will be displayed inline. Otherwise, it will be downloaded with no visual representation in the terminal session. Defaults to 0. |
The width and height are given as a number followed by a unit, or the word "auto".
- N: N character cells.
- Npx: N pixels.
- N%: N percent of the session's width or height.
- auto: The image's inherent size will be used to determine an appropriate dimension.
More on File Transfers
By omitting the inline argument (or setting its value to 0), files will be downloaded and saved in the Downloads folder instead of being displayed inline. Any kind of file may be downloaded, but only images will display inline. Any image format that macOS supports will display inline, including PDF, PICT, or any number of bitmap data formats (PNG, GIF, etc.). A new menu item titled Downloads will be added to the menu bar after a download begins, where progress can be monitored and the file can be located, opened, or removed.
Detection
Use the Feature Reporting protocol to detect the availability of inline images.
Sample Code
Sample code for displaying images may be found here.
imgls
Provides an augmented directory listing that includes a thumbnail of each image in a directory.
imgcat
Displays one or more images inline at their full size.
it2dl
Downloads a file, but does not display it inline.
divider
Draws a full-width, one line-tall graphical divider.

Badges
A badge is a large text label that appears in the top right of a terminal session to provide dynamic status, such as the current host name or git branch. Its initial value is defined in Settings>Profiles>General>Badge and it can be changed by an iTerm2-proprietary escape sequence. This value is an interpolated string, which means the badge can display the value of variables.
Here is an example of a session with a badge indicating the current user and host name.
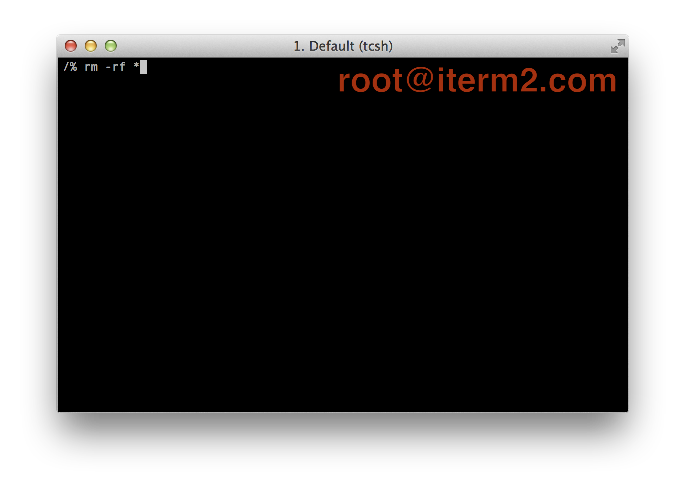
Escape Sequences
The badge may be set with the following control sequence:
OSC 1337 ; SetBadgeFormat=Base-64 encoded badge format ST
Here's an example that works in bash:
# Set badge to show the current session name and git branch, if any is set.
printf "\e]1337;SetBadgeFormat=%s\a" \
  $(echo -n "\(session.name) \(user.gitBranch)" | base64)
Color
The badge's color may be set in Settings>Profiles>Colors. The font and size can be adjusted by selecting Settings>Profiles>General>Edit… next to the Badge field.
Dynamic Profiles
Dynamic Profiles is a feature that allows you to store your profiles in a file outside the usual macOS settings database. Profiles may be changed at runtime by editing one or more plist files (formatted as JSON, XML, or in binary). Changes are picked up immediately.
Availability
Dynamic Profiles are available in iTerm2 2.9.20140923 and later.
Usage
When iTerm2 starts, it creates a folder:
~/Library/Application Support/iTerm2/DynamicProfiles
While iTerm2 runs, it monitors the contents of that folder. Any time the folder's contents change, all files in it are reloaded.
Files in this folder are expected to be formatted as Apple Property Lists. No particular file extension is required. All files in the folder must be valid property lists. If any is malformed, then no changes will be processed.
Property List Format
A property list describes a data structure consisting of arrays, dictionaries, strings, integers, and boolean values. Property lists may be written in JSON or XML. Here's an example of the skeletal structure of a JSON property list that iTerm2 expects for Dynamic Profiles:
{
  "Profiles": [
    {
       [attributes for the first profile go here]
    },
    {
       [attributes for the second profile go here]
    },
    [more profiles]
  ]
}
There are two required fields for each profile:
- Guid
- Name
The "Guid" is a globally unique identifier. It is used to track changes to the profile over time. No other profile should ever have the same guid. One easy way to generate a Guid is to use the uuidgen program, which comes standard with macOS.
The "Name" is the name, as seen in the Profiles window or in Settings.
Here is a fully formed (but minimal) Dynamic Profiles plist:
{
  "Profiles": [
    {
      "Name": "Example",
      "Guid": "ba19744f-6af3-434d-aaa6-0a48e0969958"
    }
  ]
}
Editing
The only way to change a dynamic profile is to modify its parent profile or to modify the property list file. If you change its properties through the Settings UI those changes will not be reflected in the property list.
Attributes
Every profile preference that iTerm2 supports may be an attribute of a Dynamic Profile. Since there are dozens of attributes, you usually won't specify them all. Any attribute not specified will inherit its value from the default profile, or a specified "parent" profile (see below).
The easiest way to find the name and legal value of a profile attribute is to copy it from a known-good reference. To get the JSON for a profile you already have, follow these steps:
- Open Settings > Profiles
- Select a profile
- Open the Other Actions menu beneath the list of profiles
- Select Save Profile as JSON
- Open the file in your favorite editor.
If you use this as the basis of a Dynamic Profile, remember to change the Guid. A Dynamic Profile with a Guid equal to an existing Guid of a regular profile will be ignored.
Parent Profiles
Normally, a dynamic profile inherits any attributes you don't explicitly specify from the default profile. You may also specify a particular profile to inherit from using the Dynamic Profile Parent Name attribute. The value it takes is a profile name (that is, the name you see listed in the list of profiles in Settings box). Profile names are not guaranteed to be unique, but they are more convenient than GUIDs. If no profile with the specified name is found, the default profile is used instead. For example:
Starting in version 3.4.9, Dynamic Profile Parent GUID is another way to specify a parent. It takes precedence over Dynamic Profile Parent Name.
{
  "Profiles": [
    {
      "Name": "Example",
      "Guid": "ba19744f-6af3-434d-aaa6-0a48e0969958",
      "Dynamic Profile Parent Name": "Light Background"
    }
  ]
}
Rewritable
You can mark a dynamic profile as "rewritable" which means iTerm2 can make changes to the file on disk to reflect changes made in the settings UI. Simply add "Rewritable": true to your profile to enable rewritability.
Minutiae
Dynamic profiles are loaded in alphabetical order by filename. Within a particular file, they are loaded in the order they're listed in. This only matters if one dynamic profile references another dynamic profile as its parent; the parent should be placed so it loads before any of its children. For all other purposes, the filenames don't matter.
The Dynamic will automatically be added to all Dynamic Profiles.
Troubleshooting
If something goes wrong loading a Dynamic Profile, errors will be logged to Console.app.
Triggers
By default, Highlight triggers save colors in a large inscrutable mess of a format. For dynamic profiles, you can use {#rrggbb,#rrggbb} in place of the large inscrutable mess. The first value gives the foreground color and the second value gives the background color. Replace either #rrggbb with an empty string to not change that color. For example, to make the foreground red without changing the background use #{ff0000,}.
Example
Here's an example for a common use case: a list of profiles for sshing to various hosts. In this example, I've used the hostname as the Guid, which makes constructing this file a little easier and works well enough.
{
  "Profiles": [
    {
       "Name": "foo.example.com",
       "Guid": "foo.example.com",
       "Custom Command" : "Yes",
       "Command" : "ssh foo.example.com",
    },
    {
       "Name": "bar.example.com",
       "Guid": "bar.example.com",
       "Custom Command" : "Yes",
       "Command" : "ssh bar.example.com",
    },
  ]
}
Profile Search Syntax
When iTerm2 presents a list of profiles, it usually includes a search box. The search box uses a special syntax that lets you tailor your searches to quickly find what you're looking for.
Searching Profiles
Each word in the search query must match at least one word in either the title or the tags of a profile in order for that profile to be matched by the query. For a word to be a match, it must be a substring.
| Query | Profile Name | Matches? | ||
|---|---|---|---|---|
| Linux | Linux | Yes | ||
| x | Linux | Yes | ||
| z | Linux | No | ||
| George L | George's Linux Machine | Yes |
Operators
You may prefix a phrase in the search query with an operator to narrow your query. These operators are defined:
- The name: operator only tries to match words in the profile's name.
- The tag: operator only tries to match words in the profile's tags.
- The command: operator only tries to match words in the profile's command. Note that the command is only searched for words that explicitly use the
commandoperator. Available in iTerm2 version 3.5.5 and later.
Quoting
You can require that two or more words occur in order by putting quotes in your query. For example:
| Query | Profile Name | Matches? | |
|---|---|---|---|
| "Linux machine" | George's Linux machine | Yes | |
| "machine Linux" | Linux machine | No |
Anchoring
Normally, words in a query must match a substring of a word in the title or tags of a profile. You can require that a word in your query matches a prefix of a word in the title or tags by inserting a caret (^) before the word. You can require that a word in your query matches the suffix of a word in the title or tags by appending a dollar sign ($) after the word. For example, the query ^a matches only profiles with words starting with "a". The query a$ matches words ending in "a". The query ^a$ matches only the word "a".
| Query | Profile Name | Matches? | |
|---|---|---|---|
| ^root | [email protected] | Yes | |
| ^root | Groot! | No | |
| root$ | Groot | Yes | |
| ^root$ | Groot | No | |
| ^root$ | root | Yes |
Combining Features
You may combine quoting, operators, and anchors. The operator always comes first, followed by a caret, followed by a quoted string, followed by a dollar sign. Consider the following examples:
name:^"George's Linux Machine"$
Three consecutive whole words in the profile's name must equal "George's Linux Machine".
name:"George's Linux Machine"$
Would match a profile named "XGeorge's Linux Machine", unlike the previous example.
name:^"George's Linux Machine"
Would match a profile named "George's Linux MachineX", unlike the first example.
name:"George's Linux Machine"
Would match a profile named "XGeorge's Linux MachineX", unlike the first example.
name:^George's
name:George's$
name:^George's$
A word having the prefix, suffix, or exactly matching "George's" must occur in the profile's name to match these queries, respectively.
Automatic Profile Switching
iTerm2 can use information it knows about your current path, host name, user name, and foreground job name to change profiles. For example, your window's background color or the terminal's character encoding could change when connecting to different hosts.
Shell Integration Required
You must install Shell Integration on all machines and all user accounts where you plan to use Automatic Profile Switching (either by using the scripts or the Triggers workaround described in the Shell Integration docs).
Rule Syntax
In Settings>Profiles>Advanced, you may specify a set of rules.
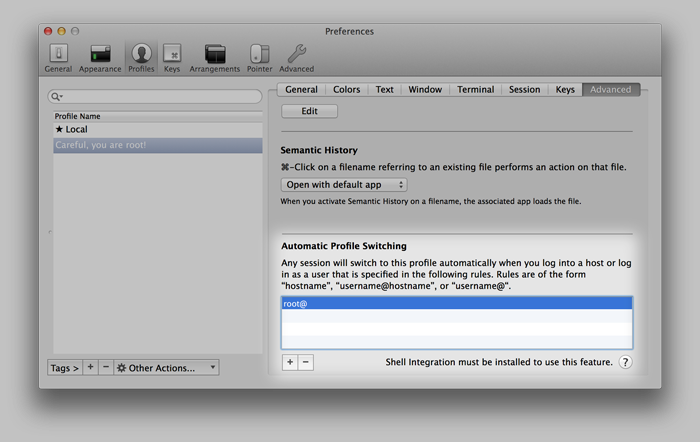
When any session satisfies a rule in a given profile, it will switch to that profile. Rules consist of three optional components: the user name, the hostname, and the path. At least one component must be present, since an empty rule is not allowed. The hostname is required only when both a user name and a path are specified.
A user name is a unix accont name (e.g., root) followed by an @.
A path always begins with a /. Any time a hostname is followed by a path, they are separated by a :. For example, iterm2.com:/users/george. It may include * wildcards.
A hostname can be a DNS name, like iterm2.com or an IP address like 127.0.0.1. A hostname may contain one or more * characters, which act as a wildcard (like globbing in Unix).
The job name is the name of the executable. For example, "vim" or "bash". It must be prefixed with an ampersand &. For example, &emacs*. Starting with version 3.6, the rule is matched against the full command line rather than only the job name.
Additionally, a rule may be designated as sticky by beginning with a !. This will be described below, in the Automatic Reversion section.
Some examples:
[email protected]:/users/georgegeorge@*:/users/george*:/users/george*.iterm2.com:/users/georgedev.*.com:/users/george[email protected]iterm2.comgeorge@iterm2.com:/users/george/users/george/users/*&vimiterm2.com&vim!iterm2.com
Because more than one rule may match at any given time, rules with higher quality matches prevail over those with lower-quality matches. Quality is determined by a rule's score, which is computed by summing the scores for its matching parts. In order for a rule to be considered, all of its parts that are specified must match the current state.
The scoring is defined as:
- An exact match for the hostname scores 16 points.
- A partial match for the hostname using a wildcard scores 8 points.
- A match on the job name (wildcard or not) scores 4 points.
- A match on the user name scores 2 points.
- An exact match on the path scores one point.
- A partial match on the path using a wildcard scores zero points, but does count as a match for the rule.
The highest scoring rule, if any, will be used and the session's profile will be switched.
The UI tries to prevent you from entering the same rule in two different profiles, but if that does happen then one profile is chosen arbitrarily.
Automatic Reversion
After APS switches a session's profile, its rules may eventually cease to match
(for example, the hostname changes back to "localhost" because an ssh session
ends). If no profile has a matching rule, the session's original profile will
be restored. The exception is if the last-matched rule was "sticky". A sticky
rule is prefixed with an !.
Implementation
Each session maintains a stack of profiles. Initially, the stack contains the profile the session was created with. When the username, hostname, or path changes, iTerm2 finds the best-matching profile. If some profile has a matching rule, one of two things happens:
- If that profile is already on the stack, profiles above that one will be removed from the stack and the session will switch to that profile.
- Failing that, the profile will be pushed on the stack and the session will switch to that profile.
If no profile has a matching rule, the stack is emptied (except for the first entry, the original profile for the session) and the session reverts to its original profile.
Rules may begin with ! to indicate "stickiness". A sticky rule causes its profile to stay even after the rule no longer applies, so long as no other rule matches.
Triggers
Since it's impractical to install shell integration everywhere (for example, as root), there will be times when you need to write a trigger to detect the current username or hostname. Please see the Triggers section of Shell Integration for details.
Troubleshooting
There are a few ways things can go wrong. Please see the Why doesn't secure copy/automatic profile switching work? document for help diagnosing and fixing these issues.
Coprocesses
iTerm2 offers support for "coprocesses". This very powerful feature will allow you to interact with your terminal session in a new way.
What is a Coprocess?
A coprocess is a job, such as a shell script, that has a special relationship with a particular iTerm2 session. All output in a terminal window (that is, what you see on the screen) is also input to the coprocess. All output from the coprocess acts like text that the user is typing at the keyboard.
One obvious use of this feature is to automate interaction. For instance, suppose you want to automate your presence in a chat room. The following script could be used as a coprocess:
#!/usr/bin/python
import sys
while True:
  line = raw_input()
  if line.strip() == "Are you there?":
    print "Yes"
  sys.stdout.flush()
You could disappear for years before your friends discover you're gone.
How Do I Start a Coprocess?
There are two ways to start a coprocess.
Select "Run Coprocess..." from the Session menu. Enter the name of a command to run as a coprocess.
Create a Trigger in Prefs>Profiles>Advanced and select Run Coprocess... as the action. Give the script to run as a parameter. Triggers also have Silent Coprocesses, which prevent any output from going to the screen. This is useful for ZModem, for example.
Usage
A session can not have more than one coprocess at a time. When a coprocess is active, an icon will indicate that in the top right of the session.
Technical Details
The coprocess's stdin is a byte-for-byte copy of the input from the session's pty, beginning at the time the coprocess starts. In the case of a trigger-started coprocess, the line of input that triggered it MAY be the first line of input to the coprocess, but this is not guaranteed. If a coprocess is running, triggers with a Run Coprocess action will not fire. The coprocess's stdout stream will be treated the same as keyboard input. A small amount of buffering is provided for both input and output of the coprocess. When a buffer fills, the coprocess will block.
Session Restoration
Session restoration works by running your jobs within long-lived servers rather than as child processes of iTerm2. If iTerm2 crashes or upgrades, the servers keep going. When iTerm2 restarts, it searches for running servers and connects to them. The OS's window restoration feature preserves the content of your window, including scrollback history. iTerm2 marries the restored session to the appropriate server so you can pick up where you were.
tl;dr watch this: Demo Video
Notes
You must turn off System Prefs > Desktop & Dock > Close windows when quitting an application. For more information on system window restoration, please see Apple's docs.
You must set Prefs > General > Startup to Use system window restoration settings.
Force quitting iTerm2, causing it to crash, or upgrading it when prompted should restore your sessions. NOTE: Quitting iTerm2 with Cmd-Q will terminate your jobs and they won't be restored. There is an advanced preference to change this behavior, though.
You can toggle this feature with Prefs>Advanced>Enable session restoration., but you must restart iTerm2 after changing this setting.
A session that has had only its window contents restored and not the running processes will get a reverse video Session Restored banner. A properly restored session will pick up right where you left it.
If you reboot, your jobs will terminate and not be restored. The window contents should be restored.
If you prefer for sessions not to be terminated when you quit iTerm2, turn off Prefs>Advanced>User-initiated quit (cmd-q) of iTerm2 will kill all running jobs.
Session Archives
A session archive is a saved copy of a session's scrollback that you can restore later. It captures the session's contents so you can set aside a terminal's history and reopen it whenever you need it.
Saving and Restoring Archives
The archive commands live under Shell > Archives.
Choose Save Archive of Current Session… to write the current session's scrollback to a file. Choose Restore Archive… to pick a saved archive and reopen it. iTerm2 remembers your ten most recent archives and lists them in the Archives submenu, so you can restore a recent one without hunting for the file.
Restoring an archive reopens the session's scrollback in a new window.
Archiving Sessions Automatically
You can have iTerm2 archive a session for you when it closes. In Settings > Profiles > Session, turn on Archive sessions on closure and choose a destination directory. When a session using that profile closes, iTerm2 automatically writes an archive of its scrollback to that directory. See Profiles > Session for the related settings.
Session Notes
A Session Note is a floating, resizable panel of freeform text attached to a session. Use it to jot down anything you want to keep alongside the terminal, such as a reminder, a snippet of output, or a running to-do list. The note floats above the terminal content and stays with the session.
Showing a Session Note
Select View > Show Session Note (⌥⌘G) to show the note for the current session and put the keyboard focus in it. If the note is collapsed, this expands it first. The menu item shows a checkmark while the note is visible; selecting it again hides the note.
Each session has its own single note. A new note starts near the top-right corner of the session, out of the way of the prompt.
Editing
The note holds plain, multiline text. It has its own undo stack, and it uses the session's font, so it tracks changes to the font. Pasted content is inserted as plain text, and automatic substitutions such as smart quotes, dash replacement, and link detection are turned off so the text stays exactly as you type it. When the content is taller than the note, a scroller appears. Press Escape to move focus out of the note and back to the terminal.
A note with no text is not kept: if you leave an empty note, iTerm2 removes it.
Moving, Resizing, and Collapsing
Drag the title bar to move the note anywhere within the session. Drag any edge or corner to resize it. The note is constrained to stay inside the session's bounds.
Click the chevron button in the title bar to collapse the note down to just its title bar, or press Shift-Return while editing. When collapsed, the title bar shows the first line of the note instead of the label "Session Note," and you can still drag it and resize it horizontally. Click the chevron again to expand it.
When the Session Resizes
The note keeps its distance from the top-right corner of the session rather than the bottom-left. When you resize the window or split pane, the note moves along with that corner so it stays in the same relative spot near the top-right. If the session becomes smaller than the note, the note is clamped to fit.
Persistence
A note that has text is saved with the session, so it survives restarts and is stored in saved arrangements. Its text, size and position, and collapsed state are all preserved. An empty note is not saved.
Session Status
A session can report a status: a short bit of state that iTerm2 surfaces on the session's tab as a custom subtitle, a colored dot indicator, and a subtitle color. Status lets you see at a glance which of your sessions is working, which is waiting for you, and which is idle, without switching to each one.
Status is most useful when you run many long-lived sessions at once, such as several coding agents. The Claude Code integration uses Session Status to show, tab by tab, whether Claude is thinking, waiting for your input, or done.
Setting a Session's Status
There are three ways to set a session's status. Each one can set the status text, the dot color, and the subtitle text color independently, and clearing a field removes just that piece.
Control Sequence
A program running in a session can set its own status with the OSC 21337 control sequence. The payload is a list of key=value pairs separated by semicolons:
OSC 21337 ; status=[text] ; indicator=[color] ; status-color=[color] ; detail=[text] ST
The keys are:
status: the subtitle text (for example,WorkingorWaiting).indicator: the color of the dot shown on the tab.status-color: the color of the subtitle text.detail: optional extra text shown alongside the status in the Session Status tool and the Cockpit.
Colors use xterm's format: either #RRGGBB or rgb:RR/GG/BB. Set any key to an empty value to clear it, and unknown keys are ignored. For example, to mark a session as working with an orange dot:
printf '\e]21337;status=Working;indicator=#ffa500\a'
And to clear everything:
printf '\e]21337;status=;indicator=;status-color=\a'
See Proprietary Escape Codes for the conventions used above.
The it2 Command Line
The it2 command-line tool sets the status of any session from a script:
it2 session set-status --session [id] --status Working --dot-color '#ffa500'
The options are --status (the status text, such as idle, working, or waiting), --dot-color and --text-color (each a #rrggbb value), and --detail (optional detail text). Pass an empty value to clear a field.
The Set Tab Status Trigger
A trigger can set the status when a session's output matches a regular expression. Add a Set Tab Status trigger in Settings > Profiles > Advanced > Triggers. It gives you a combo box for the status text (with Working, Waiting, and Idle as suggestions) plus two color wells, one for the dot color and one for the subtitle text color. This is handy for programs that don't set status themselves: match their output and label the tab automatically.
The Session Status Tool
The Session Status tool shows the status of every session in a window in one place. Add it with View > Toolbelt > Session Status (open the toolbelt first with View > Toggle Toolbelt if it isn't showing). Each row lists a session's name, its colored dot, its status text, and a keyboard shortcut that jumps to that session. Click a row to reveal the session it names. Rows are sorted by priority, so the sessions that need attention rise to the top; the default order is waiting, then working, then idle.
The tool's gear button opens a settings popover with:
- Show status in tab subtitle: turn this off to hide the status text on tabs while keeping the colored dot.
- Merge workgroup statuses: collapse every session in a Workgroup to a single representative row.
- A priority list you can edit to control which status keywords sort highest.
Right-click a row and choose Snooze to move it below a divider at the bottom of the list and dim it. A snoozed session automatically un-snoozes the next time its status changes, so you can quiet a session you're done with and still be shown when something new happens.
The bell button at the bottom of the tool arms notify-on-status-change. With a row selected it watches that session; with nothing selected it watches the whole window. The next time the target's status changes, iTerm2 shows an alert and disarms the bell.
Notify on Status Change
Window > Notify on Status Change (⇧⌘X) arms an alert for the current window. The next time any session in the window changes its status, iTerm2 shows a notification. The alert has a Reveal button that jumps straight to the session that changed. This is the menu-driven equivalent of the Session Status tool's bell, and the two stay in sync.
The Cockpit
The Cockpit is a floating panel that shows session status across every window at once, not just the front one. Open it with Window > Cockpit (⌥⇧⌘C). It floats above your terminal windows while iTerm2 is active and gets out of the way when you switch to another app.
The Cockpit organizes its list three ways, selectable from the toolbar:
- Status: grouped by window, then by state (Waiting, Working, Idle).
- Window: grouped by window, then by tab and split pane.
- Workgroup: only sessions that belong to a Workgroup, grouped by Workgroup.
A search field filters the list to sessions whose name matches what you type, keeping the grouping you chose. Click any row to jump to that session, tab, window, or Workgroup. The bell in the toolbar arms notify-on-status-change for the selected row, per window or per session, and armed rows show a bell so you can see at a glance what you're watching.
Tab Groups
Tab groups let you organize the tabs in a window the way Chrome and Firefox do. A named, colored chip heads each group, and its member tabs sit next to the chip in the tab bar. Use groups to keep related tabs together, tell projects apart at a glance, and tuck a set of tabs out of the way without closing them.
Creating a Group
Right-click a tab and choose Add Tab to Group > New Group…. iTerm2 asks for a name (it suggests the tab's current title) and gives the new group a color. The tab moves next to its new chip.
To add another tab to a group that already exists, right-click that tab and choose Add Tab to Group and then the group's name from the submenu. A checkmark marks the group the tab already belongs to. To take a tab back out, right-click it and choose Remove Tab from Group.
The members of a group always stay contiguous in the tab bar, so adding a tab from elsewhere moves it next to the rest of the group.
Managing a Group
Right-click a group's chip to act on the whole group:
- Rename Group… changes its name.
- The color swatches just below Rename recolor the group; pick a preset or open the full color picker.
- Duplicate Group makes a copy of the group and its tabs.
- Move Group to New Window tears the whole group off into its own window.
- Remove All Tabs from Group ungroups the tabs, leaving them in place without a chip.
- Close Group closes every tab in the group.
You can rearrange groups by dragging. Drag a chip to move the entire group within its window or into another window. Drag a single tab to move it around inside its group, into a different group, or out of a group entirely. A tab dragged out of the tab bar into empty space becomes an ungrouped tab in a new window.
Collapsing a Group
Click a group's chip (or choose Collapse Group from its menu) to hide the group's tabs behind the chip. The chip then shows how many tabs it holds. Click the chip again, or choose Expand Group, to bring the tabs back. Collapsing and expanding are animated.
Selecting a tab that lives in a collapsed group automatically expands the group, so the active tab is never hidden. For the same reason, a group cannot collapse when it is the only group of tabs in the window.
Collapsing works on both horizontal and vertical tab bars and in every theme.
Persistence
A group carries its name and color with its member tabs, so the grouping survives everything that saves and restores windows, including window arrangements and restart. A group's collapsed or expanded state persists across restarts as well.
Utilities
iTerm2 has a collection of shell scripts that help you take advantage of some of its unique features. When you install Shell Integration from the iTerm2 > Install Shell Integration menu, you're asked if you'd like to install the Utilities Package as well. This page describes these utilities.
If you prefer to install only the utilities (without also installing Shell Integration) you can find them here. Most of the utilities work without Shell Integration.
Components
The Utilities Package contains the following programs:
imgcat
The imgcat program displays images inline in your terminal.

It supports all standard image formats, including animated GIFs.
Usage:
imgcat filename [filename...]

or

cat image | imgcat
imgls
Lists the files in a directory with thumbnail previews for images.
Usage:
imgls [filename...]
it2
it2 is a command-line tool that lets you drive iTerm2 from the shell. It is installed automatically wherever Shell Integration loads, so it is on your PATH without any extra setup.
With it2 you can create windows, tabs, and split panes, send text to sessions, run commands, manage profiles, set a session's status, monitor iTerm2 for events, and more.
Usage:
it2 subcommand [options]
The available subcommands are:
alias          Execute an alias from the config file.
app            Control the iTerm2 application.
auth           Manage authentication with iTerm2.
clear          Shortcut for 'it2 session clear'.
config-path    Show the configuration file path.
config-reload  Reload the configuration file.
load           Load a custom profile from the config file.
ls             Shortcut for 'it2 session list'.
monitor        Monitor iTerm2 events.
new            Shortcut for 'it2 window new'.
newtab         Shortcut for 'it2 tab new'.
profile        Manage iTerm2 profiles.
run            Shortcut for 'it2 session run'.
send           Shortcut for 'it2 session send'.
session        Manage iTerm2 sessions.
set-status     Shortcut for 'it2 session set-status'.
split          Shortcut for 'it2 session split'.
tab            Manage iTerm2 tabs.
vsplit         Shortcut for 'it2 session split --vertical'.
window         Manage iTerm2 windows.
Run it2 --help, or it2 help subcommand, for details on any of these.
it2 also works over SSH Integration. When you run it on a host you reached through iTerm2's SSH integration, its requests are routed back to your local iTerm2 and run there. This is gated by a per-session permission: the first time a remote it2 command tries to control iTerm2 you are asked to allow it. The Shell > SSH > Remote host can control iTerm2 menu item toggles this permission and shows a checkmark while it is granted.
it2attention
Requests attention. Can bounce the dock icon or show a fireworks animation at the cursor position.
Usage:
it2attention start
  Begin bouncing the dock icon if another app is active
it2attention stop
  Stop bouncing the dock icon if another app is active
it2attention fireworks
  Show an explosion animation at the cursor
it2check
Checks if the terminal emulator is iTerm2.
Example:

it2check && echo This is iTerm2 || echo This is not iTerm2
it2copy
Copies text to the pasteboard. Works over ssh. Accepts either standard input or a named file.
Examples:

cat file.txt | it2copy
it2copy file.txt
For this to work you must enable Prefs > General > Applications in terminal may access clipboard.
it2dl
The it2dl program downloads files. This is useful when you are ssh'ed to a remote host.
Usage:
it2dl filename
In iTerm2 3.7 and later, a terminal-initiated download asks whether to save the file to your Downloads folder or to choose a destination with a save panel. This prompt is silenceable: you can make it always save to Downloads or always show a save panel.
it2getvar
Fetches a session variable. For a list of session variables, see the Badges page.
Example:

it2getvar session.name
it2setcolor
Configures iTerm2's colors.
Usage

1) To set a specific color to an RGB value:
  it2setcolor name color [name color...]
For example:
  it2setcolor fg fff

name is one of:
  fg bg bold link selbg selfg curbg curfg underline tab
  black red green yellow blue magenta cyan white
  br_black br_red br_green br_yellow br_blue br_magenta br_cyan br_white

color is of the format:
  RGB        (three hex digits, like fff)
  RRGGBB     (six hex digits, like f0f0f0)
  cs:RGB     (cs is a color space name)
  cs:RRGGBB  (cs is a color space name)

  The color space names accepted in the color are:
    srgb       (sRGB, the default if none is specified)
    rgb        (Apple's old device-independent colorspace)
    p3         (Apple's fancy large-gamut colorspace)

2) To switch to a named color preset:
  it2setcolor preset name
For example:
  it2setcolor preset 'Light Background'

3) To reset the current tab's color to the system default:
  it2setcolor tab default
it2setkeylabel
Configures touch bar function key labels.
Usage:
   it2setkeylabel set Fn Label
     Where n is a value from 1 to 20
   it2setkeylabel set status Label
     Sets the Touch Bar "status" button's label
   it2setkeylabel push [name]
     Saves the current labels with an optional name. Resets labels to their default value, unless name begins with a . character.
   it2setkeylabel pop [name]
     If name is given, all key labels up to and including the one with the matching name are popped.
Recommended usage for customizing an application is to set key labels and then push with a name of a concatenation of the app's name (e.g., "emacs") and a random number. When the app exists, pop to that same name.
it2ul
Uploads a file. Works over ssh.
Usage: it2ul [destination [tar flags]]
  If given, the destination specifies the directory to place downloaded files.
  Further options are passed through to tar. See your system's manpage for tar for details.
If used without arguments, the file goes to the current directory. When you run this, you'll be prompted to select one or more files. Next, iTerm2 creates a tar.gz file containing those files and base-64 encodes them. The it2ul script receives it, decodes it, and untars it with -xzfC. Any arguments you provide go after a lone - argument,
it2universion
Sets the unicode version for the current session. The key difference is that unicode 8 and unicode 9 use different width tables for emoji. Most apps aren't updated to use the unicode 9 tables, but Unicode 9 produces nicer results with fewer overlapping characters.
Usage:
  it2universion set 8
  it2universion set 9
  it2universion push [name]
     Saves the current version with an optional name.
  it2universion pop [name]
     If name is given, all versions up to and including the one with the matching name are popped.
Location
The Utilities Package places shell scripts in $HOME/.iterm2/ and creates aliases to them at the bottom of $HOME/.iterm2_shell_integration.$SHELL.
Claude Code Integration
The Claude Code integration connects Anthropic's Claude Code CLI with iTerm2. Once you set it up, iTerm2 shows each Claude session's state (working, waiting, or idle) in the Session Status tool, and a ready-made Workgroup puts your Claude conversation, a diff viewer, and a code-review session a single click apart.
The integration is optional, and you can undo it as easily as you install it. It lists everything it changes up front, and iTerm2 > Uninstall Claude Code Integration reverses all of it.
Requirements
You need the Claude Code CLI installed and runnable as claude. The integration uses iTerm2's Python API to convey each session's status to iTerm2 and to add Code Review findings to the Workgroup's shared Clippings panel, so the installer offers to turn the Python API on if it is not already on.
Installing
Select iTerm2 > Install Claude Code Integration to open the setup window. It opens with a summary of everything it will change, and walks you through the steps one at a time. Each step is optional except enabling the Python API.
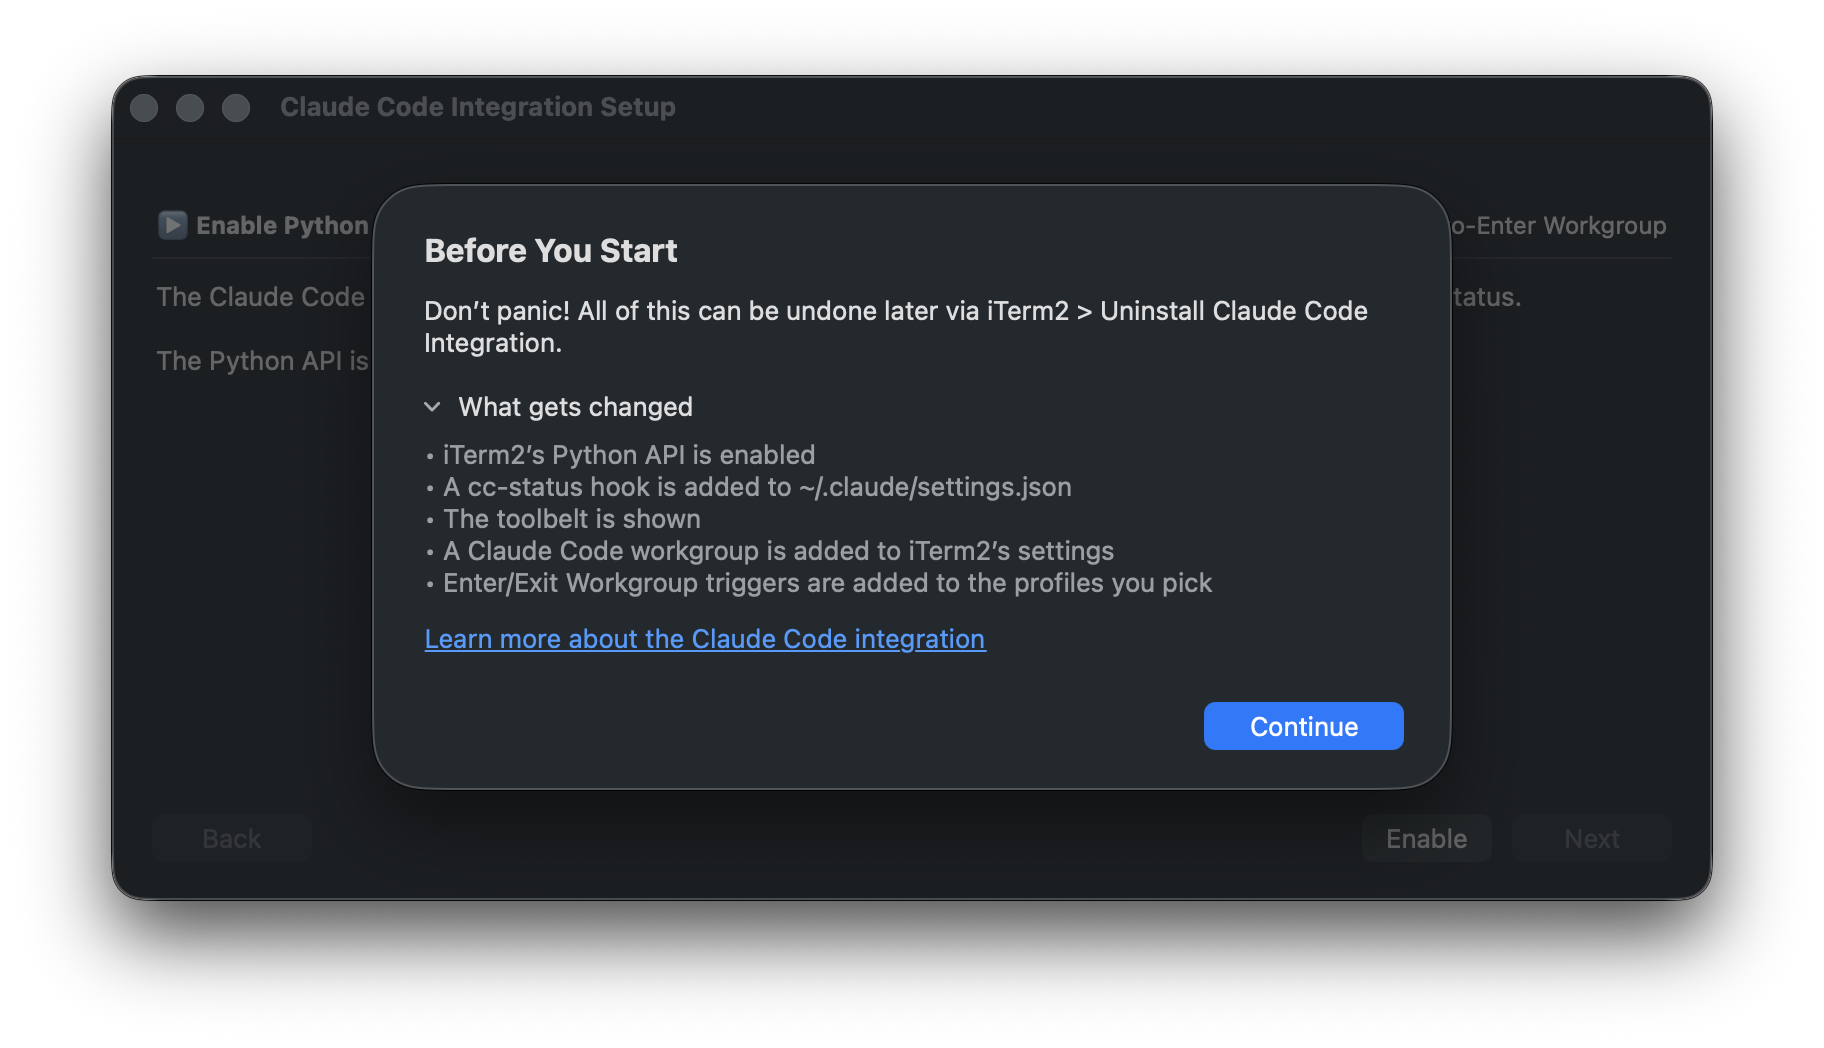
The installer performs the following actions:
- Enables the Python API.
- Adds hooks to
~/.claude/settings.jsonthat report status updates to iTerm2. - Shows the toolbelt and enables the Session Status tool.
- Adds a Claude Code Workgroup to iTerm2's settings.
- Adds Enter/Exit Workgroup triggers to the profiles you pick.
Enable Python API
The integration relies on it to convey Claude's status to iTerm2 and to share Code Review findings through the Clippings panel, so setup can't continue until you enable it. macOS asks you to confirm before the API turns on.
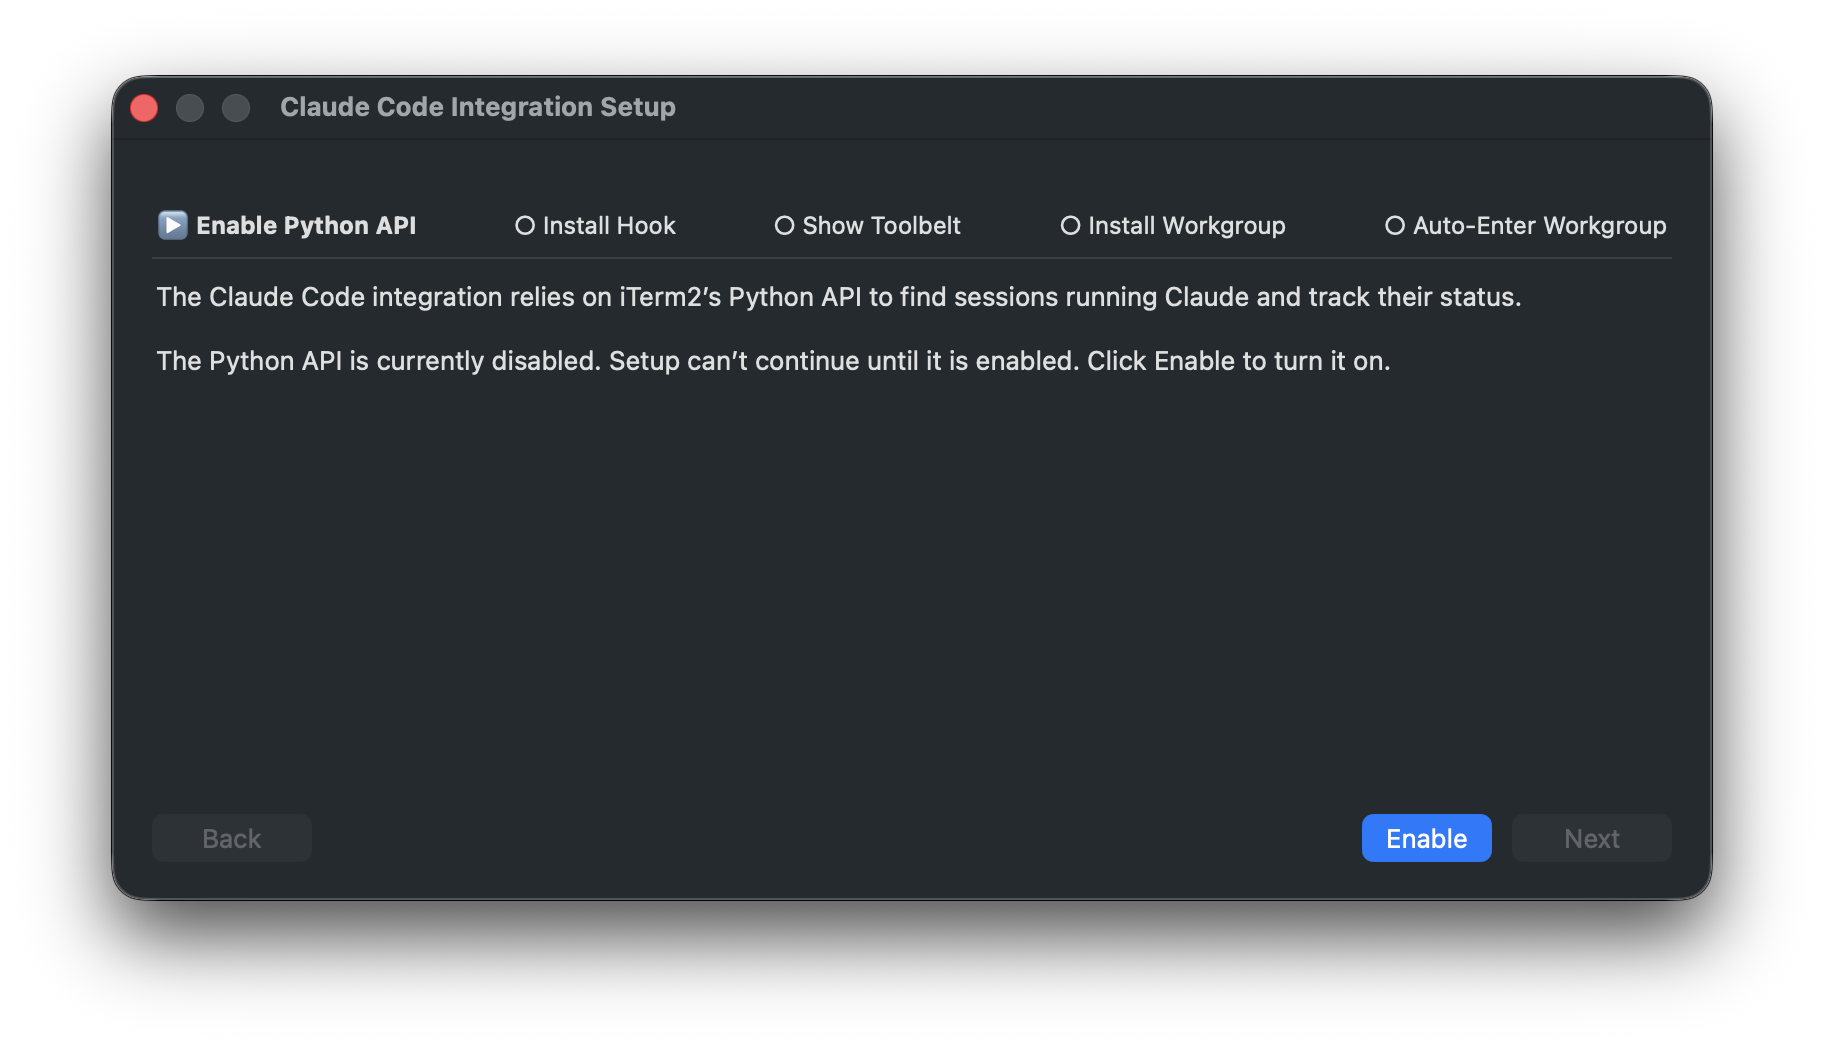
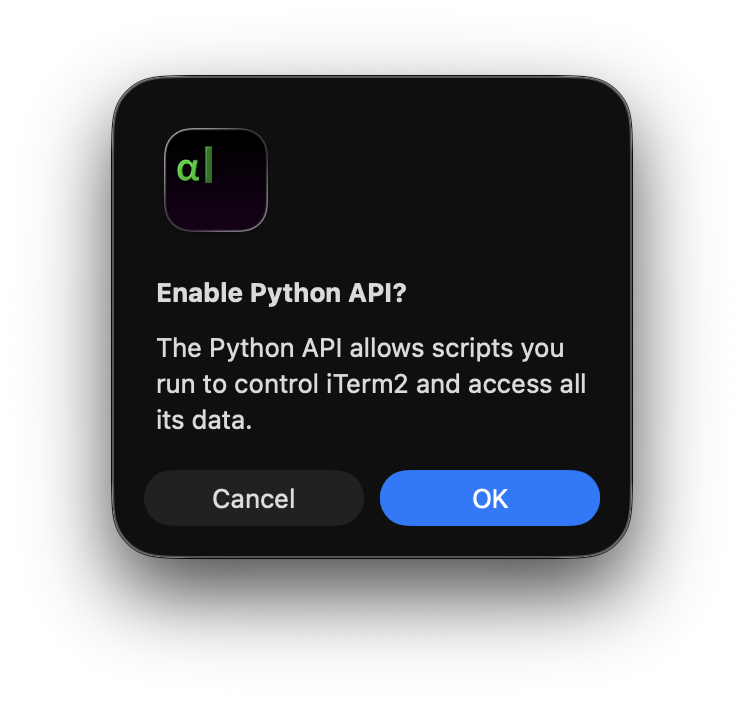
Install Hook
Adds hooks to your Claude Code settings (~/.claude/settings.json) that run automatically as Claude works. The hook is what lets iTerm2 detect Claude's state (busy/working/idle) and show it in the Session Status tool. The hook points at a stable location inside iTerm2's configuration directory, so upgrading or moving iTerm2 does not break it.
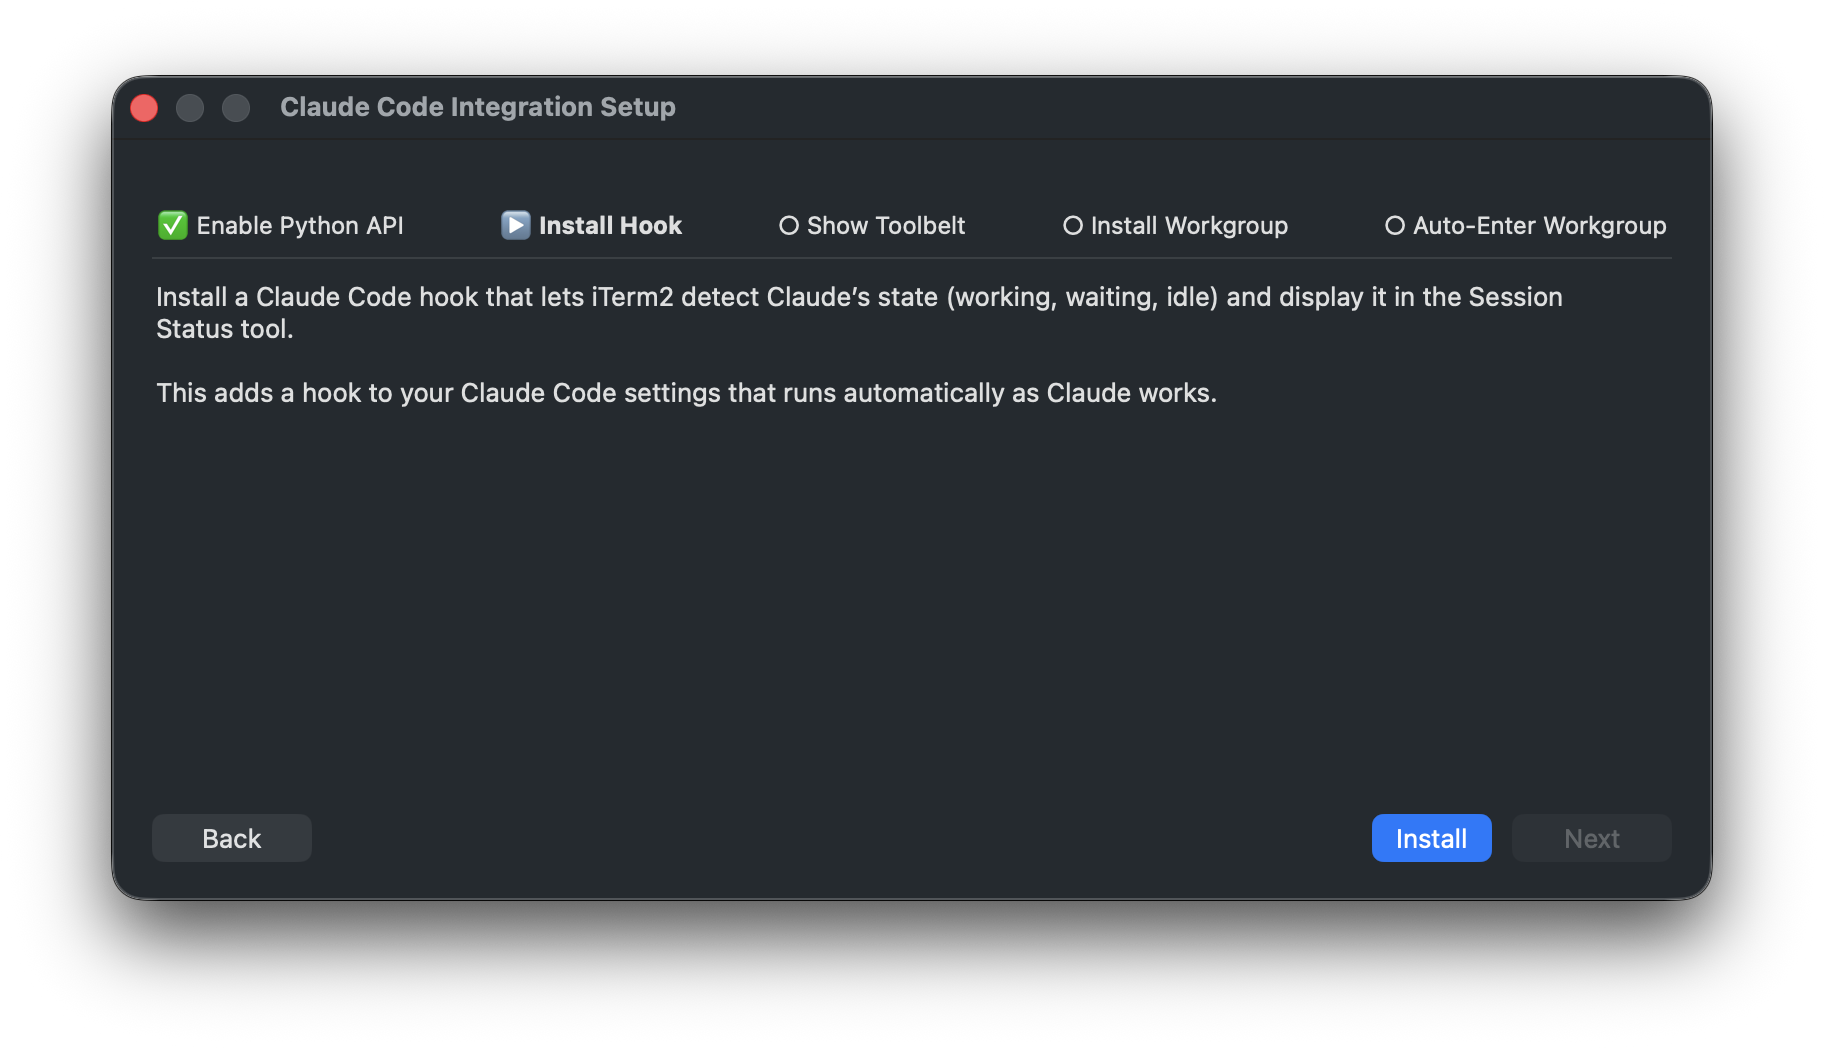
Show Toolbelt
Shows the toolbelt (on the right side of the window) and enables the Session Status tool. You can toggle the toolbelt at any time from View > Toolbelt > Show Toolbelt or with ⌘⇧B.
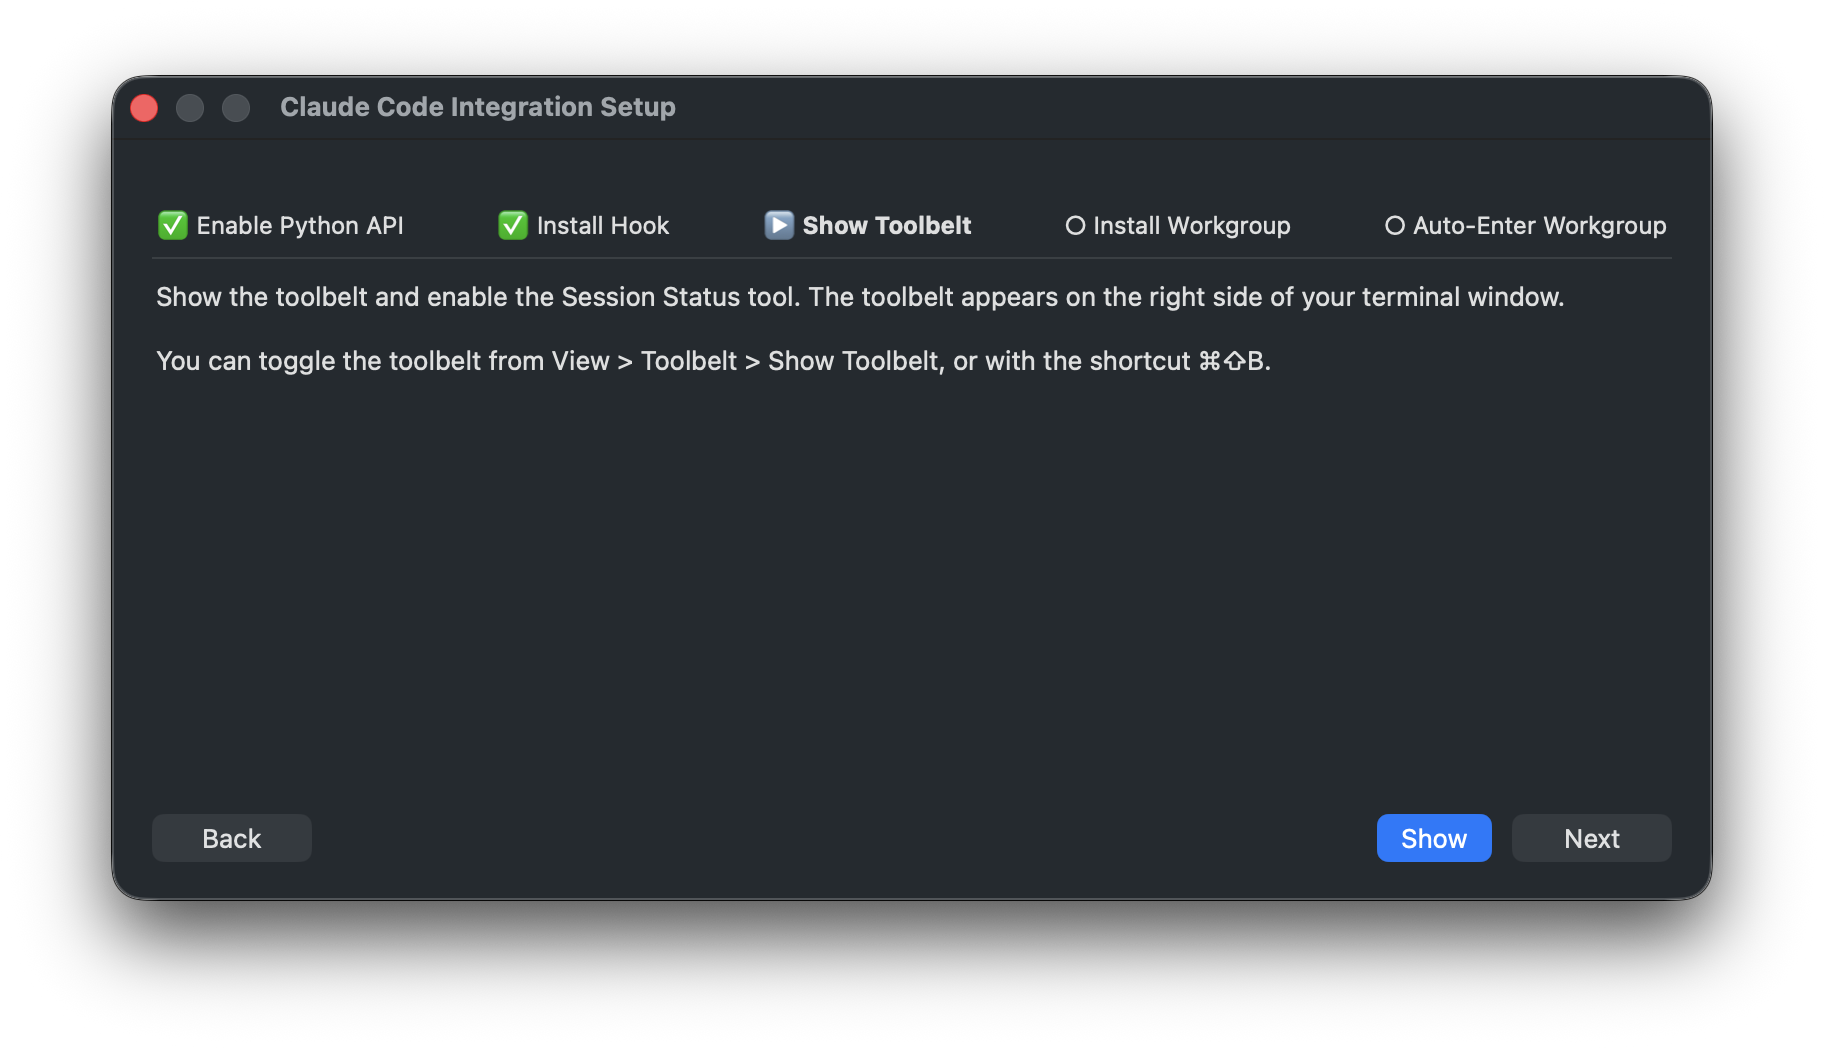
Install Workgroup
Adds the Claude Code Workgroup to your settings. See The Claude Code Workgroup below. You can customize the layout afterward in Settings > Arrangements > Workgroups.
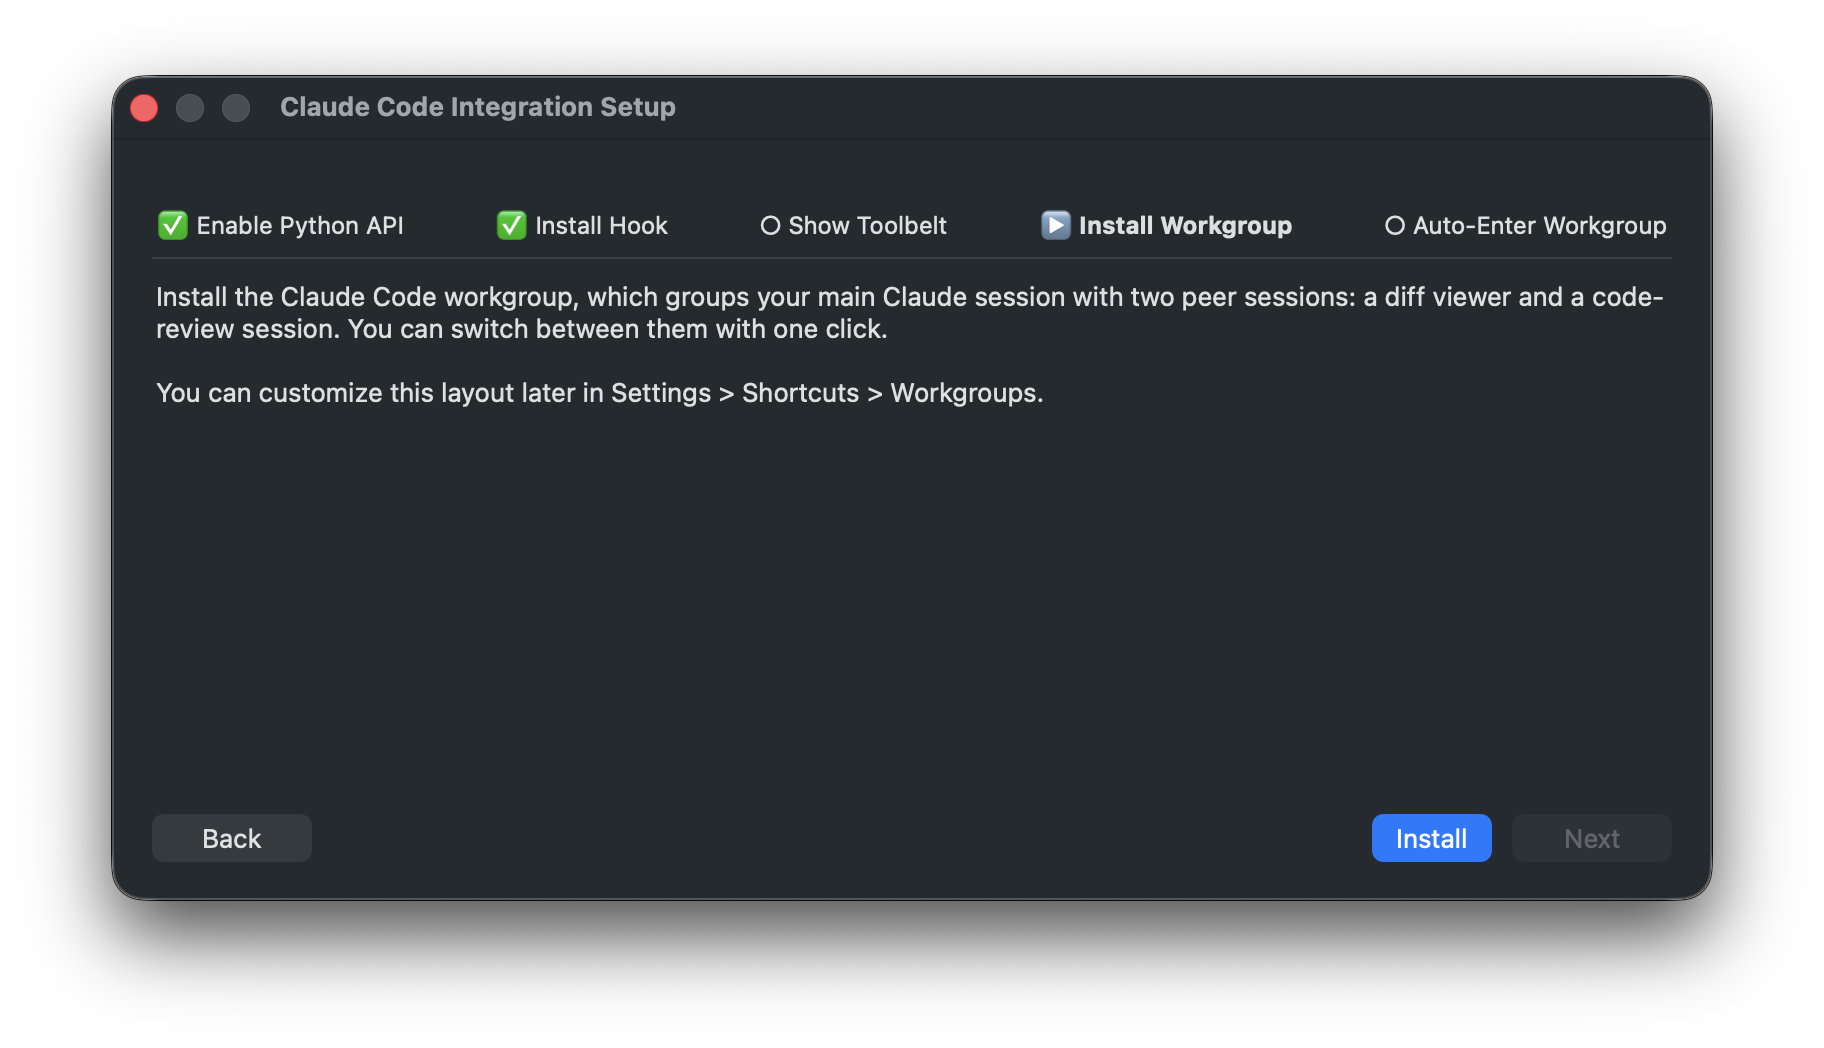
Auto-Enter Workgroup
Lets you pick the terminal profiles you run claude in. iTerm2 adds triggers to each one so it enters the Workgroup automatically when claude starts and exits when the main session's claude stops. This step is optional; you can always enter the Workgroup by hand from Shell > Workgroups > Claude Code. For how these triggers behave at runtime, see Entering the Workgroup Automatically below.
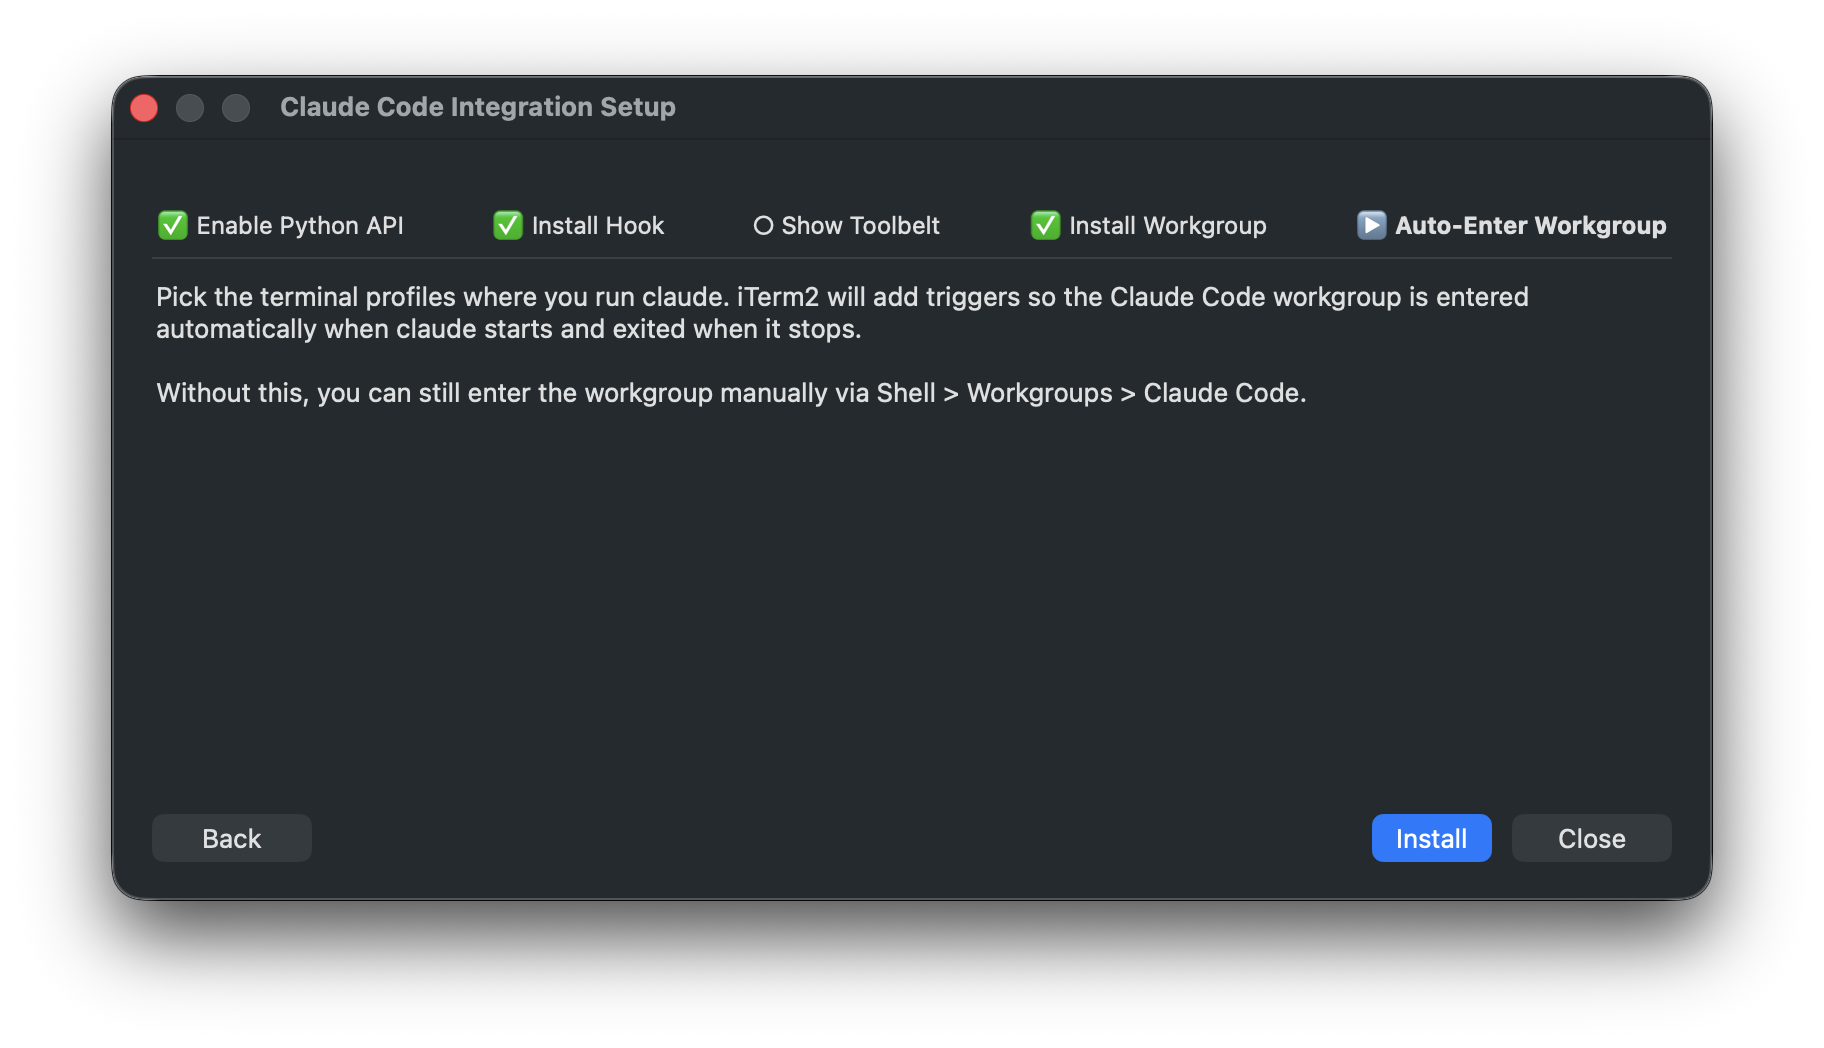
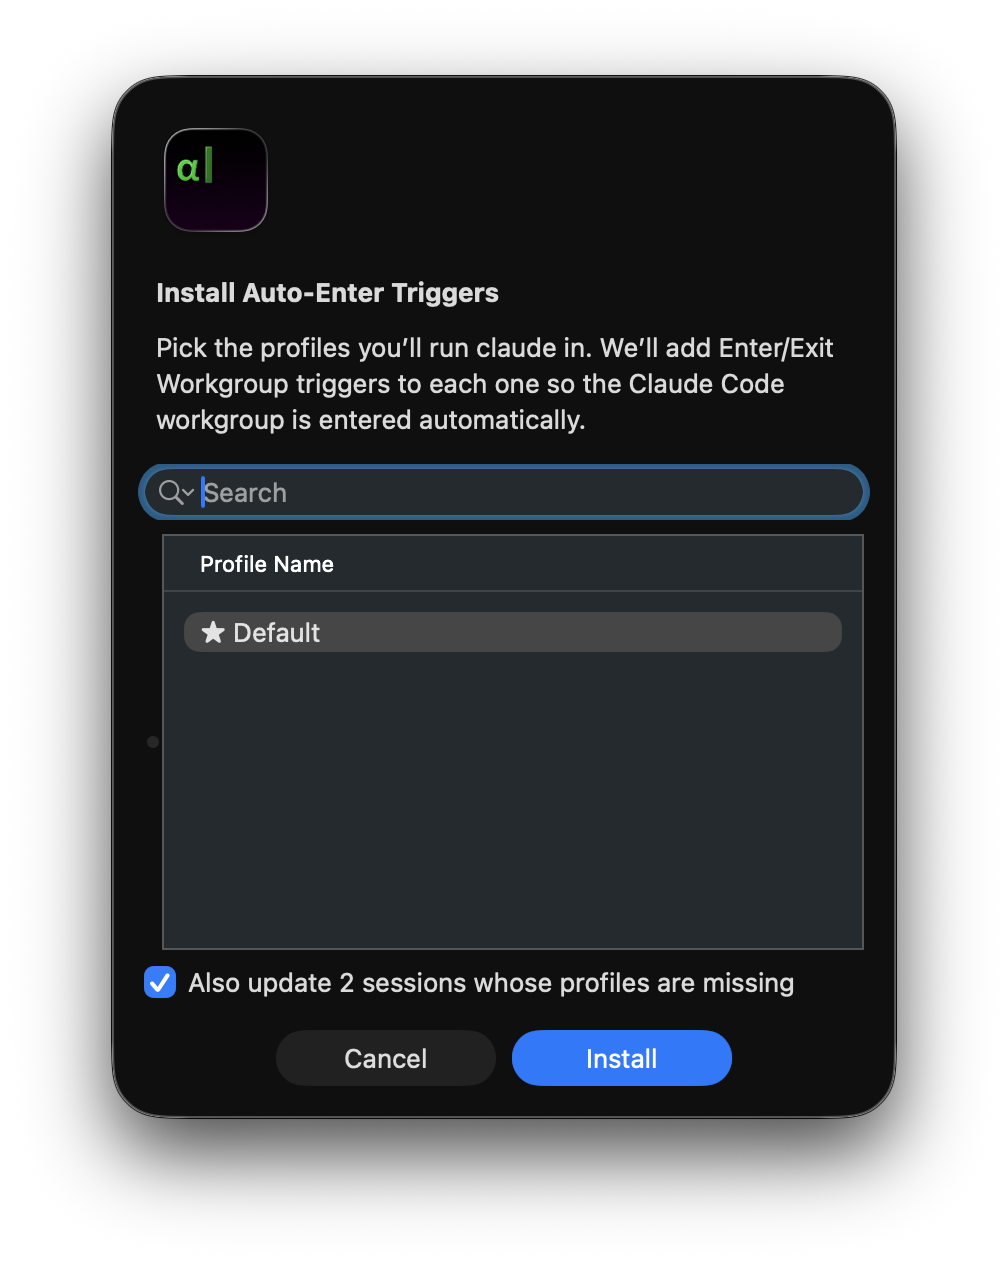
Session Status
The Session Status tool in the toolbelt lists your sessions with the status each one reports. Show it with View > Toolbelt > Session Status (the installer does this for you). For Claude, the cc-status hook keeps it current automatically, so each session shows a colored dot and a label for its state:
- working while Claude is running a prompt or a tool
- waiting when Claude needs your input, for example to approve a permission request
- idle when Claude has finished and is waiting for your next message
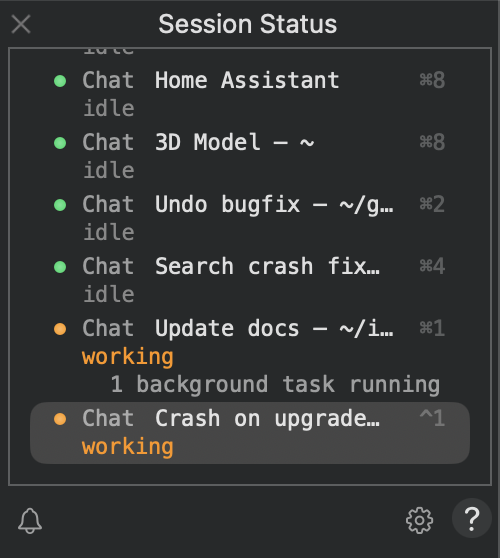
With a recent version of Claude Code, a session stays working while background agents or background tasks it launched are still running, even when the main conversation is momentarily idle between them. This keeps watchers from firing during the lulls between subagent phases; the session only becomes idle once the background work is actually done.
A row may also show a short detail line, such as the tool a permission request is for or a snippet of Claude's last message. The tool sorts sessions by priority, so the ones that need attention rise to the top. Click a row to jump to that session.
The Claude Code Workgroup
A Workgroup defines how to build a set of related sessions from a single one. Entering the Claude Code Workgroup creates two Peers alongside your main Claude session:
- Chat is your main Claude conversation.
- Diff shows a side-by-side view of your working-tree changes.
- Code Review is a dedicated session for reviewing changes.
Switch between the Peers with one click using the Workgroup's toolbar, and customize the whole layout (commands, toolbar items, additional Peers) in Settings > Arrangements > Workgroups. Workgroups are a general iTerm2 feature; the Claude Code Workgroup is just a preset the installer adds as ordinary, editable settings. To learn what else Workgroups can do, see the Workgroups documentation.
Entering the Workgroup Automatically
If you installed the Auto-Enter Workgroup triggers, iTerm2 enters the Workgroup for you whenever claude starts in one of the profiles you chose, and exits it when the main session's claude stops. The triggers filter on the claude job, so they don't fire for anything else. The Exit trigger is leader-only: only the main (leader) session's claude ending tears the Workgroup down, so ending or reloading claude in a Peer like the Diff or Code Review session leaves the rest of the Workgroup intact.
To enter the Workgroup by hand at any time, use Shell > Workgroups > Claude Code. To leave it, use Shell > Workgroups > Exit Workgroup.
Trying It Out First
When Claude Code is running in a session and you have not set up the integration yet, iTerm2 offers a one-time banner: "Claude Code is running. Want to try the Claude Code integration?" Click Try It Now to enter the Workgroup on the spot (the entry is temporary and ends when Claude stops), or Don't Show Again to dismiss the offer for good. Installing the integration from the menu makes the Workgroup permanent.
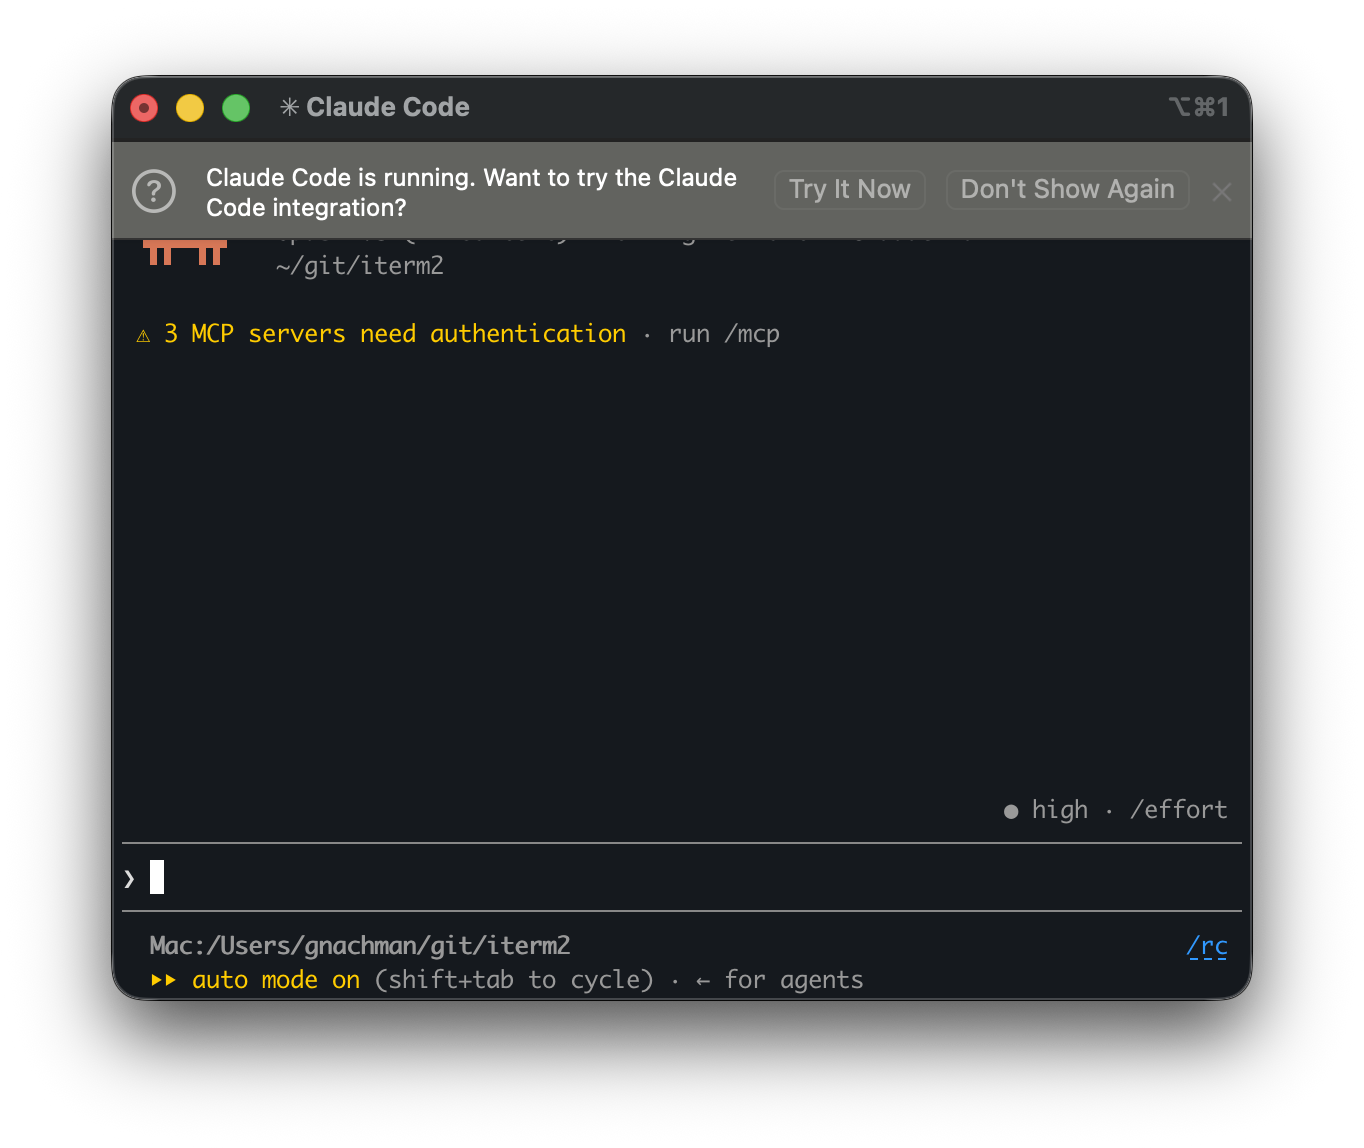
Repairing a Broken Installation
Claude Code occasionally rewrites ~/.claude/settings.json and can drop the cc-status hook. If that happens after you have set the integration up, iTerm2 notices the next time Claude runs and offers to reinstall the hook so the status indicators keep working. Choose Reinstall to reopen the setup window, or Not Now to dismiss. You can also reinstall at any time from iTerm2 > Reinstall Claude Code Integration.
Uninstalling
Select iTerm2 > Uninstall Claude Code Integration. This removes the cc-status hook from ~/.claude/settings.json, the Claude Code Workgroup from your settings, and the Enter/Exit Workgroup triggers from every profile.
If the Python API is enabled, iTerm2 asks whether to leave it on, since other scripts or integrations may now depend on it. You can reinstall the integration any time from iTerm2 > Install Claude Code Integration.
Companion App
iTerm2 Buddy is an iOS app that pairs with your Mac so you can interact with iTerm2 from your phone. Once paired, you can carry on an AI chat and receive terminal alerts on your iPhone, even when the two devices are on different networks.
Pairing
To pair a device, choose iTerm2 > Companion Device Settings. The first time you set this up, iTerm2 opens a guided wizard, Set Up a Companion Device, that walks you through the whole process:
- It installs the AI and companion plugins and turns on both features. (After this, iTerm2 can send data off the Mac, but only with your explicit consent.)
- It takes your AI provider and API key.
- It helps you install iTerm2 Buddy on your iPhone.
- It shows a pairing QR code. On your phone, open iTerm2 Buddy, tap Scan, and point the camera at the code.
- It asks you to confirm a 6-digit code shown on your phone, which verifies that you are pairing with your own device.
Once you have paired before, choosing Companion Device Settings opens the settings window directly instead of the wizard.
Paired devices connect through a relay, so they can reach each other even when the Mac and phone are on different networks. The connection is end-to-end encrypted over a Noise channel, so your data is visible only to your own devices and not to the relay.
Push Notifications
The Companion app can receive push notifications for terminal alerts. To enable this for a profile, open Settings > Profiles > Terminal, click Filter Alerts, and turn on Send alerts to paired iPhone. With this on, the profile's "alert on next mark" and Post Notification triggers also notify your phone. See Terminal profile settings for the alert options this filters.
These pushes are content-free: the notification that travels through the relay and Apple's servers carries no message text. Instead, it wakes the phone, which then fetches the alert text over the encrypted Noise channel. As a result, neither the relay nor Apple sees the content of your alerts.
Live Session Video
The Companion app can show a live video feed of a session. The feed's bitrate scales with the window's resolution, so quality tracks the size of the window rather than being pinned to a fixed rate.
Muting
You can mute a chat from iTerm2 Buddy. A muted chat sends no push notifications, and its messages are withheld from the phone, until you unmute it.
Workgroups
A Workgroup is a set of related sessions that iTerm2 builds from a single one. You define the layout once; entering the Workgroup spawns all of its sessions at once, and exiting it closes them again and leaves your original (main) session running. Each session can run its own command and carry its own toolbar.
Workgroups grew out of a specific problem. Running a coding assistant like Claude Code, I wanted two companion sessions beside it: one showing a live diff of my changes, and one for code review. Setting that up by hand every time, splitting panes or juggling tabs and keeping them together as you work, is clumsy. A Workgroup lets you define that layout once and summon the whole set on demand (or automatically, with a trigger). The related sessions always travel with your main one and stay a keystroke away.
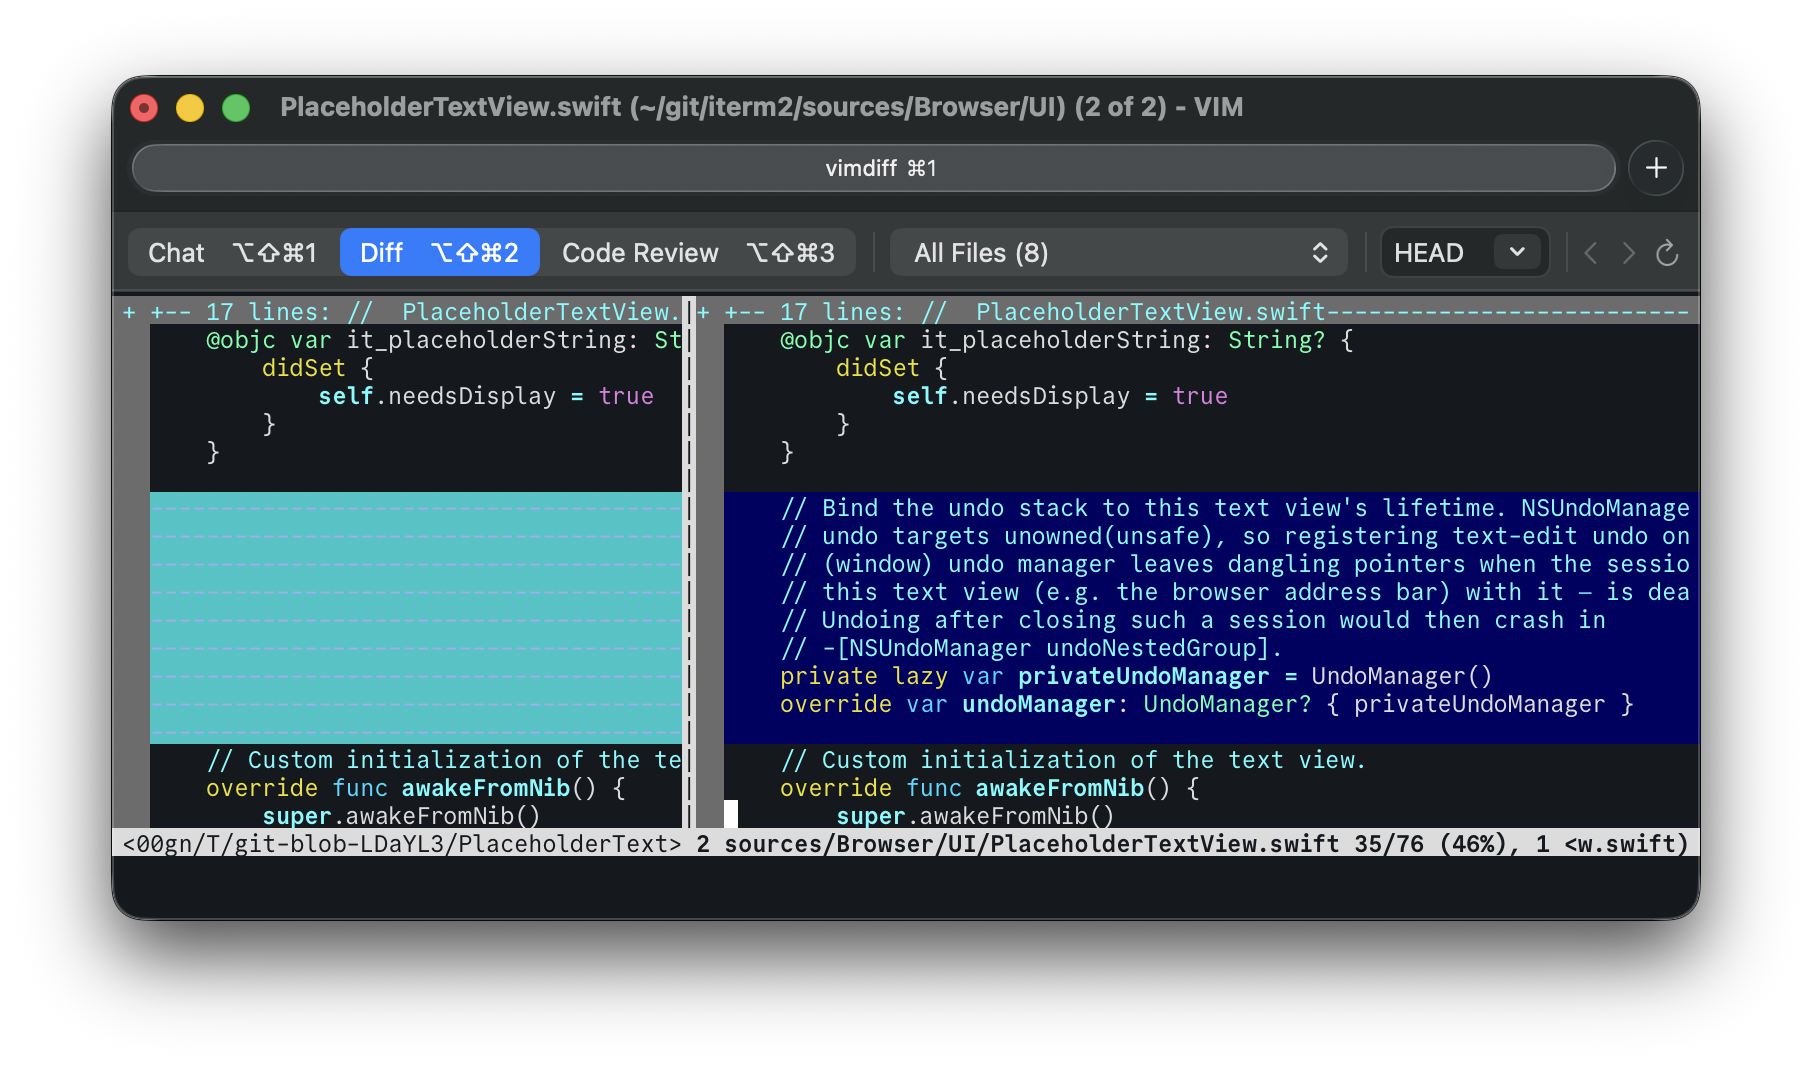
Peers are the key idea
The one concept to understand first is the Peer, because it does not behave like a tab.
Peers are several sessions that share a single pane, as though they were tabs living inside that one pane. Only one Peer is visible at a time; you switch among them in place, instantly, without opening a new tab or disturbing any other pane. That is the whole point: your diff and code-review sessions stay one keystroke away in the exact same spot, instead of scattered across the tab bar.
The main session and its Peers occupy the same pane and share one toolbar. That toolbar has a row of buttons, one per Peer, for switching among them.

Peers are not macOS tabs and not the Workgroup's own Tabs (described below). If you press ⌘T, you get an ordinary new tab that is not part of the Workgroup. Peers are added when you define the Workgroup, not on the fly.
How a Workgroup is Built
Every Workgroup has one main session: the session you are in when you enter the Workgroup. To it you can add any number of related sessions of three kinds:
Peers
Multiple sessions sharing one pane, switched in place (see above). Peers are the heart of the feature. Each Peer has a name, which labels its switch button.
Splits
An independent pane that sits alongside its parent. You choose its orientation (vertical or horizontal), which side it goes on, and how much of the parent's area it takes.
Tabs
A new tab that opens when you enter the Workgroup. Like splits, each tab is an independent session with its own toolbar.
Entering and Leaving a Workgroup
To enter a Workgroup by hand, choose it from Shell > Workgroups. Entering spawns the Workgroup's Peers, splits, and tabs and wires up the toolbars. The session you were in becomes the main session.
The Workgroup you are currently in is marked with a checkmark in this menu, so you can always tell which one is active.
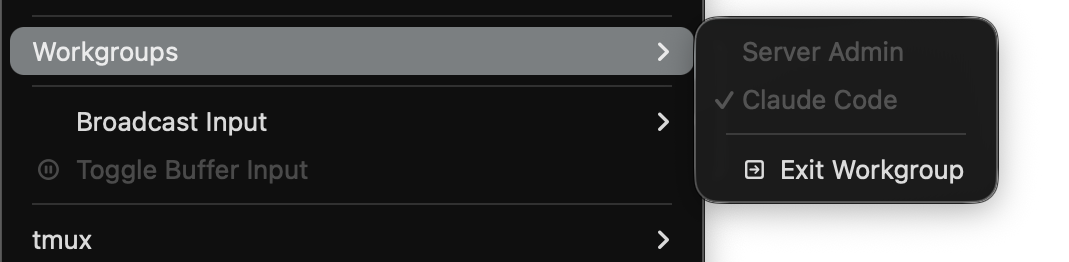
To leave, select Shell > Workgroups > Exit Workgroup. This closes the sessions the Workgroup created and returns the main session to its normal toolbar. The main session itself keeps running.
You can also enter and exit automatically using triggers (see Automatic Entry with Triggers below).
Switching Between Peers
When a Workgroup has Peers, its toolbar shows a Peer switcher: a row of buttons, one per Peer. Click a Peer's button to switch to it. If you prefer the keyboard:
⌥⇧⌘1through⌥⇧⌘8activate the first eight Peers (⌥⇧⌘9activates the last Peer when there are nine or more).- Window > Select Split Pane > Previous Peer (
⌥⌘[) and Next Peer (⌥⌘]) step through the Peers in order.
Each Peer can also define its own custom shortcut in place of the default.
Toolbars
Every session in a Workgroup, the main session and its Peers, splits, and tabs alike, has its own toolbar, and that toolbar can hold tools specific to that session's purpose. A session's toolbar always shows its name automatically. You build each session's toolbar from these items:
Peer Mode Switcher
The row of buttons, one per Peer, for switching between them (shown above). It only appears on Peer toolbars.
Git Status
Shows the working directory's current git status and updates it live.
Changed File Selector
A popup of the files that have changed. Picking one runs that session's per-file command, for example to show the diff of just that file.
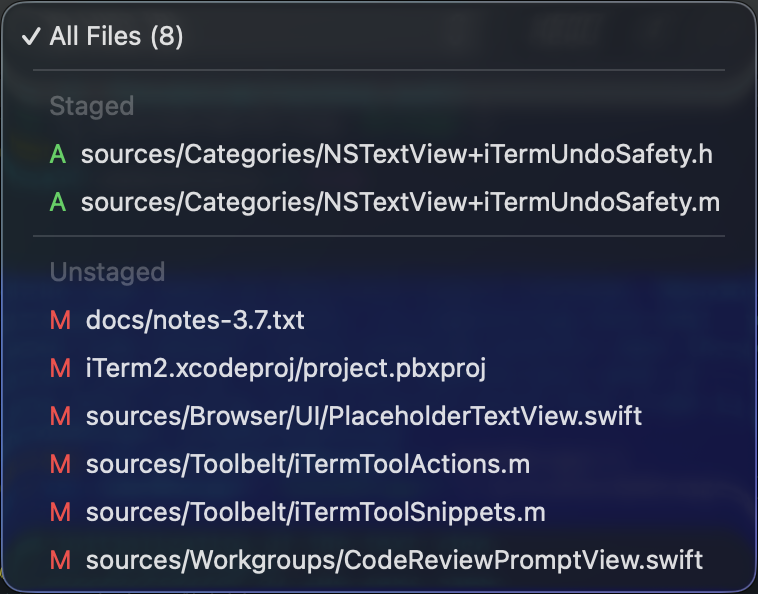
Git Base Selector
Chooses the git revision to diff against. It defaults to HEAD, and commands can read the chosen value as the gitBase variable.
Navigation Buttons
Back and forward buttons for stepping through the changed-file list. Each has an optional keyboard shortcut.

Reload
A standalone reload button, with an optional keyboard shortcut.

Auto-Send Clippings When Idle
A toggle offered on Code Review sessions (off by default). When on, the review session's Clippings are sent to the Workgroup's main session each time the review session goes idle.

Auto-Request Review When Idle
A toggle offered on the main session (off by default). When on, a review is automatically requested from the Workgroup's code-review session each time the main session goes idle. It requires the Workgroup to have exactly one code-review session.

Spacer
Flexible whitespace for arranging the other items.
Session Modes
Each session in a Workgroup runs in one of three modes:
Regular
Runs its command immediately when you enter the Workgroup. This is the default.
Diff
Waits until there are pending changes in the working directory before running its command. This avoids launching a diff tool against a clean tree. As soon as changes appear, the command runs.
Code Review
Shows a prompt overlay before the command runs. You type a free-form instruction (or pick a saved one from the Prompts menu) and click Start. iTerm2 exposes the text you enter to the command as the codeReviewPrompt variable, so the session can pass it to whatever program it launches. A companion variable, codeReviewSystemPrompt, holds a reusable system prompt that shapes how the review is conducted; you can edit it in Settings > General > AI > Prompts > Code Review System Prompt. The Claude Code Workgroup uses this mode to hand your review request to Claude, passing your instruction as the prompt and the system prompt through Claude's --append-system-prompt option.
A Code Review session can also add items to the Clippings panel, which every session in the Workgroup shares. This is how you pass comments from the review to a coding-assistant session: the review adds its findings as Clippings, and the other sessions in the Workgroup see the same panel.
Configuring Workgroups
Open Settings > Arrangements > Workgroups. The left side lists your Workgroups; use + and - to add or remove them, and the Add Preset popup to start from a built-in template (see Presets).
Select a Workgroup to edit it in the middle, where its sessions appear as the buttons above a layout preview. Select a session to configure it on the right. The settings available depend on the session: the main session has only a name, shortcut, and toolbar items (its command is whatever you were already running when you entered), while an added Peer also has a profile, mode, and command.
The main session, here named "Chat".
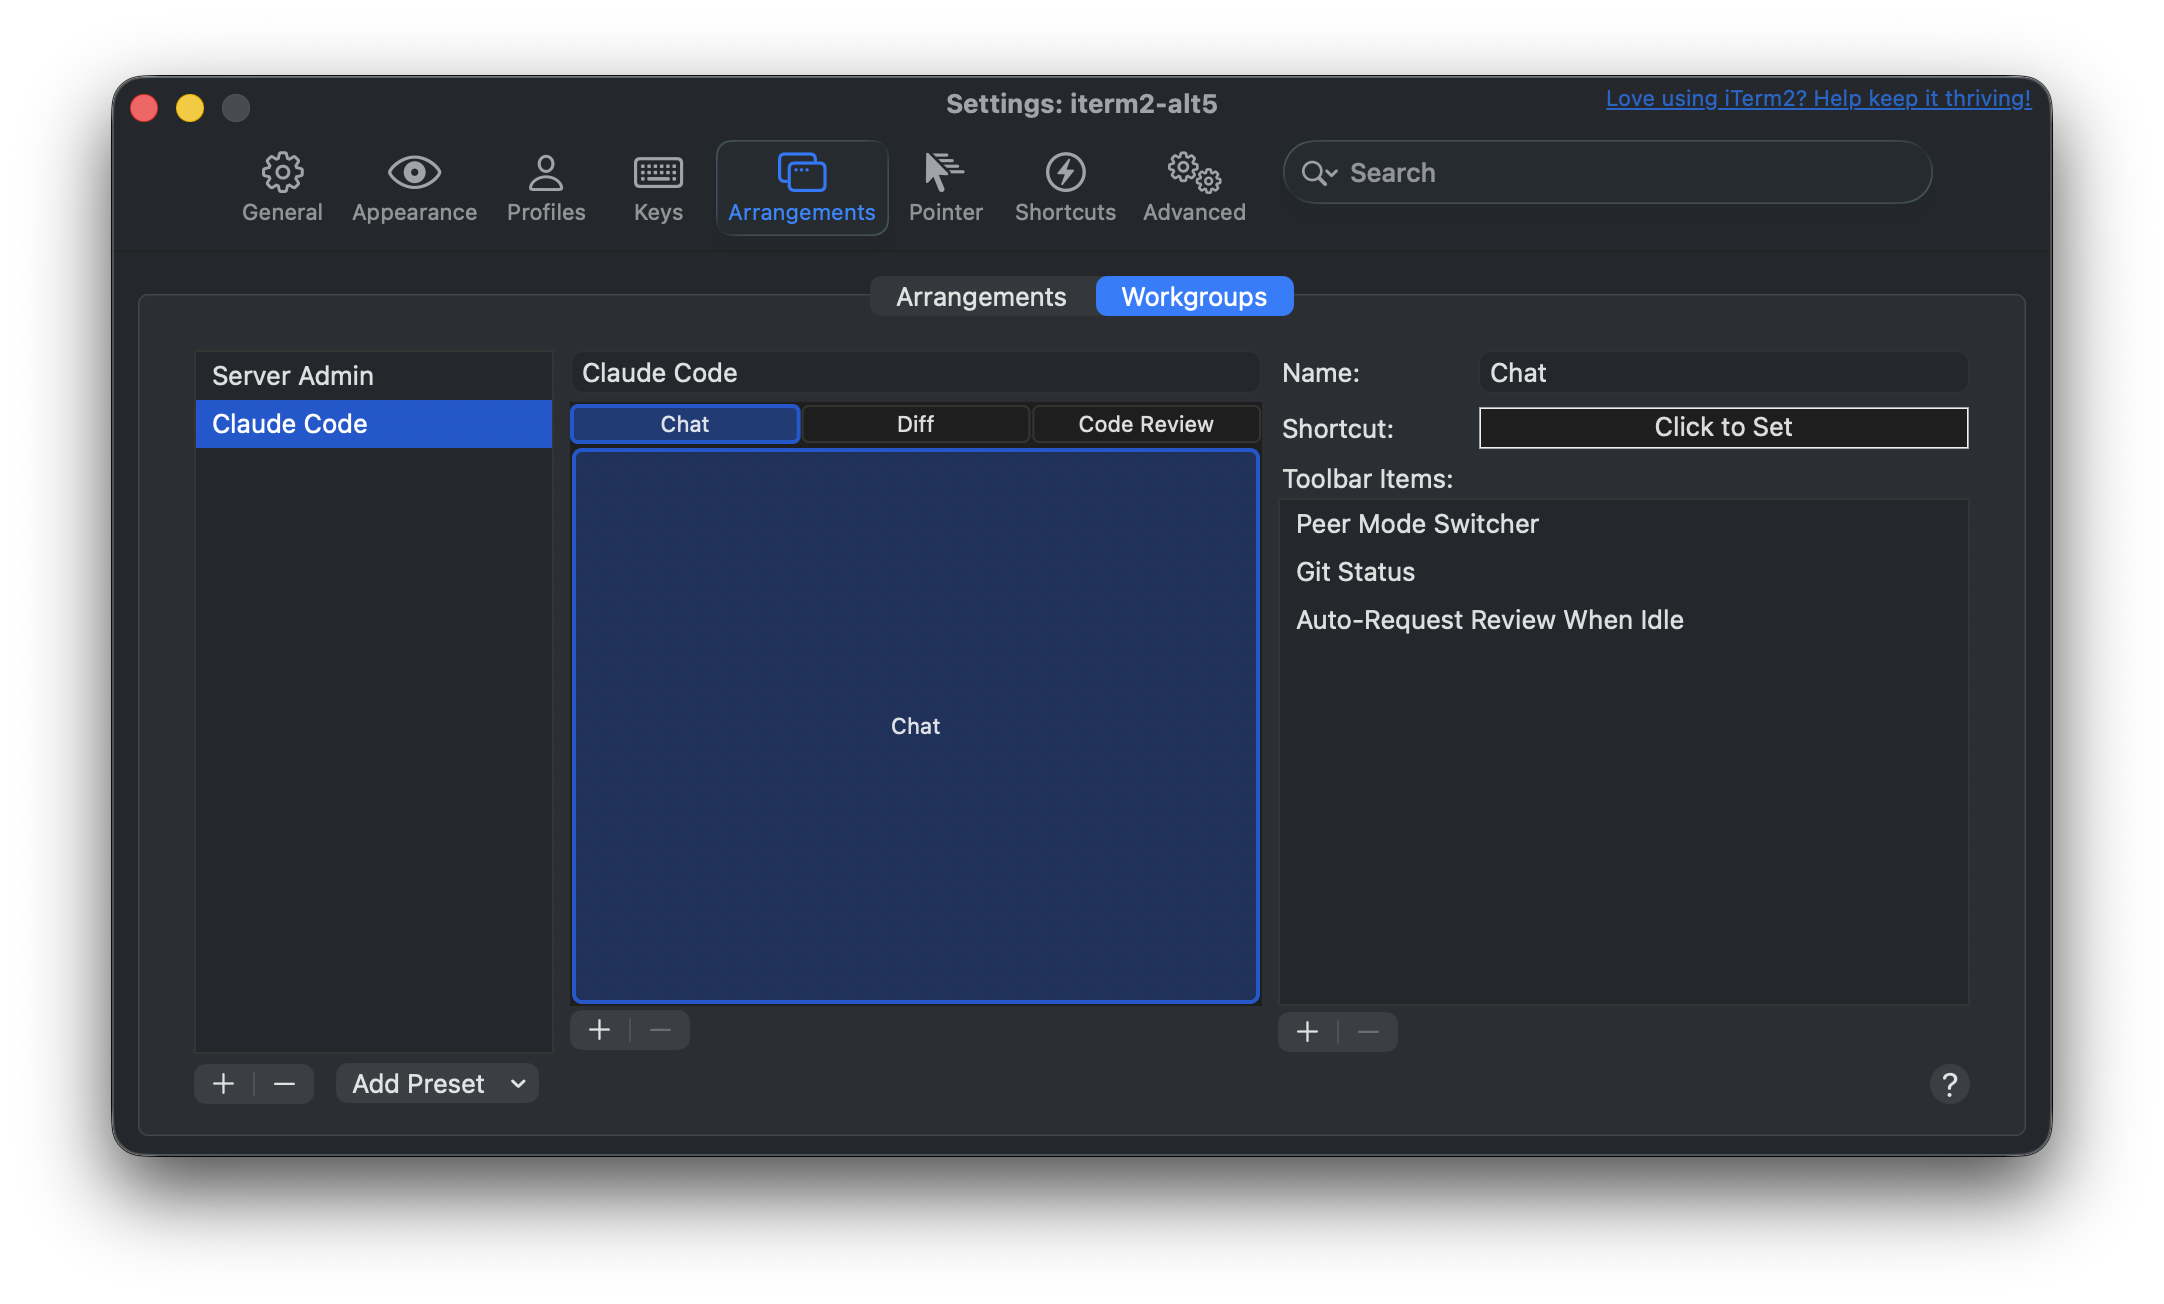
A Diff-mode Peer. Because its toolbar includes the Changed File Selector, it also gets a File command.
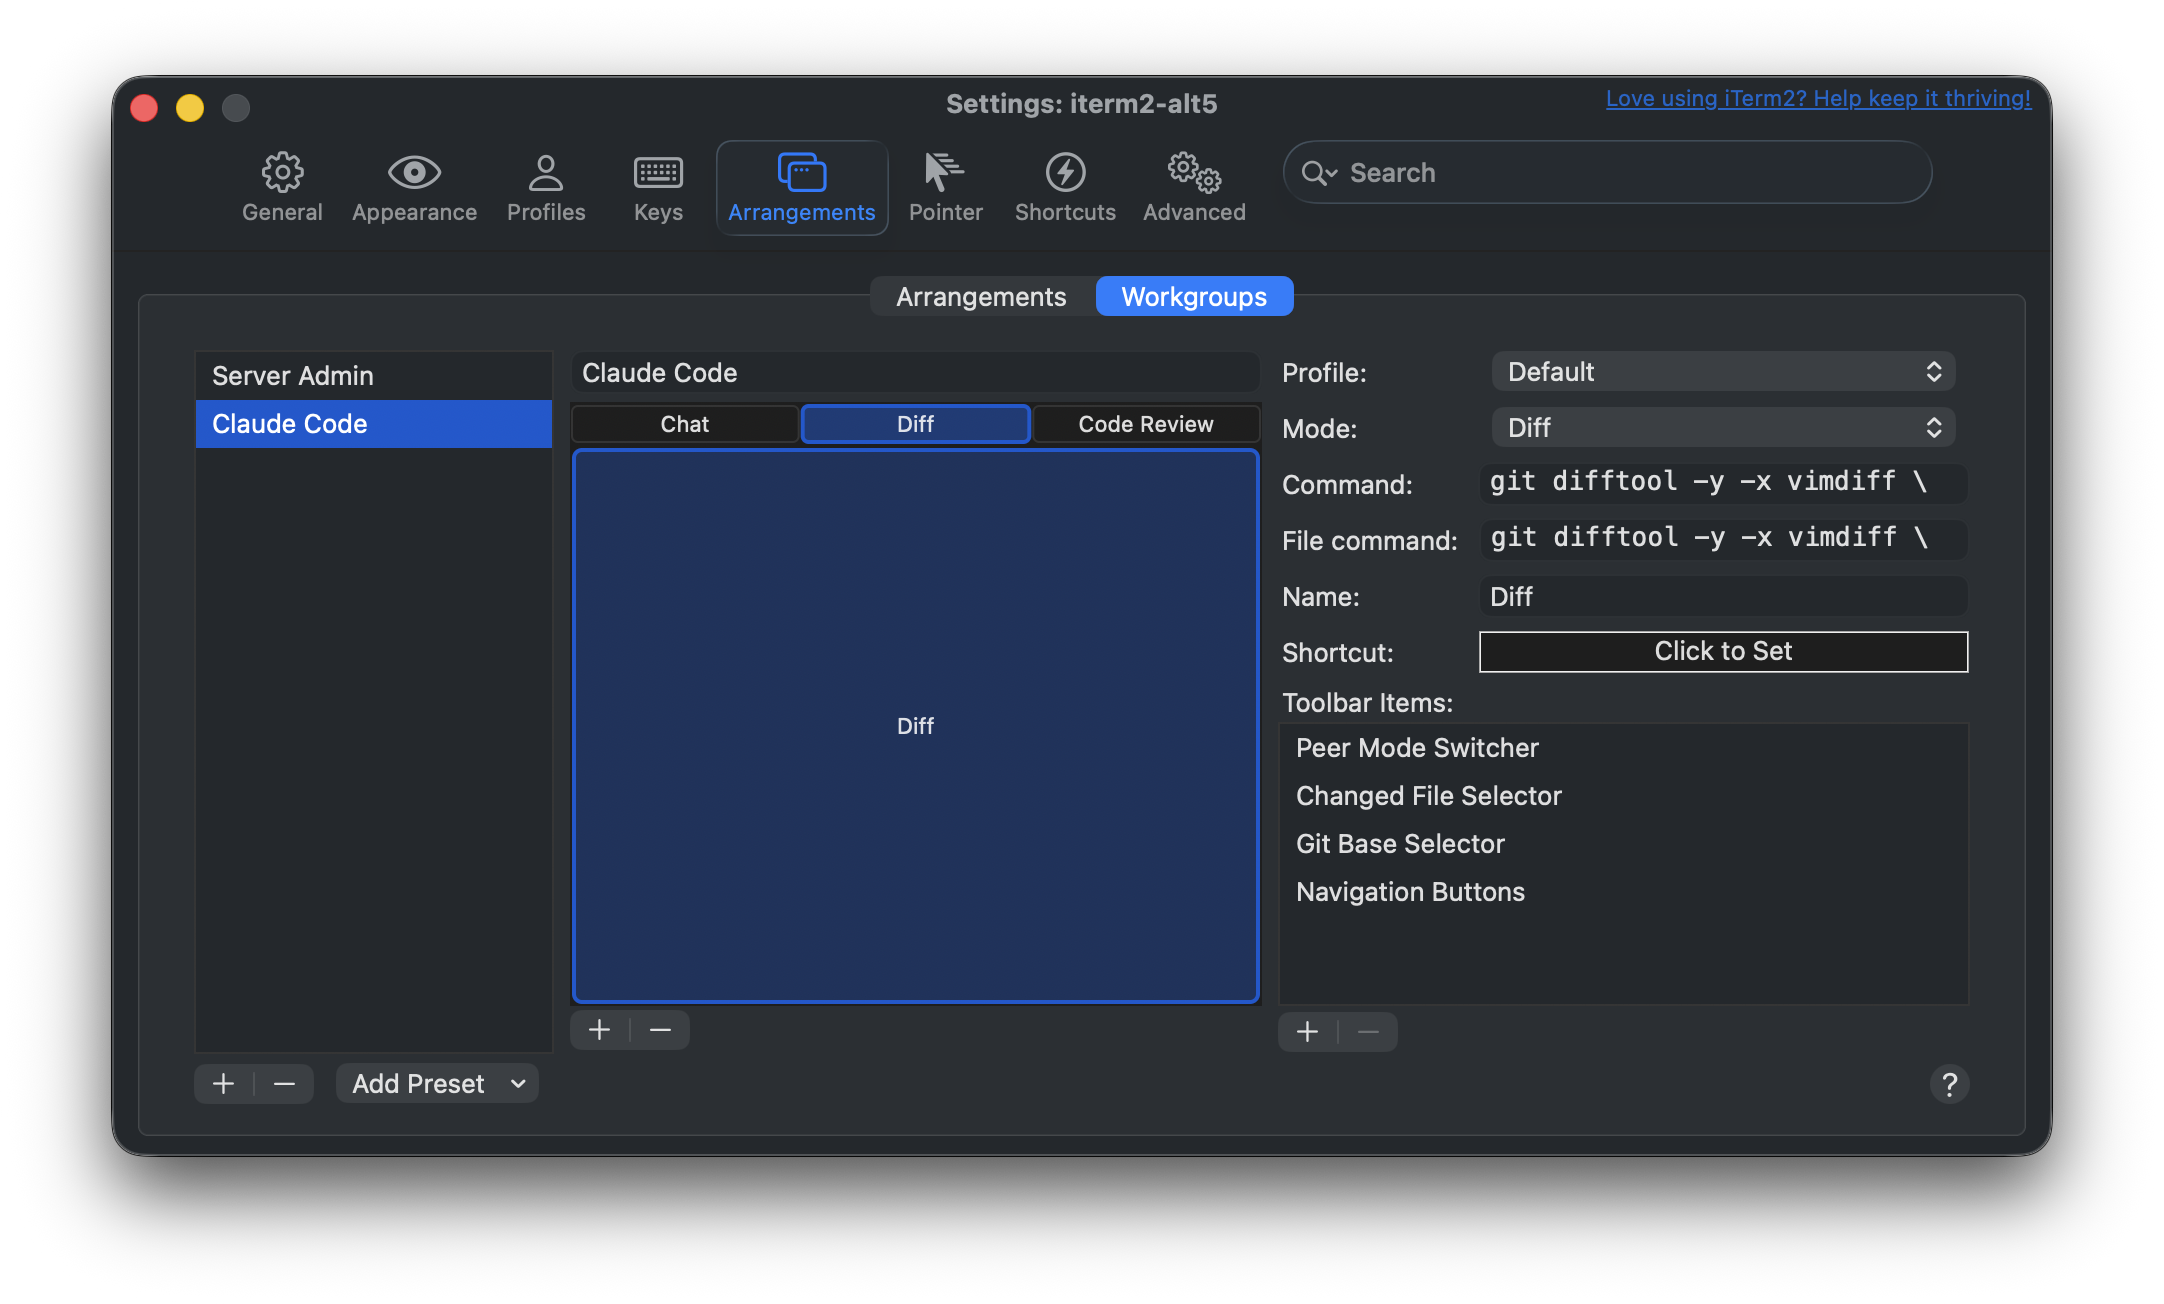
A Code Review Peer, whose command passes \(codeReviewPrompt) to Claude.
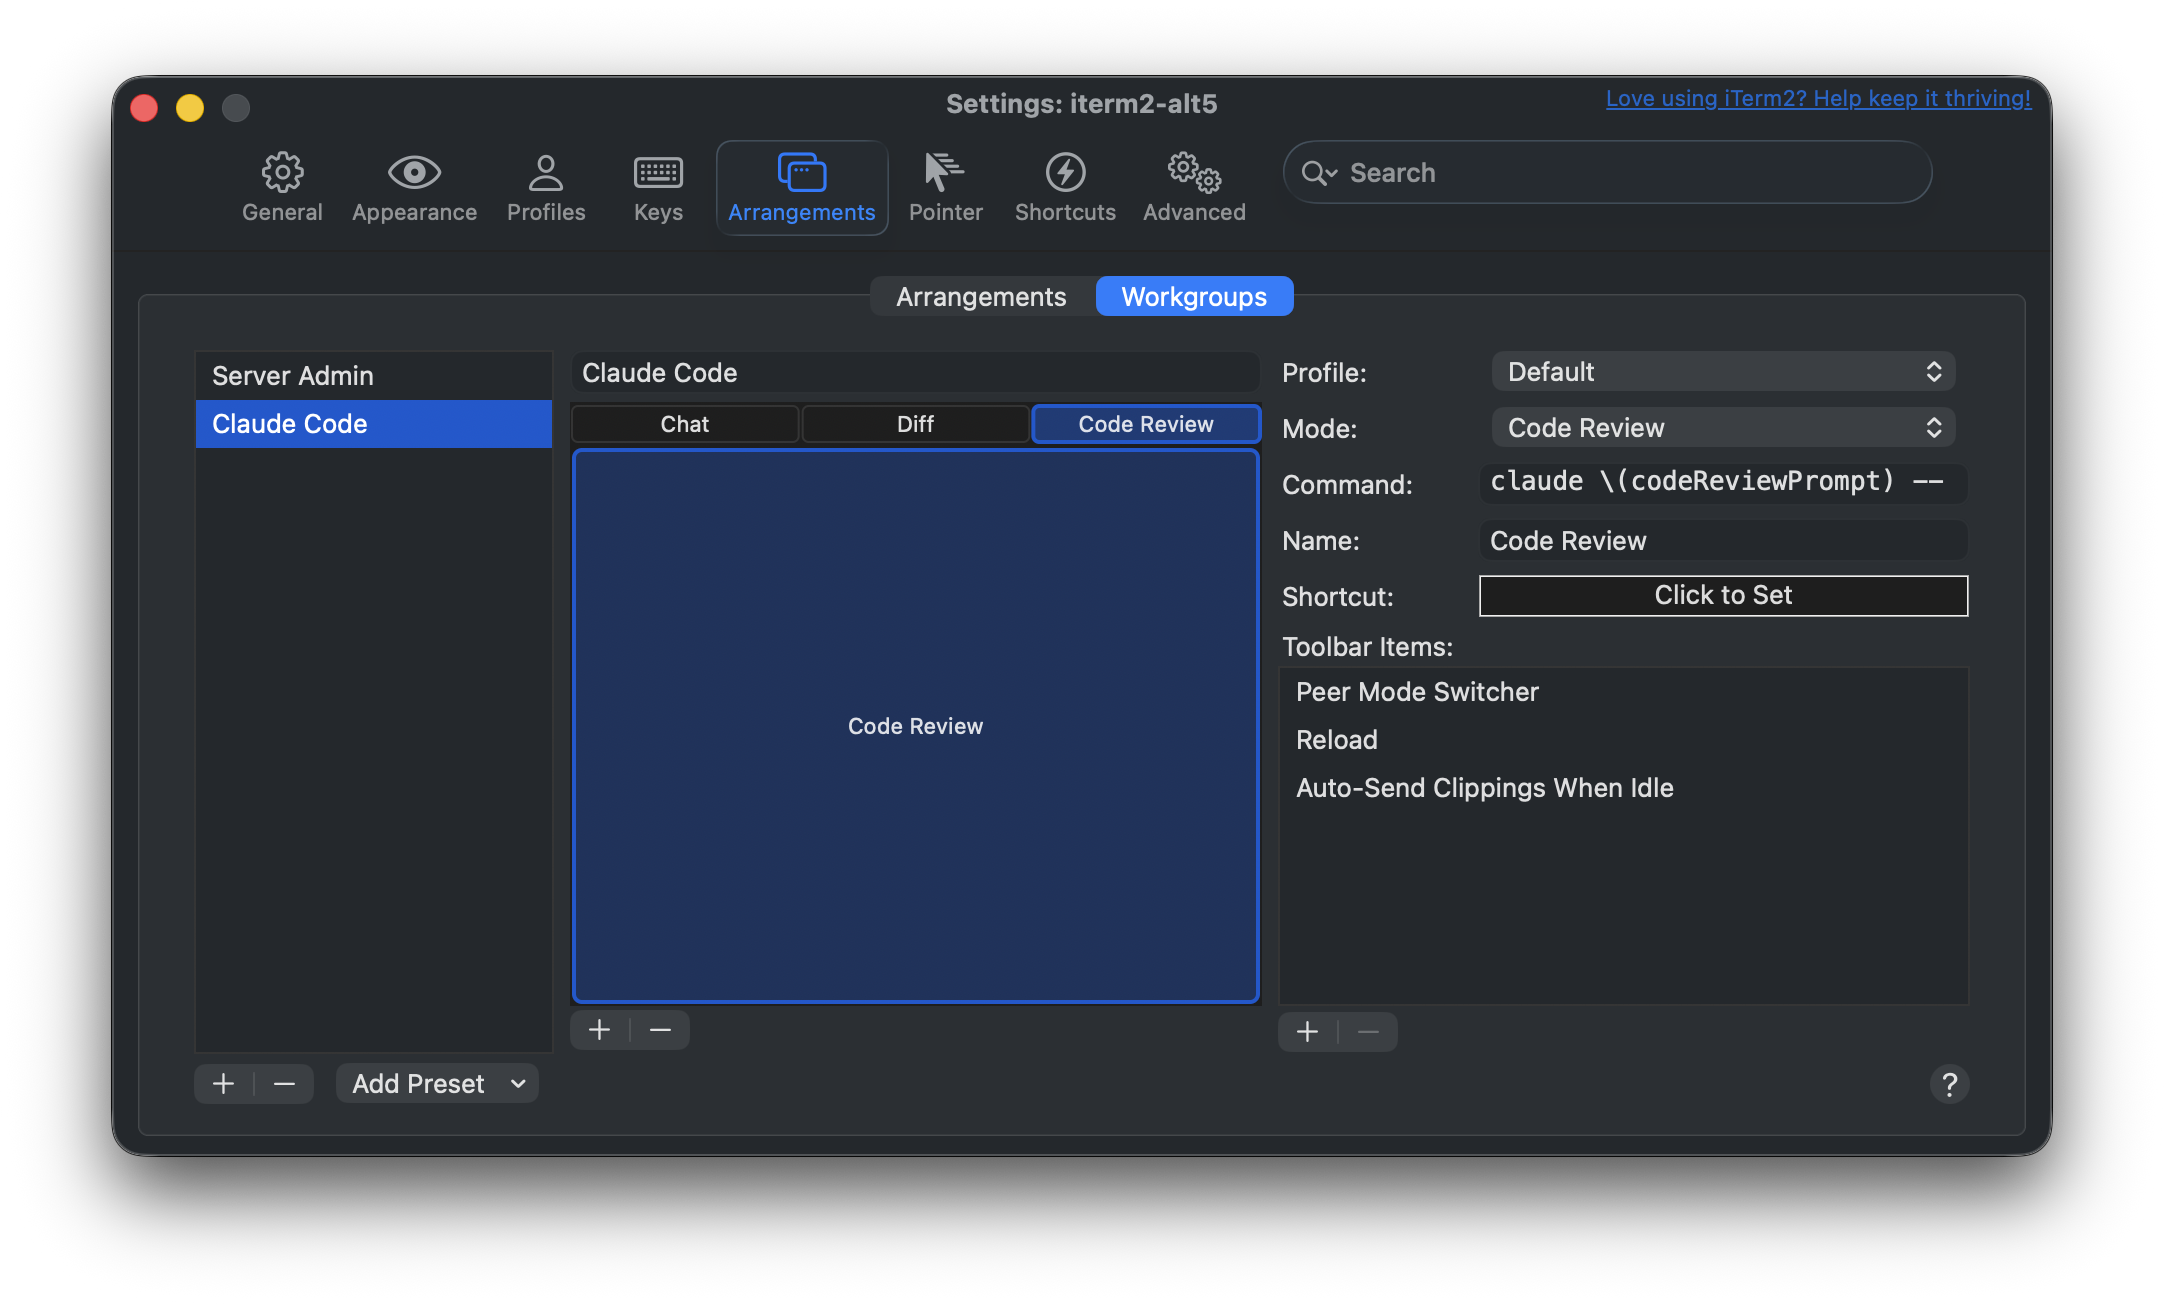
The settings a session can have are:
- Profile: which iTerm2 profile the session uses.
- Mode: Regular, Diff, or Code Review.
- Command: the command to run (for terminal sessions), or a starting URL for browser sessions.
- File command: the command that runs when you pick a file in the Changed File Selector. It can interpolate the picked file and the git base. This setting appears only when the session's toolbar includes the Changed File Selector.
- Name and Shortcut (Peers only): the label that appears on the Peer's switch button and an optional custom keyboard shortcut.
- For splits: orientation, side, and the fraction of the parent the split occupies.
This is also the only place you add or remove sessions in a Workgroup. Membership is fixed by the definition, so ⌘T and ⌘W do not add to or subtract from the group; edit it here instead.
Workgroups you create from a preset are ordinary, fully editable settings; the presets are just starting points.
Presets
Two built-in presets appear in the Add Preset popup:
- Coding Agent + Diff: a main session plus a Diff Peer that shows
git diffof your changes and lets you drill into individual files. - Coding Agent + Diff + Code Review: the same, plus a Code Review Peer that prompts you for a review request and runs a coding agent against it.
Variables
Commands and file commands support iTerm2's interpolated string syntax, \(name). The variables most useful in Workgroups are:
\(gitBase): the revision you choose in the Git Base Selector (defaultHEAD).\(file): the file you pick in the Changed File Selector, for use in a session's file command.\(codeReviewPrompt): the text you enter in a Code Review session's prompt overlay.\(codeReviewSystemPrompt): the reusable system prompt from Settings > General > AI > Prompts > Code Review System Prompt.
iTerm2 shell-escapes file and git-base values before substitution, so names with spaces or special characters are safe.
Automatic Entry with Triggers
Two triggers let a Workgroup come and go on its own:
- Enter Workgroup… enters a Workgroup you choose when its condition matches.
- Exit Workgroup leaves the current Workgroup.
In terminal profiles these fire on matching output or on session events such as a job starting or ending; in browser profiles they fire on a URL matching a regular expression. This is how the Claude Code integration auto-enters its Workgroup: an Enter Workgroup trigger fires when the claude job starts, and an Exit Workgroup trigger fires when it ends. Re-entering a Workgroup you are already in does nothing, so the triggers are safe to fire repeatedly.
A Job Started trigger set to Enter Workgroup "Claude Code" when the claude job begins.
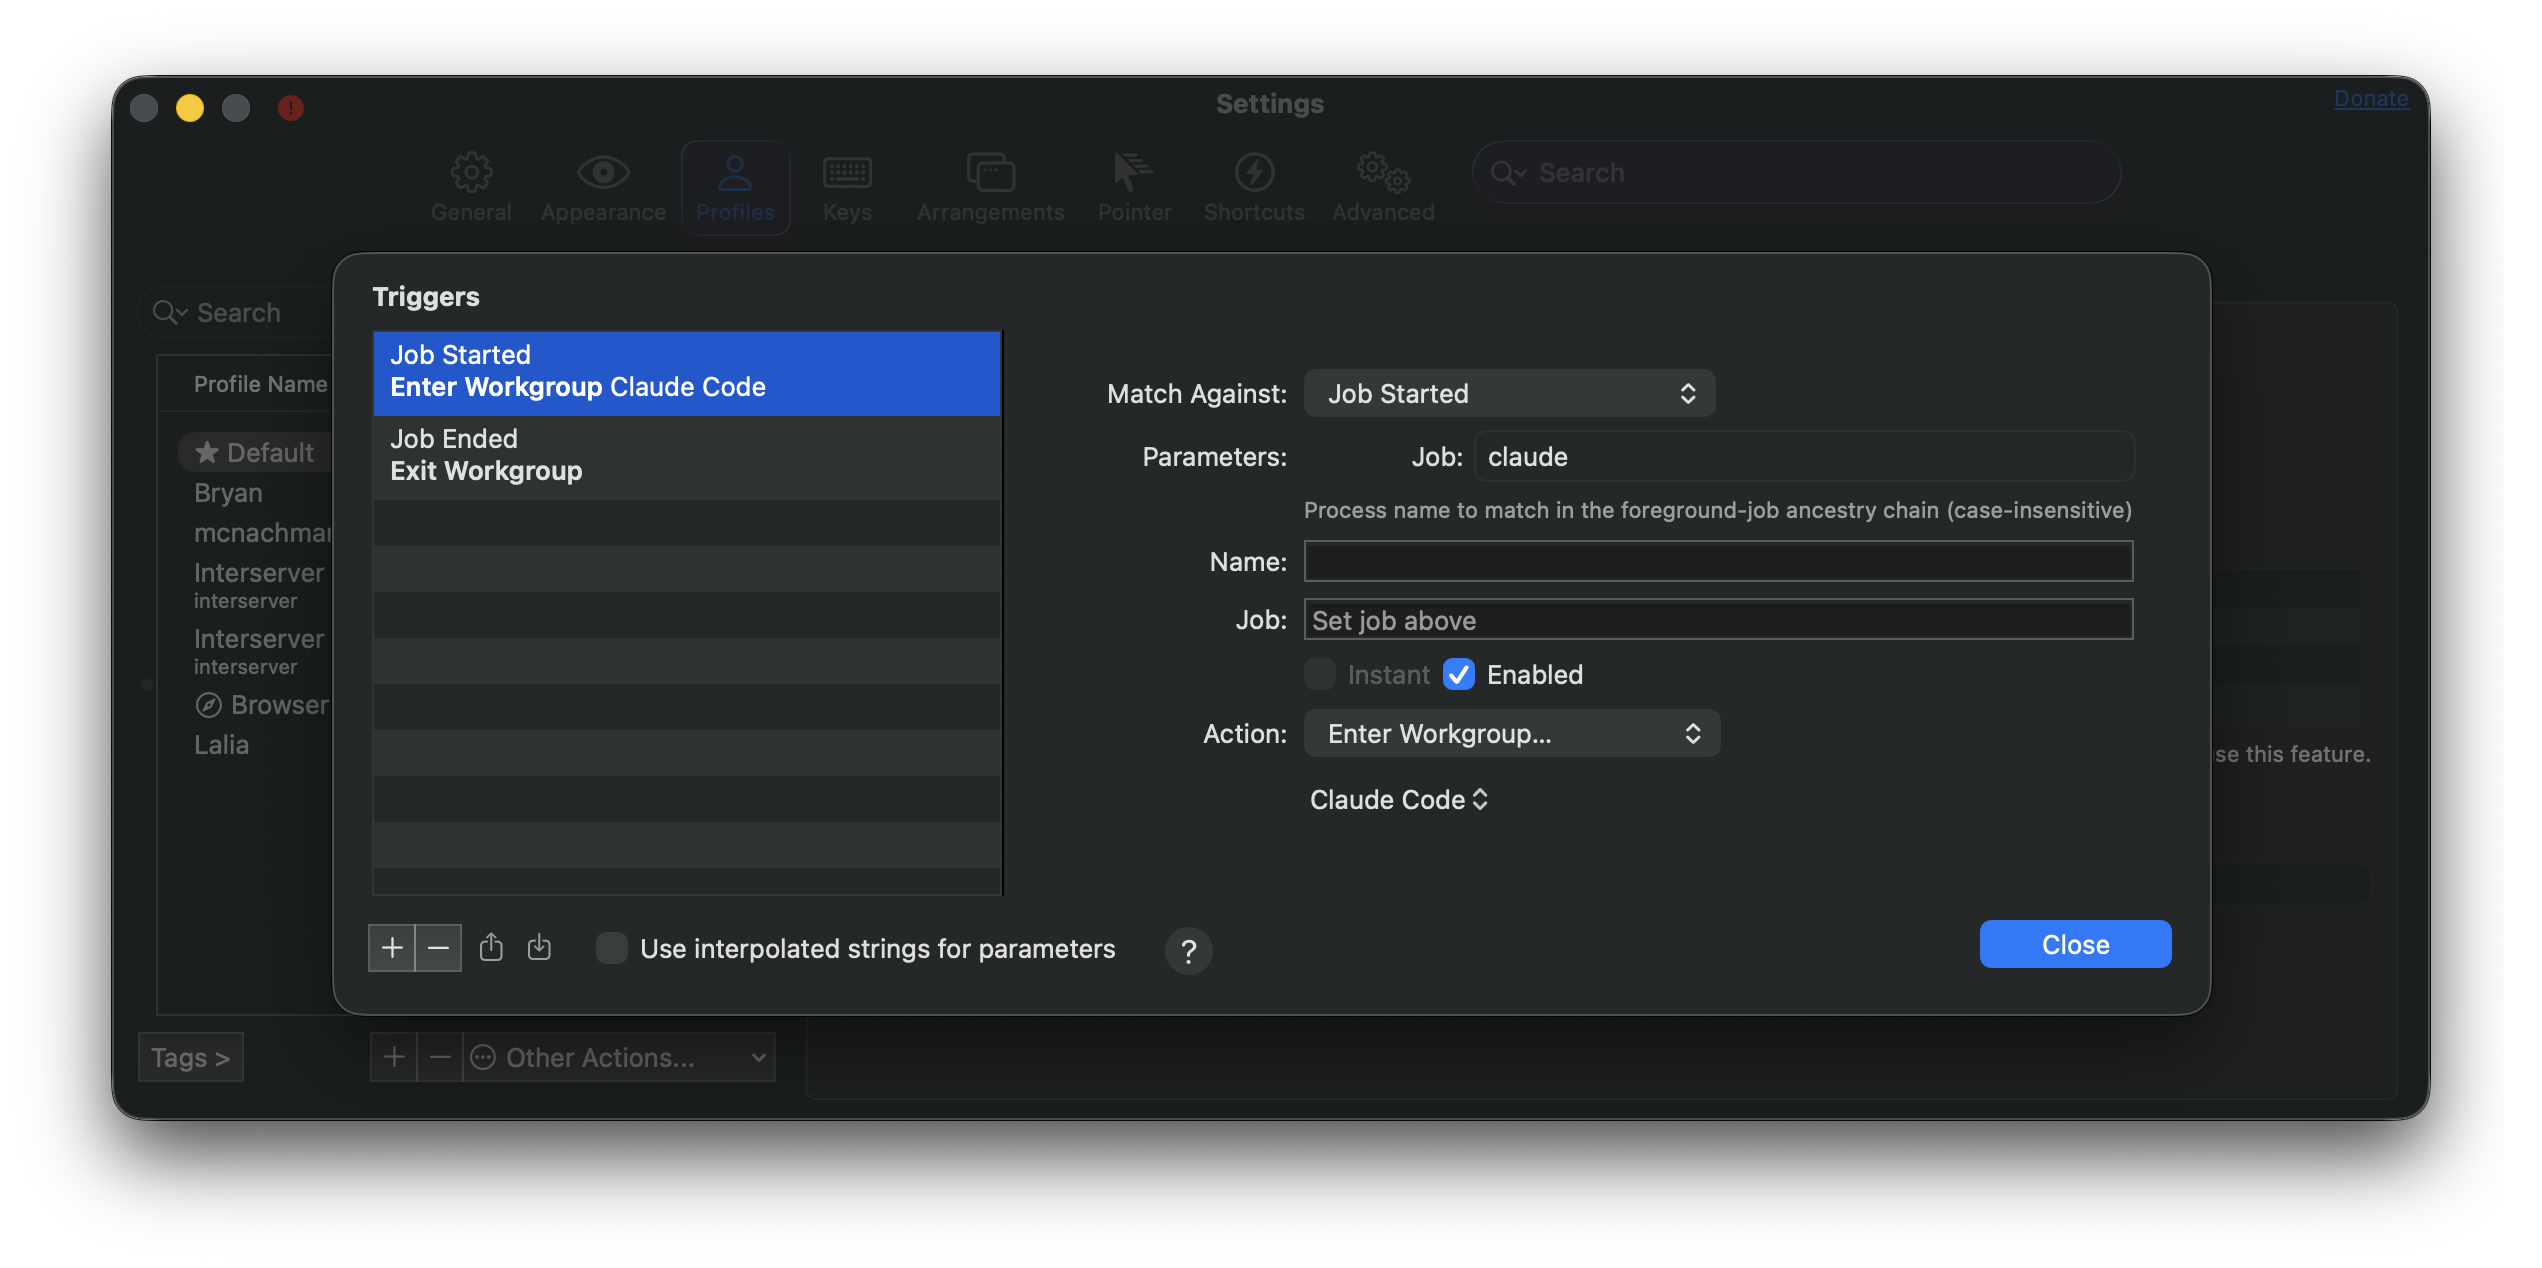
A Job Ended trigger set to Exit Workgroup when claude ends. "Only on the workgroup leader" makes only the main session's exit tear the Workgroup down.
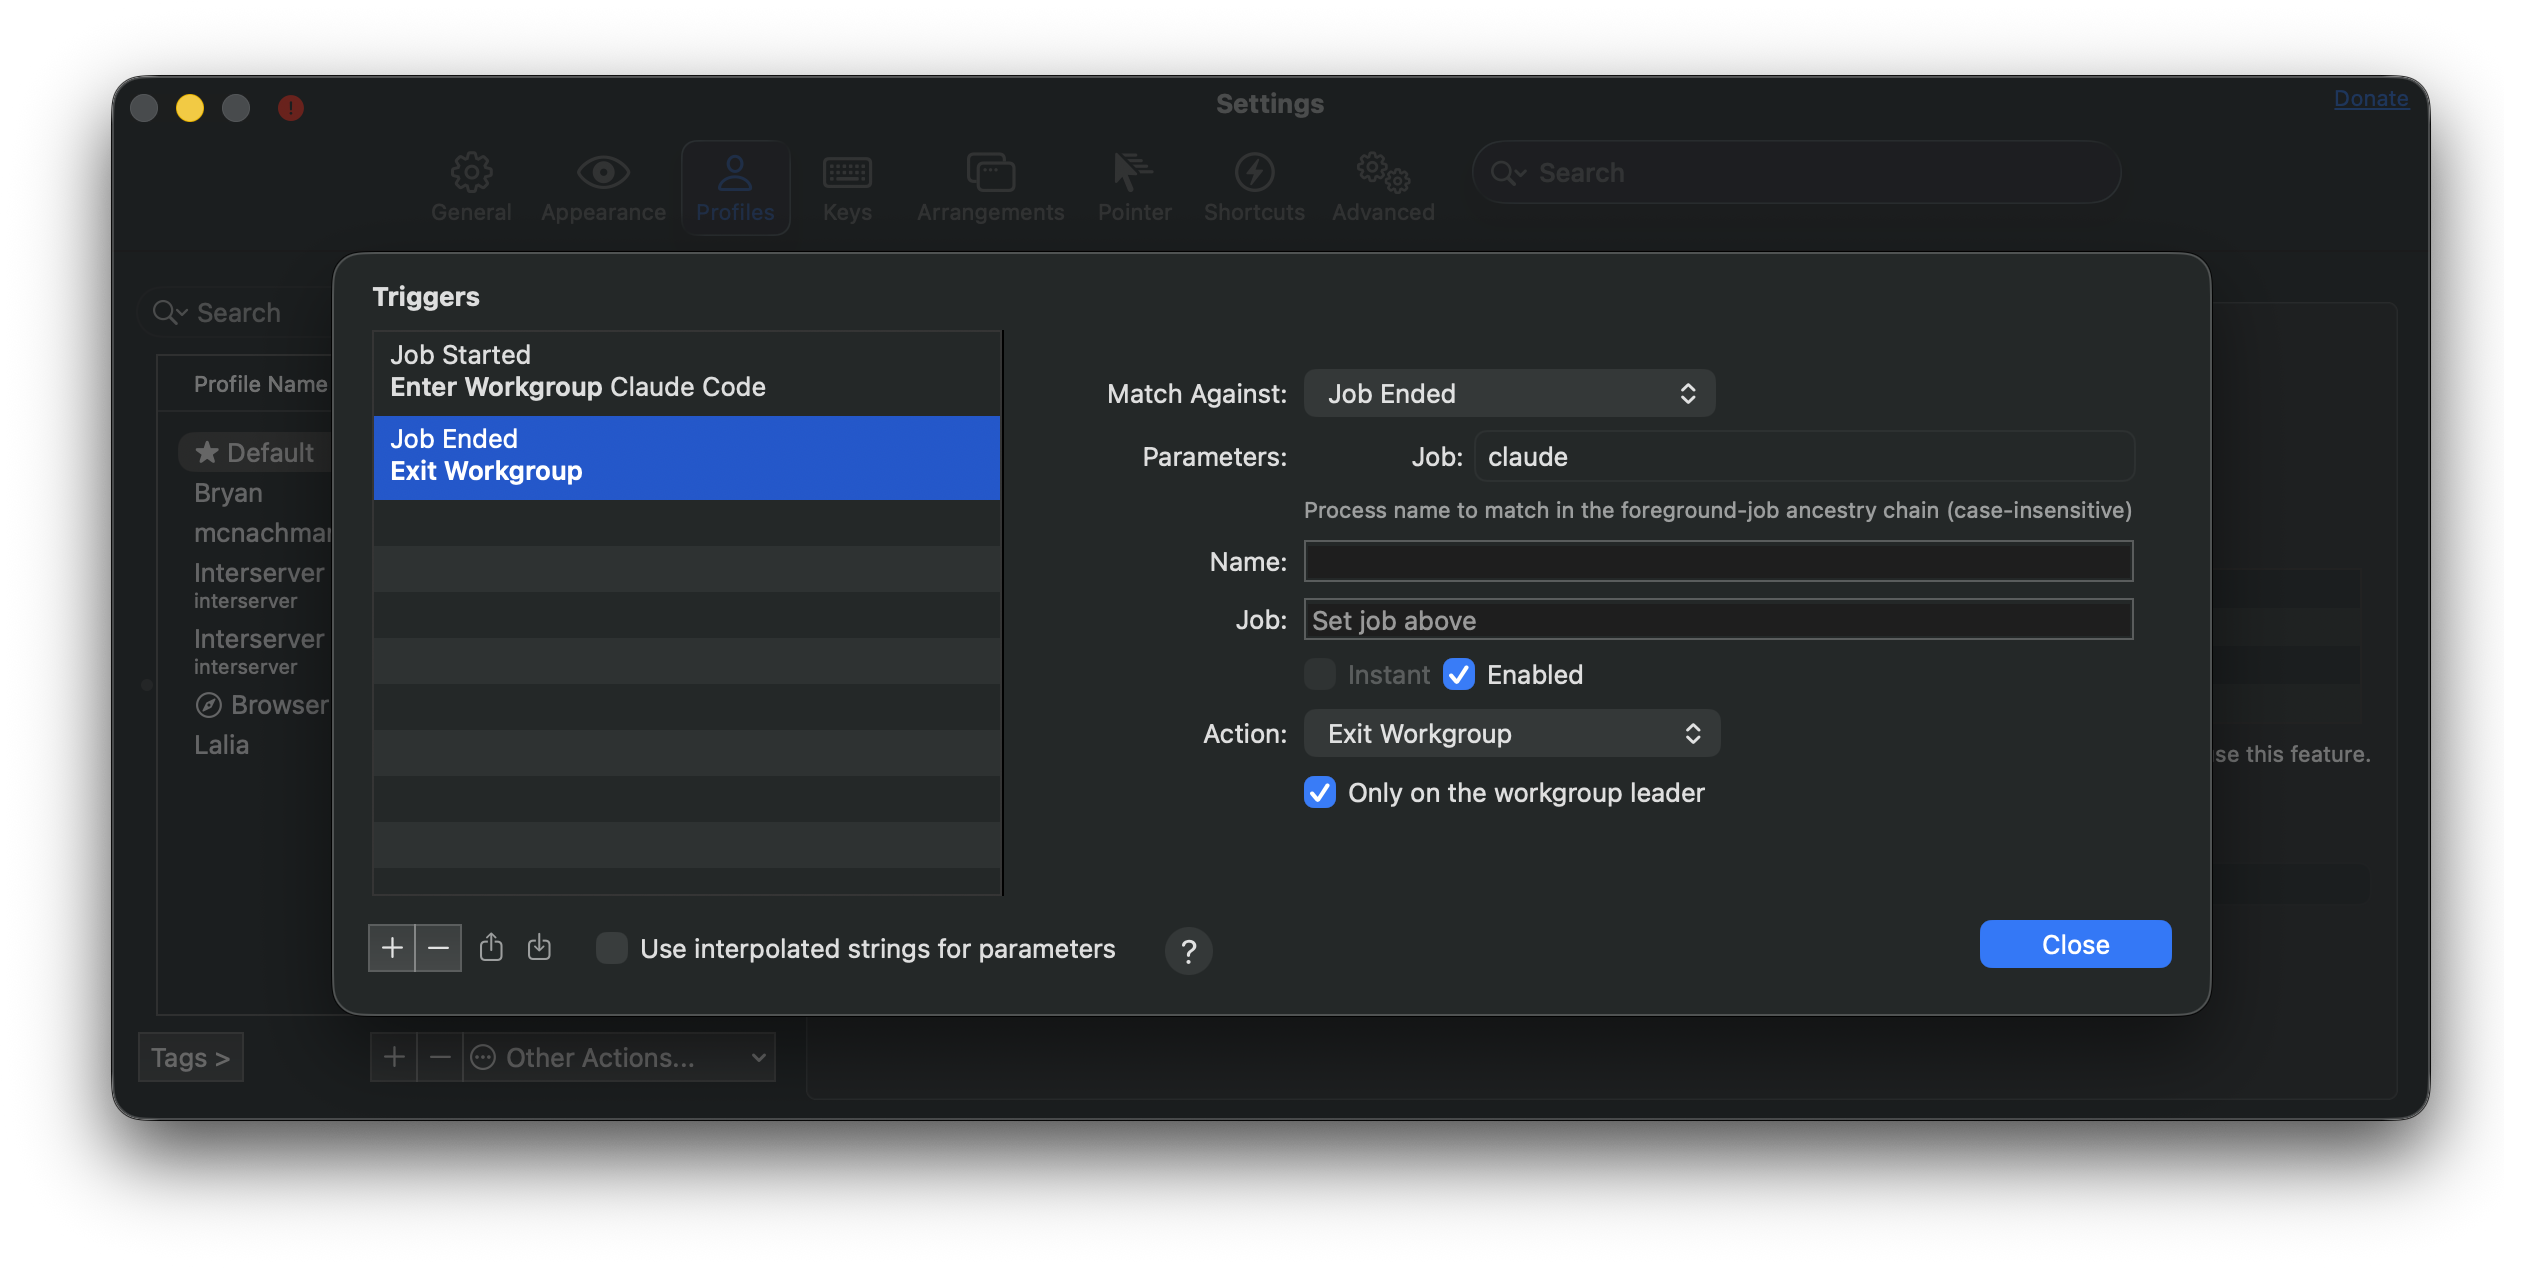
For a concrete, ready-made example of Workgroups in action, see the Claude Code integration.
Clippings
Clippings are a panel of saved text snippets you can send to the terminal or copy to the clipboard. Each Clipping has a title and a body, and the body can use Markdown. The panel is handy for collecting things you want to reuse or hand off, such as commands, notes, or review comments.
Showing the Panel
Toggle the Clippings panel with View > Show Clippings (⇧⌘=). It appears on the right side of the window. Drag its left edge to make it wider or narrower; iTerm2 remembers the width per machine.
Adding, Sending, and Copying
Click the + button to open the New Clipping dialog, give the Clipping a Title and Detail (the body), and click Add. To remove one, select it and click − (or press Delete).
Select one or more Clippings and use the panel's buttons to send them to the terminal or copy them to the clipboard. When a Clipping has a title, iTerm2 puts the title in bold Markdown above the body. When you send or copy several at once, iTerm2 joins them with a separator, an advanced setting that defaults to a line of two dashes. (You can change it in Settings > Advanced; search for "Separator inserted between multiple clippings.")
History
The archive button snapshots the current list and clears it, which gives you a fresh list while keeping the old one. The back and forward buttons walk through your archived snapshots, and a counter shows where you are in the history. From a script you can archive with the it2 session archive-clippings command or the iterm2.archive_clippings API call, and add Clippings with the it2 session add-clipping command or the iterm2.add_clipping API call.
Clippings in Workgroups
Every session in a Workgroup shares one Clippings panel. iTerm2 routes each session's Clippings to the Workgroup's main session, so all of its sessions see the same list. This is what lets a Code Review session hand its findings to a coding-assistant session: the review adds Clippings, and the agent's session sees them in the same panel.
A program running in the review session adds a Clipping with the it2 session add-clipping <type> <title> <detail> command (for example, a type of "Code Review Comment"). This is how the Claude Code Workgroup's review session posts its comments to the coding session.
Proprietary Escape Codes
iTerm2 supports several non-standard escape codes. These may not work properly in tmux or screen, and may have unknown effects on other terminal emulators. Proceed with caution.
The control sequences use the following notation:
ESCmeans "Escape" (hex code 0x1b) .STmeans eitherBEL(hex code 0x07) orESC \\.- Spaces in control sequences are to be ignored.
- Values in [brackets] are variable parameters, not literals.
OSCmeansESC ]CSImeansESC [SPmeans a literal "space" character (not ignored!)
The OSC command 50 used to be used but it conflicts with xterm, so it is now 1337.
Report Foreground/Background Colors (OSC 4)
The xterm-defined OSC 4 control sequence has a mode where it reports the RGB value of a color. iTerm2 extends its reporting mode to add two additional color indices representing the default foreground and background color.
To get the background color:
OSC 4 ; -2; ? ST
And this gets the foreground color:
OSC 4 ; -1 ; ? ST
For background and foreground respectively, the terminal will write back:
OSC 4 ; -2 ; rgb : [red] / [green] / [blue] ST
OSC 4 ; -1 ; rgb : [red] / [green] / [blue] ST
Where [red], [green], and [blue] are either 2 or 4-digit hex values like 14a7
or ff. For 4-digit values, you can get an approximation of the 2-digit value
by taking the first two digits.
Anchor (OSC 8)
VTE and iTerm2 support OSC 8 for defining hyperlinks, much like HTML's anchor tag.
OSC 8 ; [params] ; [url] ST
[params] consists of zero or more colon-delimited key-value pairs. A key-value pair is formatted as key=value. The only currently defined key is id. Two adjacent hyperlinks with the same URL but different ids will highlight separately when Command is pressed during hover.
If the url is absent then that ends the hyperlink. Typical usage would look like:
OSC 8 ; ; https://example.com/ ST Link to example website OSC 8 ; ; ST
To open a link, hold Command and click the link.
Note: in iTerm2 version 3.4 and later, if the URL has the file scheme and
a # fragment is present then the semantic history rules will apply for
opening the file. It may optionally include a line number, like
file:///tmp/file.txt#123 or line number and column number like
file:///tmp/file.txt#123:45.
Set cursor shape
OSC 1337 ; CursorShape=[N] ST
where [N]=0, 1, or 2.
- 0: Block
- 1: Vertical bar
- 2: Underline
Add this to your .vimrc to change cursor shape in insert mode:
let &t_SI = "\<Esc>]1337;CursorShape=1\x7"
let &t_EI = "\<Esc>]1337;CursorShape=0\x7"
This is derived from Konsole.
Set Mark
The "Set Mark" (cmd-shift-M) command allows you to record a location and then jump back to it later (with cmd-shift-J). The following escape code has the same effect as that command:
OSC 1337 ; SetMark ST
Steal Focus
To bring iTerm2 to the foreground:
OSC 1337 ; StealFocus ST
Clear Scrollback History
To erase the scrollback history:
OSC 1337 ; ClearScrollback ST
Set current directory
To inform iTerm2 of the current directory to help semantic history:
OSC 1337 ; CurrentDir=[current directory] ST
Post a notification
To post a notification:
OSC 9 ; [Message content goes here] ST
Progress Bar
The progress bar can be controlled using OSC 9 with a leading 4 parameter:
OSC 9 ; 4 ; [st] ; [pr] ST
[st] specifies the state:
- 0: Stop/clear the progress bar
- 1: Set progress to `[pr]` percent (success state)
- 2: Set error state, optionally with `[pr]` percent
- 3: Set indeterminate state (animates horizontally)
- 4: Set paused state (the ConEmu "paused" state), optionally with `[pr]` percent
[pr] is the progress value as a number from 0 to 100. It is required for state 1. For state 2 it is optional; when omitted, the progress indicator shows an error state without a specific percentage. For state 4 it is also optional; when omitted, the current percentage is kept and simply recolored.
To stop the progress bar, you can also use the abbreviated form:
OSC 9 ; 4 ST
Examples in bash:
# Show 50% progress
echo -e "\033]9;4;1;50\a"

# Show indeterminate progress
echo -e "\033]9;4;3\a"

# Show error state at 75%
echo -e "\033]9;4;2;75\a"

# Show indeterminate error state
echo -e "\033]9;4;2\a"

# Show paused state at 25%
echo -e "\033]9;4;4;25\a"

# Clear the progress bar
echo -e "\033]9;4;0\a"
Change profile
To change the session's profile on the fly:
OSC 1337 SetProfile=[new profile name] ST
Set profile property
To change one or more of the current session's profile properties at runtime:
OSC 1337 ; SetProfileProperty=[Key]=[base64-JSON] [ ; [Key2]=[base64-JSON] ...] ST
Each [Key] is a profile property key and each [base64-JSON] is a base64-encoded JSON value for that key. Multiple key-value pairs may be separated by semicolons.
For example, to set the Cursor Type property to 2 (underline), base64-encode the JSON value 2 (which is Mg==) and send:
echo -e "\033]1337;SetProfileProperty=Cursor Type=Mg==\a"
Copy to clipboard
To place text in the pasteboard:
OSC 1337 ; CopyToClipboard=[clipboard name] ST
Where name is one of "rule", "find", "font", or empty to mean the general pasteboard (which is what you normally want). After this is sent, all text received is placed in the pasteboard until this code comes in:
OSC 1337 ; EndCopy ST
Set window title and tab chrome background color
To set the window title and tab color use this escape sequence:
OSC 6 ; 1 ; bg ; red ; brightness ; [N] ST
OSC 6 ; 1 ; bg ; green ; brightness ; [N] ST
OSC 6 ; 1 ; bg ; blue ; brightness ; [N] ST
Replace [N] with a decimal value in 0 to 255.
Example in bash that turns the background purple:
echo -e "\033]6;1;bg;red;brightness;255\a"
echo -e "\033]6;1;bg;green;brightness;0\a"
echo -e "\033]6;1;bg;blue;brightness;255\a"
To reset the window title and tab color, use this code:
OSC 6 ; 1 ; bg ; * ; default ST
For example:
echo -e "\033]6;1;bg;*;default\a"
Session Status
To set the tab's dot indicator, subtitle text, and subtitle color:
OSC 21337 ; indicator=[#rrggbb] ; status=[text] ; status-color=[#rrggbb] ST
indicator is the color of the tab's dot indicator, status is the subtitle text, and status-color is the color of that text. Colors are given as #rrggbb. Any field may be omitted, and sending a field with an empty value clears it.
See Session Status for more about this feature.
Change the color palette
To change the current session's colors use this code:
OSC 1337 ; SetColors=[key]=[value] ST
[key] gives the color to change. The accepted values are: fg bg bold link selbg selfg curbg curfg underline tab" black red green yellow blue magenta cyan white br_black br_red br_green br_yellow br_blue br_magenta br_cyan br_white
[value] gives the new color. The following formats are accepted:
- RGB (three hex digits, like
fff) - RRGGBB (six hex digits, like
f0f0f0) - cs:RGB (like RGB but
csgives a color space) - cs:RRGGBB (like RRGGBB but
csgives a color space)
If a color space is given, it should be one of:
- srgb (the standard sRGB color space)
- rgb (the device-specific color space)
- p3 (the standard P3 color space, whose gamut is supported on some newer hardware)
The following alternate schemes are also supported:
* If key is preset then value should be the name of a color preset.
* If key is tab then a value of default removes the tab color and restores it to the system default.
A second escape sequence is also supported, but its use is not recommended:
OSC P [n] [rr] [gg] [bb] ST
Replace [n] with:
- `0`-`f` (hex) = ansi color
- `g` = foreground
- `h` = background
- `i` = bold color
- `j` = selection color
- `k` = selected text color
- `l` = cursor
- `m` = cursor text
[rr], [gg], [bb] are 2-digit hex value (for example, "ff").
Example in bash that changes the foreground color blue:
echo -e "\033]Pg4040ff\033\\"
Annotations
To add an annotation use on of these sequences:
OSC 1337 ; AddAnnotation=[message] ST
OSC 1337 ; AddAnnotation=[length] | [message] ST
OSC 1337 ; AddAnnotation=[message] | [length] | [x-coord] | [y-coord] ST
OSC 1337 ; AddHiddenAnnotation=[message] ST
OSC 1337 ; AddHiddenAnnotation=[length] | [message] ST
OSC 1337 ; AddHiddenAnnotation=[message] | [length] | [x-coord] | [y-coord] ST
- `[message]`: The message to attach to the annotation.
- `[length]`: The number of cells to annotate. Defaults to the rest of the line beginning at the start of the annotation.
- `[x-coord]` and `[y-coord]`: The starting coordinate for the annotation. Defaults to the cursor's coordinate.
AddHiddenAnnotation does not reveal the annotation window at the time the escape sequence is received, while AddAnnotation opens it immediately.
Cursor Guide
OSC 1337 ; HighlightCursorLine=[boolean] ST
The [boolean] should be yes or no. This shows or hides the cursor guide.
Attention
OSC 1337 ; RequestAttention=[value] ST
The [value] should be yes to request attention by bouncing the dock icon indefinitely, once to bounce it a single time, or no to cancel a previous request. If it is fireworks then fireworks explode at the cursor's location.
Background Image
OSC 1337 ; SetBackgroundImageFile=[base64] ST
The value of [base64] is a base64-encoded filename to display as a background image. If it is an empty string then the background image will be removed. User confirmation is required as a security measure.
Report Cell Size
OSC 1337 ; ReportCellSize ST
The terminal responds with either:
OSC 1337 ; ReportCellSize=[height];[width] ST
Or, in newer versions:
OSC 1337 ; ReportCellSize=[height];[width];[scale] ST
[scale] gives the number of pixels (physical units) to points (logical units). 1.0 means non-retina, 2.0 means retina. It could take other values in the future.
[height] and [width] are floating point values giving the size in points of a single character cell. For example:
OSC 1337 ; ReportCellSize=17.50;8.00;2.0 ST
Copy to Pasteboard
You can place a string in the system's pasteboard with this sequence:
OSC 1337 ; Copy=:[base64] ST
Where [base64] is the base64-encoded string to copy to the pasteboard.
Report Variable
Each iTerm2 session has internal variables (as described in Scripting Fundamentals). This escape sequence reports a variable's value:
OSC 1337 ; ReportVariable=[base64] ST
Where [base64] is a base64-encoded variable name, like session.name. It responds with:
OSC 1337 ; ReportVariable=[base64] ST
Where [base64] is a base64-encoded value.
Badge
The badge has custom escape sequences described here.
Downloads
For information on file downloads and inline images, see here.
Uploads
To request the user select one or more files to upload, send:
OSC 1337 ; RequestUpload=format=[type] ST
In the future the [type] may be configurable, but for now it must always be tgz, which is a tar and gzipped file.
When iTerm2 receives this it will respond with a status of ok or abort followed by a newline. If the status is ok then it will be followed by a base-64 encoded tar.gz file.
If the user selects multiple files they will be placed in a directory within the tar file.
Set Touch Bar Key Labels
You can configure touch bar key labels for function keys and for the "status" button. The code used is:
OSC 1337 ; SetKeyLabel=[key]=[value] ST
Where [key] is one of F1, F2, ..., F24, to adjust a function key label; or it can be status to adjust the touch bar status button. You can also save and restore sets of key labels using a stack. To push the current key labels on the stack use:
OSC 1337 ; PushKeyLabels ST
To pop them:
OSC 1337 ; PopKeyLabels ST
You can optionally label the entry in the stack when you push so that pop will pop multiple sets of key labels if needed. This is useful if a program crashes or an ssh session exits unexpectedly. The corresponding codes with labels are:
OSC 1337 ; PushKeyLabels=[label] ST
OSC 1337 ; PopKeyLabels=[label] ST
Where [label] is an ASCII string that works best if it is unique in the stack.
Unicode Version
iTerm2 by default uses Unicode 9's width tables. The user can opt to use Unicode 8's tables with a preference (for backward compatibility with older locale databases). Since not all apps will be updated at the same time, you can tell iTerm2 to use a particular set of width tables with:
OSC 1337 ; UnicodeVersion=[n] ST
Where [n] is 8 or 9
You can push the current value on a stack and pop it off to return to the previous value by setting n to push or pop. Optionally, you may affix a label after push by setting n to something like push mylabel. This attaches a label to that stack entry. When you pop the same label, entries will be popped until that one is found. Set n to pop mylabel to effect this. This is useful if a program crashes or an ssh session ends unexpectedly.
File Transfer
OSC 1337 ; File=[args] ST
See Images for details.
Note that if the file is not an image but would benefit from native rendering, you can use this control sequence to display it with syntax highlighting and proporitonally spaced typography. For example, this is a good way to view a markdown file. In that case, the following optional arguments may be provided:
type=mime type or extensionmode=regularorwide
When you pass mode=wide then horizontal scrolling will be allowed for the contents of the document.
Custom Control Sequences
iTerm2 allows scripts to define custom control sequences. See the Create Window example for a working demo. The control sequence is:
OSC 1337 ; Custom=id=[secret]:[pattern] ST
Where [secret] is a secret shared between the script implementing the control
sequence and the program producing it, as a security measure to make it more
difficult for untrusted text to invoke a custom control sequence. [pattern] is
used to identify the sequence and may contain any parameters the script needs
to handle it.
Shell Integration/FinalTerm
iTerm2's Shell Integration feature is made possible by proprietary escape sequences pioneered by the FinalTerm emulator. FinalTerm is defunct, but the escape sequences are documented here.
Concepts
The goal of the FinalTerm escape sequences is to mark up a shell's output with semantic information about where the prompt begins, where the user-entered command begins, and where the command's output begins and ends.
[PROMPT]prompt% [COMMAND_START] ls -l
[COMMAND_EXECUTED]
-rw-r--r-- 1 user group 127 May 1 2016 filename
[COMMAND_FINISHED]
Escape Sequences
FinalTerm originally defined various escape sequences in its original spec that are not supported by iTerm2 and are not described in this document. The best remaining references to these codes are in iTerm2's source code.
FTCS_PROMPT
OSC 133 ; A ST
Sent just before start of shell prompt.
FTCS_COMMAND_START
OSC 133 ; B ST
Sent just after end of shell prompt, before the user-entered command.
FTCS_COMMAND_EXECUTED
OSC 133 ; C ST
Sent just before start of command output. All text between FTCS_COMMAND_START
and FTCS_COMMAND_EXECUTED at the time FTCS_COMMAND_EXECUTED is received
excluding terminal whitespace is considered the command the user entered. It is
expected that user-entered commands will be edited interactively, so the screen
contents are captured without regard to how they came to contain their state.
If the cursor's location is before (above, or if on the same line, left of) its
location when FTCS_COMMAND_START was received, then the command will be
treated as the empty string.
FTCS_COMMAND_FINISHED
OSC 133 ; D ; [Ps] ST
OSC 133 ; D ST
The interpretation of this command depends on which FTCS was most recently
received prior to FTCS_COMMAND_FINISHED.
This command may be sent after FTCS_COMMAND_START to indicate that a command
was aborted. All state associated with the preceding prompt and the command
until its receipt will be deleted. Either form is accepted for an abort. If the
[Ps] argument is provided to an abort it will be ignored.
If this command is sent after FTCS_COMMAND_EXECUTED, then it indicates the
end of command prompt. Only the first form with [Ps] should be used in this
case. [Ps] is the command's exit status, a number in the range
0-255 represented as one or more ASCII decimal digits. A status of 0 is
considered "success" and nonzero indicates "failure." The terminal may choose
to indicate this visually.
If neither FTCS_COMMAND_START nor FTCS_COMMAND_EXECUTED was sent prior to
FTCS_COMMAND_FINISHED it should be ignored.
iTerm2 Extensions
iTerm2 extends FinalTerm's suite of escape sequences.
SetUserVar
OSC 1337 ; SetUserVar=[Ps1]=[Ps2] ST
Sets the value of a user-defined variable. iTerm2 keeps a dictionary of key-value pairs which may be used within iTerm2 as string substitutions. See Scripting Fundamentals for more information on variables and how they can be used.
[Ps1] is the key.
[Ps2] is the base64-encoded value.
ShellIntegrationVersion
Two forms are accepted. The second form is deprecated and should not be used:
OSC 1337 ; ShellIntegrationVersion=[Pn] ; [Ps] ST
OSC 1337 ; ShellIntegrationVersion=[Pn] ST
Reports the current version of the shell integration script.
[Pn] is the version.
[Ps] is the name of the shell (e.g., bash).
iTerm2 has a baked-in notion of the "current" version and if it sees a lower number the user will be prompted to upgrade. The version number is specific to the shell.
RemoteHost
OSC 1337 ; RemoteHost=[Ps1]@[Ps2] ST
Reports the user name and hostname.
[Ps1] is username.
[Ps2] is fully-qualified hostname.
The following synonym is available as a combination of RemoteHost and CurrentDir:
OSC 7 [Ps] ST
where [Ps] is a file URL with a hostname and a path, like file://example.com/usr/bin.
CurrentDir
OSC 1337 ; CurrentDir=[Ps1] ST
Reports the current directory.
[PS1] is the current directory.
The following synonym is available as a combination of RemoteHost and CurrentDir:
OSC 7 ; [Ps] ST
where [Ps] is a file URL with a hostname and a path, like file://example.com/usr/bin.
ClearCapturedOutput
OSC 1337 ; ClearCapturedOutput ST
Erases the current captured output.
DECSCUSR 0
CSI 0 SP q
This will reset the cursor to its default appearance. This is an intentional deviation from the behavior of DEC virtual terminals.
Curly Underlines
CSI 4 : 3 m
This turns on curly underlines.
Dual-mode Colors (light/dark variants)
iTerm2 extends SGR so that a program can specify different colors for the light and dark appearances. iTerm2 shows the appropriate variant for the current appearance, so scrollback written in one appearance stays readable after the appearance is toggled.
For 24-bit color, give a light RGB triple followed by a dark RGB triple:
CSI 38 : 12 : Rl : Gl : Bl : Rd : Gd : Bd m
For 256-color (indexed) color, give a light index followed by a dark index:
CSI 38 : 13 : Nl : Nd m
Use 38 for the foreground color, 48 for the background color, and 58 for
the underline color. For example, CSI 48 : 12 : ... m sets a dual-mode 24-bit
background and CSI 58 : 13 : Nl : Nd m sets a dual-mode indexed underline color.
Double-width and Double-height Lines
iTerm2 supports the DEC line-size control sequences, which affect the line containing the cursor:
- `ESC # 3` (DECDHL): top half of a double-width, double-height line.
- `ESC # 4` (DECDHL): bottom half of a double-width, double-height line.
- `ESC # 5` (DECSWL): single-width, single-height line (the default).
- `ESC # 6` (DECDWL): double-width, single-height line.
Extended Device Attributes
Report terminal name and version.
CSI > q
iTerm2 will respond with:
ESC P > | iTerm2 [version] ST
Where [version] is the version of iTerm2, such as 3.4.0.
Open URL
To request that iTerm2 open a URL:
OSC 1337 ; OpenURL=: [url] ST
Where [url] is a base64-encoded URL. The user must grant permission, and the feature can also be disabled.
Disinter
To disinter a buried session, send:
OSC 1337 ; Disinter ST
Blocks
To define a region as a code block:
OSC 1337 ; Block=id=[identifier] ; attr=start|end
Use attr=start to begin a block and attr=end to end it, Use the same identifier for both.
Update Block
Available in iTerm2 3.6.9 and later.
To fold or unfold an existing block:
OSC 1337 ; UpdateBlock=id=[identifier] ; action=fold|unfold ST
Where [identifier] is the ID of a previously defined block. Use action=fold to collapse the block into a single line, or action=unfold to expand it back to its full content.
Example in bash:
# Fold a block
echo -ne "\033]1337;UpdateBlock=id=myblock;action=fold\a"

# Unfold a block
echo -ne "\033]1337;UpdateBlock=id=myblock;action=unfold\a"
Buttons
To create a copy button that, when clicked, copies a code block:
OSC 1337 ; Button=type=copy ; block=[identifier]
The identifier should reference the identifier of a code block defined with OSC 1337;Block=....
Available in iTerm2 3.6.9 and later.
To create a custom button that sends an escape sequence when clicked:
OSC 1337 ; Button=type=custom ; code=[code] ; icon=[sf-symbol] ST
Where [code] is a positive integer and [sf-symbol] is the name of an SF Symbol (e.g., star.fill, checkmark.circle). When the button is clicked, the terminal sends the following escape sequence to the running application:
CSI ? 1337 ; [code] ~
For example, if [code] is 42, clicking the button sends ESC [ ? 1337 ; 42 ~ (hex: 1b 5b 3f 31 33 33 37 3b 34 32 7e).
To invalidate all custom buttons (making them appear grayed out and non-interactive):
OSC 1337 ; Button=type=custom ST
Example in bash:
# Create a custom button with code 42 and a star icon
echo -ne "\033]1337;Button=type=custom;code=42;icon=star.fill\a"

# Invalidate all custom buttons
echo -ne "\033]1337;Button=type=custom\a"
Feature Reporting
To detect which features the terminal supports, use the protocol described in feature reporting.
URL Scheme
iTerm2 registers a custom URL scheme, iterm2:, that lets other apps,
scripts, links, and the open command ask iTerm2 to perform certain actions.
For example, opening iterm2:reveal?sessionid=$ITERM_SESSION_ID brings a
particular session to the front.
You can open one of these URLs in many ways: with open 'iterm2:...' from the
shell, by clicking a link in another app, or with an OSC 8 hyperlink printed in the
terminal. Most handlers are also used internally by iTerm2 itself, for instance
in the messages shown by clicking the indicators at the top right of a session.
Security Model
Because any app on the system can open an iterm2: URL, these handlers are
designed to be safe to trigger from an untrusted source:
- Handlers that only reveal existing content (such as
reveal,annotation, andreveal-mark) take no destructive action. - The
commandhandler always shows a dialog that lets you review and edit the command before it runs, and the option to run a command silently in the background is only available for links generated by iTerm2 itself. - The
triggershandler shows a confirmation dialog listing what will be imported and into which profiles.
The scheme name is always iterm2. Note that the exact number of slashes
matters: some handlers use an opaque path like iterm2:reveal?... (no slashes)
while others use a leading slash like iterm2:/command?.... Follow the exact
form given for each handler below.
command
Runs a command. This is the URL created by the Share button on a selected command (see Command Selection) and by Copy Command URL to Clipboard in the Command Info panel.
A simple example is iterm2:/command?c=date. The path is always /command.
Query parameters:
c(required): the command to run. Leading and trailing whitespace is removed.d(optional): a directory to change into before running the command.silent(optional): a value-less flag requesting that the command run in the background without showing its output. This only takes effect for links generated inside iTerm2; when it applies, a confirmation dialog is shown first.
If a hostname is present, iTerm2 offers to ssh to that host to run the command.
For example, iterm2://[email protected]/command?c=date runs date on
example.com as user gnachman.
When you open a command URL, iTerm2 presents a window describing what will be done and lets you edit the command, directory, and ssh destination before choosing how to run it: in a new window, a new tab, or the current session.
This handler requires macOS 11 or later.
reveal
Brings a specific session to the front, searching visible tabs, buried sessions, and other windows.
iterm2:reveal?sessionid=<id>
The sessionid parameter takes the value of the session's ITERM_SESSION_ID
environment variable (for example, w0t0p0:ABCD-EFGH-...). This is useful for
jumping back to a session from an external script, note, or other application:
record the session ID when starting a long-running job and open the URL later to
return to it.
triggers
Imports one or more triggers into profiles you select. This is the URL produced when you export triggers from iTerm2.
iterm2:triggers?<trigger>&<trigger>&...
Each query parameter is a URL-encoded JSON dictionary describing one trigger, given as the parameter name with no value. When opened, iTerm2 shows a dialog listing the triggers and asks which profiles to add them to. Because of the encoding involved, these URLs are meant to be generated by iTerm2 rather than written by hand.
copy-block
Copies the text of a command block (the output of a single command, when Shell Integration is installed) to the clipboard.
iterm2:copy-block?guid=<session-guid>&block=<block-id>
Query parameters:
guid(optional): the GUID of the session containing the block. If omitted, the current session is used.block(required): the identifier of the block to copy.
annotation
Reveals a particular annotation and brings its session to the front.
iterm2:annotation?s=<session-guid>&ann=<annotation-id>
Query parameters:
s(required): the GUID of the session containing the annotation.ann(required): the identifier of the annotation to reveal.
reveal-mark
Scrolls to and reveals a named or prompt mark, bringing its session to the front.
iterm2:reveal-mark?s=<session-guid>&m=<mark-guid>
Query parameters:
s(required): the GUID of the session containing the mark.m(required): the identifier of the mark to reveal.
compound-location
Reveals a selection within a session, restoring an exact range of selected text. This is used by iTerm2 to link back to a specific location.
iterm2:/compound-location?session=<session-guid>&sub=<selection>&sub=...
Query parameters:
session(required): the GUID of the session.sub(one or more): a serialized sub-selection. Multiplesubparameters may be given to describe a discontiguous selection.